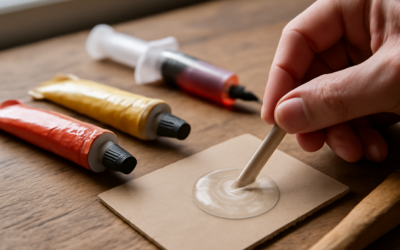
Reaching for epoxy glue for plastic is the right move when you need a strong, gap-filling, structural bond rather than a quick tack. Two-part epoxy cures into a hard, durable joint that can hold up to stress and water far better than ordinary household glue. The trick is that not all plastics bond the same way, and success comes down almost entirely to picking the right product and prepping the surface. Get those two things right and epoxy is one of the most reliable repairs you can make.
Part of our Epoxy, Concrete & Garage Floors guide — explore the full guide →
How Epoxy Works
Epoxy comes in two parts, a resin and a hardener, that you mix together right before use. The chemical reaction between them is what cures the glue into a rigid, high-strength solid, rather than relying on solvents evaporating the way many glues do. That means epoxy fills gaps, bonds dissimilar materials, and resists water and many chemicals once cured. For plastic repairs that need to actually bear a load, this structural strength is the main reason to choose epoxy over instant glues.
Not All Plastics Bond the Same
This is the most important thing to understand before you start. Some plastics glue easily; others resist nearly every adhesive because their surfaces are too slick and chemically nonstick.
- Bonds well: ABS, PVC, polycarbonate, acrylic, fiberglass, and many rigid plastics used in housewares and hardware.
- Hard to bond: Polyethylene (PE) and polypropylene (PP), the slick plastics used in many buckets, food containers, and toys.
For the tough ones, you need an epoxy specifically formulated for hard-to-bond plastics, often sold with a separate primer or activator that prepares the slick surface for adhesion. If you are unsure which plastic you have, check for a recycling code stamp; codes 4 (LDPE) and 5 (PP) are the difficult ones. When in doubt, choose a plastic-specific epoxy that lists the difficult plastics on the label.
Surface Preparation Makes or Breaks the Bond
Epoxy grips a clean, slightly roughened surface, not a smooth or oily one. Prep is not optional:
- Clean thoroughly with soap and water, then wipe with isopropyl alcohol to remove oils and mold-release residue.
- Scuff the surface with fine sandpaper (around 120 to 220 grit) to give the epoxy mechanical grip.
- Wipe away dust and let the surface dry completely before applying.
- Apply primer or activator if your product calls for one, especially on PE or PP plastics.
Skipping the scuff-and-clean step is the number one reason plastic epoxy repairs fail. Take the extra five minutes.
Mixing and Applying
Mix only what you can use before the epoxy starts to set. Squeeze equal parts of resin and hardener (for standard 1:1 products) onto a disposable surface and stir thoroughly with a craft stick until the color is uniform. Apply a thin, even layer to both surfaces, press them together, and hold or clamp the joint so it cannot shift while it cures. Wipe away any squeeze-out before it hardens, because cured epoxy is tough to remove cleanly.
Pay attention to working time. Five-minute epoxies set fast and are convenient for small repairs, but they give you little time to position parts. Slower-curing epoxies offer more working time and often a stronger final bond, which is better for larger or precise joints.
Cure Time and Strength
There is a difference between set time and full cure. A five-minute epoxy may hold the parts together in minutes but will not reach full strength for many hours. Most epoxies reach a strong handling strength within an hour or two and full cure in 24 hours. Do not stress the joint or put the item back into hard use until the full cure period has passed, and warmer temperatures generally help epoxy cure properly.
Epoxy Versus Other Plastic Adhesives
Epoxy is not always the right tool, so it helps to know the alternatives. Cyanoacrylate (super glue) bonds many plastics fast but creates a thin, brittle joint that cannot fill gaps and may not survive stress or impact. Plastic-specific cement, used on PVC pipe, actually melts and welds the plastic together for a permanent bond on compatible materials, but it only works on certain plastics like PVC and ABS. Flexible adhesives and polyurethane glues handle parts that bend or flex better than rigid epoxy. Choose epoxy when you need a strong, rigid, gap-filling, load-bearing bond and the parts will not flex much in use, which is exactly where it outperforms the quick-set options.
Safety Precautions
Epoxy is a chemical product and deserves respect:
- Work in a well-ventilated area to avoid breathing fumes from the resin and hardener.
- Wear nitrile gloves to keep uncured epoxy off your skin, since it can cause irritation and sensitization.
- Protect your eyes with safety glasses, especially when mixing or sanding.
- Keep it away from children and pets, and store the two parts tightly capped.
If epoxy contacts your skin, wash promptly with soap and water before it cures. Follow the specific safety directions on your product’s label.
Common Mistakes to Avoid
Most failed plastic epoxy repairs come down to a handful of errors. Skipping the cleaning and scuffing step is the biggest one, because epoxy needs a clean, slightly rough surface to grip. Using a standard epoxy on slick PE or PP plastic without a special primer is another guaranteed failure. Mixing the two parts in the wrong ratio or stirring incompletely leaves the epoxy gummy and weak, so measure carefully and stir until the color is fully uniform. Finally, rushing the cure by stressing the joint too soon undoes good work; give it the full recommended time, ideally a warm 24 hours, before relying on the bond. Avoid these traps and your repair will hold.
Final Thoughts
Epoxy glue for plastic delivers a strong, lasting bond when you match the product to the plastic and prep the surface properly. Identify whether you are dealing with an easy or a hard-to-bond plastic, clean and scuff the joint, mix carefully, clamp it, and let it fully cure. Work safely with gloves and good ventilation, and your repair will hold up for the long haul.