Epoxy is engineered to be permanent, which is exactly why an epoxy remover becomes essential the moment something goes wrong. A drip on the garage floor, a botched countertop coat, hardened resin on your tools, or a spot on your skin all need a different approach, and using the wrong method can damage the surface underneath or leave you scrubbing for hours. This guide breaks down the remover types, how to strip epoxy from common surfaces, and how to do it safely.
Part of our Epoxy, Concrete & Garage Floors guide — explore the full guide →
The key thing to understand up front: removing uncured epoxy is easy, while removing fully cured epoxy is a real project. Your strategy depends entirely on whether the resin has hardened.
Uncured vs. Cured Epoxy
Timing is everything. Wet or partially cured epoxy, within the first few hours, wipes up with acetone or denatured alcohol before it sets. Once epoxy fully cures, usually after 24 to 72 hours, it becomes a hard, chemically bonded plastic that ordinary solvents barely touch. At that point you need a dedicated chemical stripper, heat, mechanical grinding, or some combination. Always check how long the spill has been sitting, because that single fact dictates which method actually works.
Types of Epoxy Removers
Different jobs call for different products and methods:
- Acetone — dissolves uncured epoxy and cleans tools and skin; nearly useless on fully cured resin.
- Denatured alcohol — a milder solvent for fresh drips and cleanup.
- Chemical epoxy strippers — paste or gel removers formulated to soften cured epoxy coatings so they can be scraped.
- Heat — a heat gun softens cured epoxy enough to scrape it off small areas.
- Mechanical removal — grinders, sanders, and floor scrapers for large cured floor coatings.
Removing Fresh Epoxy Drips
If you catch a spill while it is still wet or tacky, you are in luck. Soak a rag in acetone and wipe the epoxy away, working from the outside of the spill inward so you do not spread it. For small drips on a hard, solvent-safe surface, this takes seconds. Do not let the epoxy sit and harden while you go looking for supplies; the longer it cures, the harder the job becomes. Always test acetone on an inconspicuous spot first, since it can dull or damage some finishes and plastics.
Removing Cured Epoxy from Floors
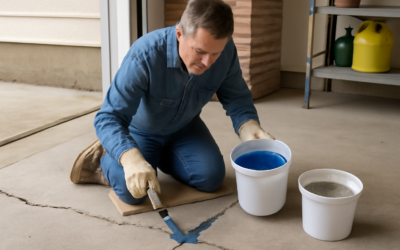
Cured epoxy on a garage or basement floor is the toughest scenario. For small spots, apply a heat gun to soften the resin, then scrape with a sharp floor scraper or putty knife while it is warm. For larger areas or a full failed coating, a chemical epoxy stripper paste is the better first try: spread it on, let it dwell for the time the label specifies, and scrape the softened epoxy off. When chemicals and heat are not enough, mechanical grinding with a diamond cup wheel or a rented floor grinder is the last resort, and it creates significant dust, so plan accordingly.
Removing Epoxy from Tools and Mixing Containers
Tools are easiest to save if you act fast. Wipe brushes, spreaders, and mixing sticks with acetone before the epoxy sets. For containers, many people let the leftover epoxy fully cure into a solid disc and then simply flex the container to pop it out, which works well with flexible plastic or silicone mixing cups. Metal tools with cured epoxy can be soaked in acetone or warmed with a heat gun to release the resin, then scraped clean.
Removing Epoxy from Skin
Getting epoxy on your skin is common and should be handled promptly but carefully. While the epoxy is still wet, wash with soap and warm water, or use a waterless hand cleaner. Avoid using harsh solvents like acetone directly on skin when possible, because they strip natural oils and can cause irritation; some people also react to uncured epoxy itself. For cured epoxy on skin, do not pick or pull it; let it wear off naturally over a day or two, or gently exfoliate, rather than scrubbing aggressively. Wearing nitrile gloves during the original work prevents the problem entirely.
Safety Precautions
Epoxy removers are strong chemicals and deserve respect. Acetone and many strippers are flammable and give off fumes, so work in a well-ventilated space, never near an open flame or pilot light, and keep a window or door open. Wear chemical-resistant nitrile gloves, eye protection, and a respirator rated for organic vapors when using strippers or working in tight spaces. When grinding cured epoxy, add a dust mask or respirator and eye protection, because the fine dust is a respiratory hazard. Read and follow every product label, and dispose of solvent-soaked rags safely, since they can be a fire risk.
Protecting the Surface Underneath
Before you reach for a stripper or grinder, think about what is beneath the epoxy. Aggressive solvents can damage some plastics, painted surfaces, and finishes, and grinding will mar concrete and gouge wood if you are heavy-handed. Test any chemical remover on a hidden area first. On a floor you intend to recoat, grinding is acceptable and even helpful since it profiles the surface, but on a finished countertop or furniture piece, work patiently with heat and careful scraping to avoid wrecking the substrate you are trying to save.
When to Call a Professional
Some jobs are not worth the struggle. A large failed epoxy floor coating, a thick pour-on countertop gone wrong, or epoxy on a delicate or valuable surface are all cases where a professional with proper grinding equipment and experience may save you money and frustration in the long run. If the area is big, the fumes are overwhelming a small space, or you are unsure what is under the epoxy, getting a pro estimate is the smart move.
Final Thoughts
Successful epoxy removal comes down to one question: is it cured or not? Fresh epoxy wipes away with acetone in seconds, while cured epoxy demands chemical strippers, heat, or grinding. Match the method to the surface, test in a hidden spot first, and never skimp on ventilation and protective gear. Work patiently, protect the substrate beneath, and you can strip away even stubborn cured resin without trading one mess for a worse one.