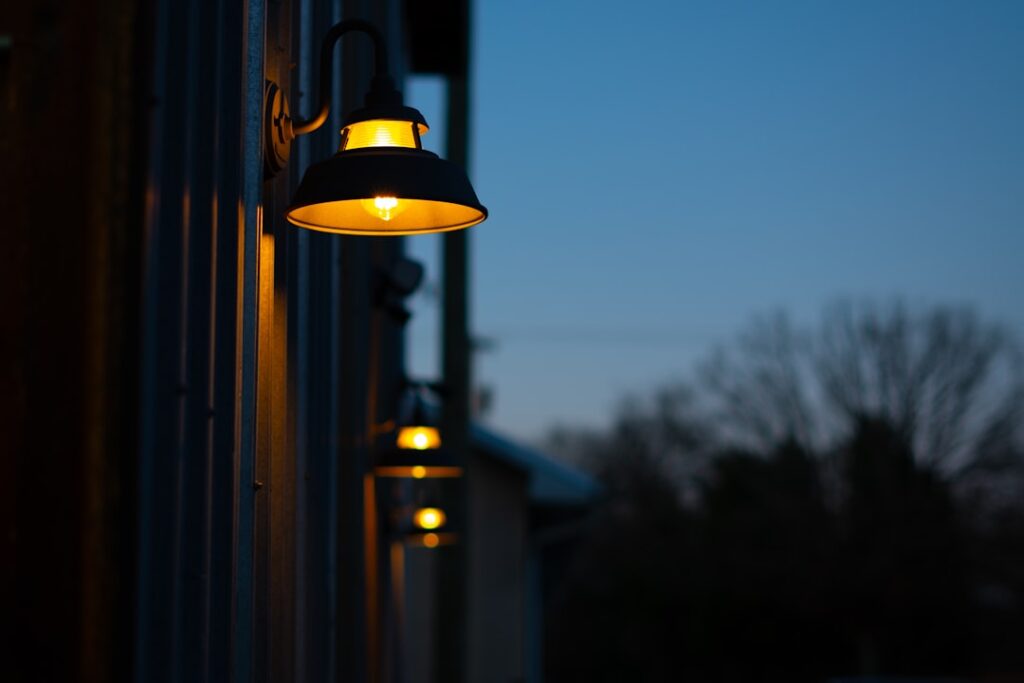
A row of glowing caps along a fence or deck turns an ordinary boundary into a warm, finished feature after dark. Fence post lights add safety along paths and stairs, mark property edges, deter intruders, and give your outdoor space a polished, custom look. They come in solar, low-voltage, and hardwired versions to fit any budget and skill level. This guide covers the types, how to size them to your posts, brightness, finishes, costs, and installation.
Part of our Decks & Outdoor guide — explore the full guide →
- Where Fence Post Lights Shine
- The Three Power Types
- Solar Post Caps: Convenience vs Consistency
- Low-Voltage Post Lights: The Reliable Choice
- Sizing Lights to Your Posts
- Brightness, Color, and Style
- What Fence Post Lights Cost
- Installation Tips
- Common Mistakes to Avoid
- Spacing and Layout for the Best Effect
- Frequently Asked Questions
Where Fence Post Lights Shine
These small fixtures do more than decorate. Mounted on the tops of fence and deck posts, they cast a soft downward and outward glow that defines the perimeter, lights the way along a walkway or deck edge, and adds a welcoming ambiance for evenings outside. On deck stairs, they improve safety by revealing the edge of each level. Along a driveway or front fence, they mark the boundary and add curb appeal. Because they sit up on the posts you already have, they light the space without extra ground stakes or clutter.
The Three Power Types
Choosing how the lights are powered is the biggest decision, and it drives cost and installation effort:
- Solar: a built-in panel charges a battery by day and lights the cap at dusk. No wiring at all. The easiest option and great for fences with no power nearby, but brightness and run-time depend on sun exposure and the battery, and they dim in winter and after cloudy days.
- Low-voltage (12V): wired to a transformer like landscape lighting. Consistent, controllable brightness, and safe to install yourself, but requires running cable along the fence.
- Hardwired (120V): tied into household power. Brightest and most permanent, but needs an electrician, conduit, and usually a permit. Least common for simple post caps.
For most homeowners, solar caps are the quick, no-wire win, while low-voltage caps are the upgrade for reliable, even lighting that does not fade on gray days.
Solar Post Caps: Convenience vs Consistency
Solar post lights are wildly popular because installation is as simple as attaching the cap to the post. There is no wiring, no transformer, and no electricity cost. The trade-off is performance variability. Their brightness depends on how much sun the panel collects, so posts in shade or a stretch of overcast days leave them dim, and the small batteries degrade over a few years and need replacement. Look for models with larger panels, replaceable batteries, and a warm-white LED (2700K to 3000K) rather than the harsh cool-white of cheap units. Quality solar caps look far better and last longer than bargain-bin versions.
Low-Voltage Post Lights: The Reliable Choice
If you want every cap to glow the same brightness every night regardless of weather, low-voltage wiring is the answer. A transformer steps household 120V down to a safe 12V, and cable runs along the fence line feeding each light. Because the cable carries only 12 volts, it is safe for DIY and does not require conduit. This system gives consistent, controllable light, lets you add a timer or photocell to automate dusk-to-dawn operation, and pairs with the same transformer running your path and landscape lights. The extra effort of running cable buys you dependable performance for years.
Sizing Lights to Your Posts
Fence and deck posts come in standard nominal sizes, and post caps are sold to match. The most common are:
- 4×4 posts: actual dimension about 3.5 by 3.5 inches, the most common residential size.
- 5×5 and 6×6 posts: larger caps for heavier posts and vinyl sleeve posts.
- Vinyl and metal posts: caps sized to the outer sleeve dimension.
Measure the actual top dimension of your post, not the nominal name, since a 4×4 is really 3.5 inches. Many caps include shims or adapters to fit slightly different sizes snugly. A cap that is too loose will wobble or blow off, so a proper fit matters.
Brightness, Color, and Style
Post lights are meant to be ambient, not floodlights. A warm-white output in the 2700K to 3000K range looks inviting and flatters wood and stone. Cool-white light reads harsh and industrial on a residential fence. Many caps have frosted or seeded glass to diffuse the LED into a soft glow, while clear glass shows a brighter point of light. Styles range from traditional lantern-look caps to sleek modern squares, in finishes like black, bronze, copper, and stainless. Pick a finish that coordinates with your fence hardware, house trim, and any other outdoor lighting for a cohesive look.
What Fence Post Lights Cost
- Budget solar caps: $8 to $20 each, fine for a quick refresh but shorter-lived.
- Quality solar caps: $20 to $45 each, larger panels, warm LEDs, replaceable batteries.
- Low-voltage caps: $20 to $60 each, plus a $60 to $150 transformer and cable for the run.
- Professional low-voltage install: a few hundred dollars in labor for a full fence line.
For a fence with a dozen or two posts, the fixture cost adds up, so buy the best you can afford; cheap caps that fade or fail within a year are a false economy.
Installation Tips
Solar caps are nearly foolproof: peel any protective film off the panel, set the cap on the post, and secure it with the included screws or adhesive. Let them charge in full sun for a day or two before judging brightness. For low-voltage caps, plan the cable route along the fence, mount a transformer near a GFCI outlet, run the cable stapled to the back or bottom of the fence rail, and connect each cap with its waterproof connector. Keep connections off the ground and sealed to prevent corrosion. Use exterior-rated screws so nothing rusts and stains the post. Confirm each post top is flat and clean so the cap seats squarely and sheds water.
Common Mistakes to Avoid
- Buying caps sized to the nominal post name instead of the actual dimension.
- Choosing cool-white LEDs that make the fence look harsh.
- Placing solar caps in shade and expecting full brightness.
- Skimping on cheap solar units with non-replaceable batteries that die in a year.
- Leaving low-voltage connectors on the ground where they corrode.
- Mismatching finishes so the lights clash with the rest of the yard.
Spacing and Layout for the Best Effect
You do not have to light every single post, and often you should not. Lighting every cap along a long fence can look busy and cost a fortune, while a well-planned rhythm looks intentional and elegant. A common approach is to light the posts that mark transitions and destinations: the ends of a run, the corners, the posts flanking a gate, and the posts alongside steps or a walkway where footing matters. On a deck, prioritize the stair posts and corner posts so the light does real safety work while still looking balanced. If you want a continuous glow, spacing lit caps every second or third post often reads better than every one, and it saves on fixtures and, for solar, on batteries. Step back and view the fence at night to judge the rhythm before committing.
Combine post caps with other layers for depth. A few post lights plus low-voltage step lights or a wash light on a feature wall create a richer scene than post caps alone, the same layering principle that makes whole-yard landscape lighting look professional.
Frequently Asked Questions
Homeowners shopping for fence post lights commonly ask these questions.
Are solar or low-voltage post caps better?
Solar caps are easiest, with no wiring, but their brightness varies with sun exposure and their batteries fade over a few years. Low-voltage caps need cable run to a transformer but give consistent, reliable brightness every night.
What size cap fits a 4×4 post?
A nominal 4×4 post actually measures about 3.5 by 3.5 inches, so buy a cap sized to the real dimension, not the nominal name. Measure the actual post top before ordering, and use shims if the fit is slightly loose.
What color light looks best on a fence?
Warm white in the 2700K to 3000K range looks inviting and flatters wood and stone. Avoid harsh cool-white LEDs, which make a residential fence look industrial and stark.
How do I keep solar caps bright?
Place them where the panel gets direct daytime sun, clean the panel occasionally, and choose quality units with larger panels and replaceable batteries. Shaded posts and cheap non-replaceable batteries are the main causes of dim solar caps.
Fence post lights are one of the simplest ways to add warmth, safety, and character to an outdoor space. Decide between the no-wire convenience of solar and the steady reliability of low-voltage, size the caps to your actual posts, choose warm-white light and a coordinating finish, and install them squarely and securely. The result is a fence line that glows softly every evening and makes your whole yard feel finished.