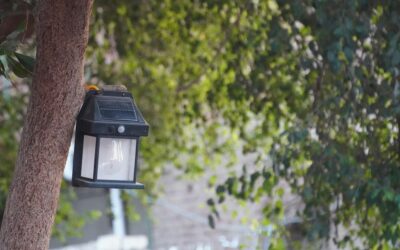
Nothing transforms a backyard at dusk faster or cheaper than a row of glowing fence caps. Fence post solar lights mount right on top of your existing posts, charge themselves during the day, and switch on automatically at night with zero wiring and zero addition to your electric bill. For homeowners who want ambiance and a measure of safety without hiring an electrician or trenching low-voltage cable, they are the easiest upgrade in the yard.
Part of our Decks & Outdoor guide — explore the full guide →
This guide explains how to size them to your posts, what the specifications actually mean, how to install them in minutes, and how to squeeze maximum life and brightness out of the solar panels once they are up.
How Solar Fence Lights Work
Each cap houses four simple parts: a small photovoltaic panel on top, a rechargeable battery, one or more LEDs, and a light sensor. During daylight the panel converts sun into electricity and stores it in the battery. At dusk the sensor detects falling light levels and switches the LED on, running until either dawn or the battery drains. There are no wires and no switches to flip.
Because everything depends on that daytime charge, placement matters more than any spec on the box. A light on a post shaded by a tree all afternoon will glow weakly for an hour and then die, no matter how good the fixture is. The best-performing lights sit on posts with several hours of direct, unobstructed sun.
Matching the Light to Your Post
The most common mistake buyers make is ordering caps that do not fit their posts. Fence posts come in standard nominal sizes, and solar caps are sold to match, often with an adapter or foam gasket to fine-tune the fit.
- 4×4 posts: the most common wood post; caps sized 4×4 or 5×5 with shims are widely available.
- 5×5 and 6×6 posts: vinyl and larger wood posts; buy caps rated for that footprint.
- Metal and round posts: chain-link and steel posts need band-mount or clamp-on solar fixtures rather than flat caps.
- Vinyl posts: measure the actual outside dimension, since vinyl sleeves run slightly larger than nominal wood.
Measure your post with a tape before buying, and if you are between sizes, choose the cap with an included adapter. A cap that rocks loosely will leak water into the post and blow off in a storm.
Reading the Specifications
Two numbers determine whether a solar cap actually lights your yard or just marks the posts. Lumens measure brightness, and battery capacity in milliamp-hours (mAh) determines runtime. Low-cost accent caps put out 2 to 10 lumens, enough for a soft decorative dot but not to see by. Brighter path-grade caps reach 15 to 40 lumens and can genuinely help you find the gate.
Battery capacity typically ranges from 400 to 1,200 mAh. Larger batteries carry a full night of runtime and hold a charge through a couple of cloudy days. Also check the color temperature: warm white around 2700K to 3000K gives a cozy amber glow, while cool white near 6000K looks brighter and more modern but harsher. Many caps now offer a switch to pick between them.
Installing Solar Fence Caps
Installation is genuinely a five-minute-per-post job, which is much of the appeal. Still, a few steps separate caps that stay put from caps you find in the flowerbed after the first wind.
- Confirm the post top is flat and clean; sand or trim any rounded or splintered edges so the cap seats fully.
- Peel and charge: leave a protective film over the panel until install, then let the light sit in full sun for a day before first use so the battery reaches full capacity.
- Set the cap over the post; most include a foam sleeve or set screws to grip snugly.
- Add two small stainless screws through the cap’s flange into the post for wind resistance, unless the fit is already very tight.
- Flip the on switch, usually hidden under the panel, so the sensor can begin cycling.
That first full-sun charge before use is the step people skip, and it is why a brand-new light sometimes seems dim on night one. Give it a full day of sun and judge it on night two.
Getting the Best Performance
Solar output is only as good as the sunlight the panel receives, so a little strategy pays off. Position lights on the sunniest posts and reserve shaded posts for non-lit decorative caps. Keep tree branches trimmed back so they do not shade the panels as the season progresses. Wipe the panels clean every few weeks, since pollen, dust, and bird droppings can cut charging efficiency by a third.
In winter, shorter days and low sun angles mean shorter runtimes, so expect less glow from November through February. Snow sitting on a panel blocks all charging, so brush it off after storms. If a light stops working entirely, the rechargeable battery has likely worn out; most are standard AA or AAA NiMH cells you can replace for a dollar or two rather than tossing the whole cap.
Comparing Solar to Wired Options
Solar caps win on cost and simplicity, running $5 to $25 each with no installation labor and no ongoing power cost. Their weakness is dependability: brightness varies with weather and season, and cheap units fade after a year or two. Low-voltage wired post lights cost more up front and require running cable and a transformer, but they deliver consistent, controllable brightness every night regardless of clouds.
For most homeowners the honest answer is to use both: solar caps for the long fence runs where wiring is impractical, and wired fixtures at the gate, steps, or entry where reliable brightness genuinely matters. That hybrid approach gives you ambiance everywhere and dependable light where you need it.
Styles and Design Effects
Solar caps come in enough styles to match any fence and any mood, so choose the look as deliberately as the specs. Downward-glow caps have a clear or frosted lens on the sides that washes light down the post, ideal for lighting a walkway beside the fence. Top-glow caps light upward or outward for a decorative beacon effect along the fence line. Lantern-style and coach-style caps mimic traditional gas lamps for a classic look, while flat modern caps suit contemporary horizontal fences.
Think about spacing and rhythm, too. Lighting every post creates a bright, formal runway, while lighting every other post gives a softer, more economical effect. On a long fence, alternating lit and unlit caps saves money and still reads as intentional. For a warm, cohesive look, keep all caps the same style and color temperature; mixing warm and cool white along one fence looks accidental. Accent colors exist, but for most homes a warm 2700K to 3000K white flatters the yard best and avoids the harsh, bluish look of cheap cool-white units.
Comparing Solar to Wired Post Lights
Solar is not the only way to light a fence post, and understanding the trade-offs helps you spend wisely. Solar caps cost $5 to $25 each, install in minutes with no wiring, and add nothing to your power bill, but their brightness swings with weather and season and cheap units fade within a year or two. Low-voltage wired post lights cost more, require a transformer and buried cable, and take real installation effort, but they deliver identical brightness every single night, cloudy or clear.
- Choose solar for: long fence runs, remote posts, renters, and anyone wanting a fast no-wiring install.
- Choose wired for: gates, steps, entries, and any spot where reliable brightness genuinely matters.
- Hybrid approach: wire the few critical posts and let solar handle the decorative runs, getting the best of both.
Most homeowners land on that hybrid: dependable wired light where it counts, cheap solar ambiance everywhere else.
Troubleshooting Weak or Dead Lights
When a solar cap dims or quits, the cause is almost always one of three things, and all are fixable. First, insufficient charge: a shaded panel, a dirty panel, or short winter days starve the battery. Move the light to a sunnier post, wipe the panel clean, and confirm nothing shades it during the day. Second, a worn-out battery: the rechargeable NiMH cell inside lasts one to two years, and most caps use a standard AA or AAA you can replace for a dollar or two rather than tossing the whole unit.
Third, a stuck sensor or switch: make sure the on/off switch under the panel is set to on, and that the light sensor is not fooled by a nearby porch light tricking it into thinking it is still daytime. If a brand-new light seems dim, remember it needs a full day of direct sun to charge before its first night. Rule out these simple causes before assuming the fixture is defective, since a genuine hardware failure is the rarest reason of all.
Buying With Confidence
When you shop, prioritize a larger battery, a color temperature you like, a fit that matches your post exactly, and reviews that mention lifespan past the first year. Skip the cheapest multi-packs if you want the lights to survive more than a season. A modest step up in quality, roughly $12 to $20 per cap, buys markedly better batteries and weatherproofing.
Installed thoughtfully on sunny posts and kept clean, fence post solar lights deliver a warm, welcoming glow that makes an ordinary backyard feel finished, all without a single wire, a permit, or a rise in your power bill. Few yard upgrades return this much charm for this little effort.