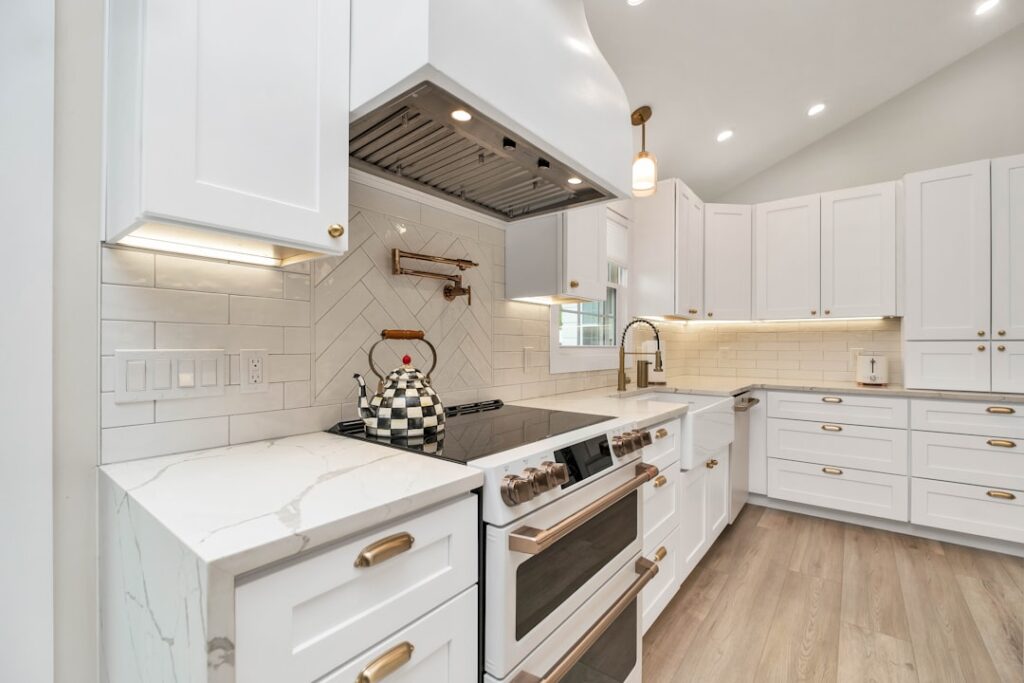
A full quartz backsplash replaces the usual 4-inch strip and traditional tile with a single continuous slab of engineered quartz that runs from the countertop all the way up to the underside of the wall cabinets, or in some layouts clear to the ceiling. Homeowners choosing a full quartz backsplash want the seamless, grout-free look that has dominated high-end kitchen design for the better part of a decade, and the material delivers exactly that when it is fabricated and installed correctly.
Before you commit thousands of dollars to this upgrade, it helps to understand how these slabs are cut, what they cost per square foot, where they outperform tile, and where they can disappoint. This guide walks through the practical details so you can decide whether a slab backsplash belongs in your kitchen.
What Exactly Is a Full Slab Backsplash
Engineered quartz is roughly 90 to 93 percent ground natural quartz bound with polymer resins and pigments. A full slab backsplash uses the same material as your countertop, cut from the same or a matching slab, so the vein or pattern can flow continuously from the horizontal surface up the vertical wall. Fabricators typically cut backsplash panels between 15 and 30 inches tall depending on the distance between your counter and cabinets, and the panels are usually 3/4 inch thick to match countertop stock.
Because a standard quartz slab measures around 120 by 55 inches, most kitchen walls need only one or two seams, and skilled fabricators can hide those seams inside inside corners or behind range hoods. The result reads as one uninterrupted surface, which is the entire appeal.
Cost of a Full Quartz Backsplash
Expect to pay between $70 and $120 per square foot installed for a slab backsplash, which is meaningfully more than the $25 to $50 per square foot you would spend on ceramic or porcelain tile installed by a professional. A typical kitchen with 30 square feet of backsplash area therefore lands somewhere between $2,100 and $3,600.
Several factors push the number up or down:
- Slab grade and brand, with premium marble-look patterns commanding a 20 to 40 percent premium.
- The number of outlet, switch, and window cutouts, since each one requires precise fabrication.
- Height of the run, especially full-height sections behind a cooktop that reach the ceiling.
- Whether you order the backsplash at the same time as the countertop, which saves on slab waste and a second fabrication trip.
Ordering countertop and backsplash together is the single biggest money saver, because the fabricator can nest your pieces on one slab and reduce the offcut you pay for but never use.
Advantages That Make It Worth the Price
Grout is the enemy of a low-maintenance kitchen. It stains, harbors grease behind the stove, and needs periodic sealing. A slab backsplash eliminates grout lines entirely, so cleanup is a quick wipe with a damp cloth and mild soap. That single benefit convinces many homeowners on its own.
Beyond cleaning, the visual payoff is substantial. Matching the counter and wall creates a monolithic, custom appearance that photographs beautifully and signals quality to buyers. Quartz is also nonporous, so it resists staining from wine, coffee, tomato sauce, and cooking oils far better than natural stone or unsealed grout. Add strong scratch and impact resistance, and you have a surface engineered to survive decades of daily cooking.
Drawbacks to Weigh Honestly
No material is perfect. Quartz contains resin, which can scorch or discolor under direct high heat, so a full-height section behind a gas range should be paired with sensible habits rather than treated as a heat shield. Never rest a screaming-hot pan directly against the slab.
The cost gap versus tile is real, and for some budgets it is decisive. Repairs are also harder: a cracked tile can be swapped, but a damaged slab panel usually means replacing the whole piece. Finally, because the pattern is fixed at the slab, you lose the design flexibility of mixing tile shapes, colors, and mosaics. If your taste runs toward eclectic or handmade looks, tile still wins.
How Installation Works
Installing a slab backsplash is a job for professional fabricators, not a weekend DIY project, because the panels are heavy, brittle until secured, and unforgiving of measurement errors. The typical sequence looks like this:
- The fabricator creates a digital or physical template of your walls after the countertop is set, capturing every outlet, window, and out-of-square corner.
- Panels are cut and polished in the shop, with outlet cutouts made using CNC machines for clean edges.
- On install day, the crew dry-fits each panel, checks the reveal against the counter, and scribes the edges if the wall is uneven.
- They apply a bead of construction adhesive to the back and press the panel firmly to the wall, supporting it with shims or temporary braces while it sets.
- Seams and the counter-to-backsplash joint are filled with color-matched silicone caulk, tooled smooth for a nearly invisible line.
Plan for a two to three week gap between templating and installation, since fabrication takes time. The install itself usually wraps in a single day for an average kitchen.
Design Ideas and Slab Selection
The most requested look is a dramatic marble imitation, such as a Calacatta pattern with bold gray or gold veining that carries from countertop to wall. These patterns turn the backsplash into a focal point, especially behind a cooktop where a full-height panel becomes a natural centerpiece.
For a calmer, modern aesthetic, choose a solid white, warm greige, or concrete-look quartz that reads as texture rather than pattern. When selecting your slab in person, ask to see the actual slabs your pieces will be cut from, not just a small sample, because veining varies dramatically across a single slab. Mark with the fabricator which portion of the veining you want centered behind the range.
- Pair matte or honed finishes with contemporary flat-panel cabinets.
- Use polished finishes to bounce light in a small or north-facing kitchen.
- Consider a waterfall or mitered edge where the backsplash meets an open shelf for a built-in look.
Maintenance and Long-Term Care
Daily care could not be simpler: wipe spills with warm water and a few drops of dish soap, then dry with a soft cloth. Avoid abrasive scouring pads and harsh chemicals like bleach, oven cleaner, or high-alkaline degreasers, all of which can dull the resin surface over time. Unlike granite or marble, quartz never needs sealing, which saves you an annual chore and the cost of sealer.
For stubborn dried-on grease behind the stove, a plastic scraper and a nonabrasive cleaner remove buildup without scratching. With minimal effort, a quality slab backsplash will look showroom-fresh for 15 to 25 years, comfortably outlasting most tile grout, which is precisely why so many homeowners decide the upfront premium is money well spent.
Is It Right for Your Kitchen
Choose a slab backsplash if you value a seamless, easy-clean, high-resale look and your budget can absorb the roughly two-to-one price premium over tile. Stick with tile if you love pattern play, want a lower cost, or expect to change your kitchen style within a few years. For most mid-to-high-end remodels, though, the combination of dramatic looks and near-zero maintenance makes the slab option one of the smartest upgrades in the kitchen.