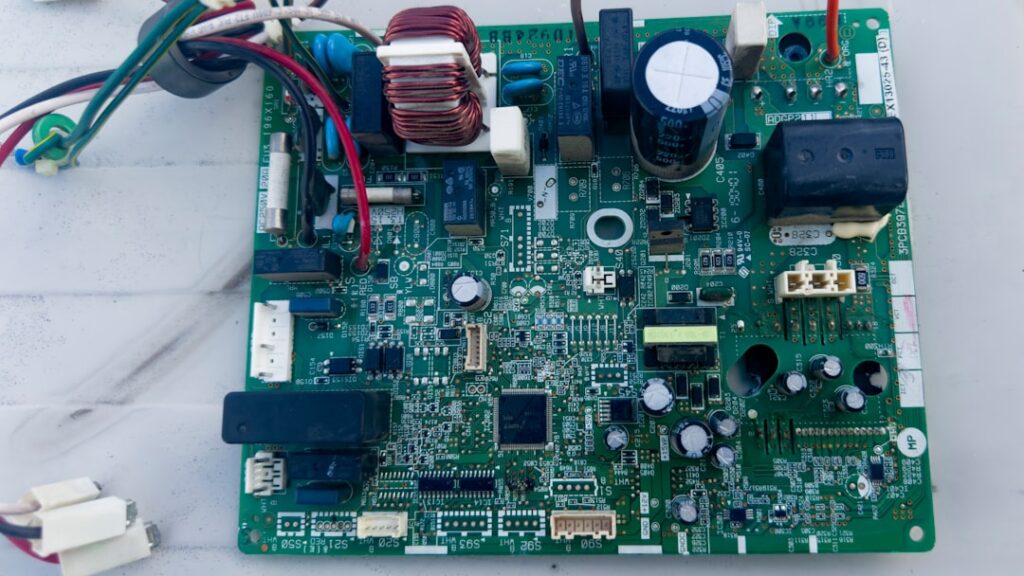
A furnace control board replacement is the fix when the brain of your furnace stops thinking straight. The control board, sometimes called the integrated furnace control or IFC, is the circuit board that sequences the entire heating cycle: it reads the thermostat, checks the safety switches, fires the ignitor, opens the gas valve, and turns the blower on and off at the right moments. When it fails, the furnace can do nothing, do the wrong thing, or run erratically. It is one of the most common failures on furnaces past about ten years old, and the good news is that swapping a board is one of the more DIY-friendly furnace repairs, as long as you are methodical about the wiring.
This guide explains what the board does, how to know it is the culprit, how to replace it without turning the job into a wiring puzzle, and what it costs in 2026.
What the Control Board Does
Think of the control board as the conductor of the furnace. Every heating cycle runs on a strict sequence, and the board enforces it. When the thermostat calls for heat, the board first checks the safety chain, the pressure switch, the limit switch, and any rollout switches. If those are clear, it energizes the inducer motor to establish draft, waits for the pressure switch to confirm airflow, powers the ignitor, opens the gas valve, and confirms flame through the flame sensor. A few seconds later it starts the blower, and at the end of the call it shuts everything down in reverse order and runs a blower-off delay.
All of that timing lives on the board. It also distributes low-voltage 24-volt control power from the transformer to the thermostat and components, and many boards carry the fuse, usually a 3-amp or 5-amp automotive-style blade fuse, that protects the low-voltage circuit. When the board’s relays, capacitors, or solder joints degrade, the sequence breaks.
Signs the Board Has Failed
A dying control board throws symptoms that can look like other failures, so you diagnose carefully. Common signs include:
- Nothing happens on a call for heat: no inducer, no ignitor, no blower, and the diagnostic LED is dark, often a blown board fuse or a dead board.
- The blower runs constantly or not at all: a stuck or failed blower relay on the board.
- Erratic or short cycling: the furnace starts and stops without reaching setpoint as the board misreads inputs.
- The diagnostic LED flashes an error that does not match the actual components: good ignitor, good sensor, good pressure switch, but the board still faults.
- Visible damage: scorched relays, burnt spots, corroded traces, or a bulging capacitor when you inspect the board.
Before you condemn the board, read its LED flash code against the legend printed on the furnace door, check the board fuse, and confirm the 24-volt transformer output and the safety switches. A blown 3-amp fuse often means a shorted wire or component, not a bad board, so find why it blew before you drop in a new board and cook it too.
Universal vs OEM Boards
You have two paths for the replacement part. An OEM board matches your furnace’s exact model, plugs into the existing connectors, and is the simplest swap because everything lands where it came off. The downside is cost and availability, OEM boards can be pricey and sometimes discontinued.
A universal control board is designed to replace a range of failed boards across brands. It costs less and is easy to find, but it requires more setup, you move each wire from the old board to the labeled terminal on the universal board and set any timing jumpers to match your furnace’s specs. For a common single-stage furnace a quality universal board works fine. For a two-stage or variable-speed furnace with communicating controls, stick with the OEM board, because the universal may not support the staging or communication.
Step-by-Step Replacement
- Turn off power to the furnace at the breaker or service switch, then confirm it is dead before touching wires.
- Photograph the board from several angles so you have a clear record of every wire and connector location.
- Label each wire with tape if it is not already color-coded and connector-keyed. Do this even if you took photos, redundancy prevents mistakes.
- Disconnect the wires and unplug the harness connectors, then remove the screws or standoffs holding the board.
- Mount the new board in the same position and transfer each wire to the matching terminal. On a universal board, follow its wiring chart terminal by terminal and set the timing jumpers.
- Double-check every connection against your photos, install the correct fuse, and restore power.
- Run a full heating cycle and watch the sequence, inducer, ignitor, gas valve, flame, blower, and confirm the diagnostic LED shows normal operation.
Methodical wiring is the whole job. A board itself is not hard to physically install, but a single wire on the wrong terminal can prevent ignition or defeat a safety, so take your time and verify.
Why Boards Fail in the First Place
Boards rarely die randomly. Power surges, especially from lightning or utility switching, are a leading cause, which is why a whole-home surge protector is cheap insurance. Voltage spikes from a failing component, a shorted ignitor or a bad transformer, can take the board with them. Age and heat cycling fatigue the solder joints and relays over ten to fifteen years. And rodents love the warm cabinet, chewing wires and shorting the low-voltage circuit.
When you replace a board, look for the root cause. If the board’s fuse was blown, hunt down the short. If a component like the ignitor or blower motor was failing, replace it too, or it will damage the new board. Swapping the board without fixing what killed the old one is how people end up buying two boards.
What Furnace Control Board Replacement Costs
The board itself runs $80 to $350 in 2026. A universal single-stage board lands around $80 to $150, while an OEM board for a two-stage or variable-speed furnace can reach $200 to $350 or more. If your furnace is still under its parts warranty, often ten years, the board may be free and you pay only labor.
Professional replacement typically runs $300 to $650 all in, including diagnosis, the part, and testing. If you do it yourself with a universal board, you are looking at roughly $80 to $150 total plus an hour or two of careful work. Given that a board swap is largely a wiring task with no gas piping or refrigerant to handle, it is one of the better furnace repairs for a confident DIYer to tackle, provided you kill the power first and rewire exactly as it came apart.
Reading the Diagnostic Flash Codes
The best troubleshooting tool on a modern furnace is already built into the board: the diagnostic LED. Behind the furnace door, usually through a small sight glass, a light blinks a pattern that maps to a fault code, and the legend is printed on the inside of the door panel. Before you assume the board is dead, read that code. A steady on or a slow, healthy heartbeat flash means the board thinks it is fine and the problem is elsewhere. A specific flash pattern, say three flashes for a pressure switch fault or four for an open limit, points you at the actual failed component.
Here is the catch that makes board diagnosis tricky: the board reports what its sensors tell it, and a failing board can report faults that are not real. If the flash code says pressure-switch fault but you have verified the inducer runs, the tubing is clear, and the pressure switch itself tests good, the board’s own sensing circuit may be the liar. That pattern, good components but persistent phantom faults, is one of the clearest signs the board itself has failed. Confirm the components are genuinely good before you trust the board’s accusation, then condemn the board only when the inputs check out and the sequence still breaks.
When you do install the new board, keep the old one for a day or two until you have run several full heating and cooling cycles and confirmed the fault is truly gone. Watch the LED through a couple of complete cycles, verify the blower-off delay behaves, and make sure the auxiliary and cooling calls work too, not just heat. Boards handle the whole system, so a swap that fixes heating but leaves the AC blower dead means a wire landed on the wrong terminal. A few minutes of verification saves a second trip into the furnace cabinet.