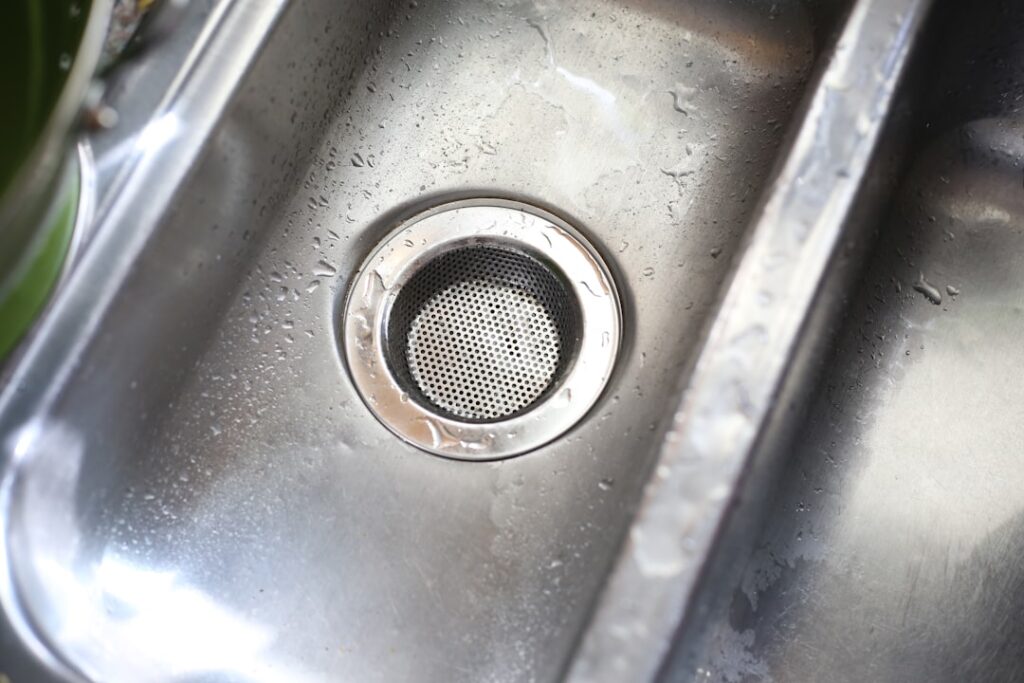
Garbage disposal repair is one of the most common kitchen fixes homeowners face, and the good news is that most problems are simple to diagnose and solve without calling a plumber. A disposal that hums but won’t spin, leaks from the bottom, or simply won’t turn on can usually be fixed in 15–30 minutes with basic tools — or no tools at all.
This guide walks you through troubleshooting every common garbage disposal problem, step-by-step repairs, when to replace instead of repair, and tips for preventing future issues. Before you spend $150–$350 on a plumber visit, try these fixes first.
- How a Garbage Disposal Works
- Safety First: Before Any Repair
- Quick Troubleshooting Guide
- Problem: Disposal Won’t Turn On (No Sound)
- Problem: Disposal Hums but Won’t Spin
- Problem: Disposal Is Leaking
- Problem: Slow Draining
- Problem: Bad Smell from Disposal
- When to Replace vs Repair
- Prevention & Maintenance Tips
- Broken Sink Disposal? Check the Hidden Failure Points First
- Frequently Asked Questions
How a Garbage Disposal Works
Understanding the basic mechanics helps you diagnose problems faster. A garbage disposal has a few key components:
- Motor — a 1/3 HP to 1 HP electric motor mounted at the bottom of the unit
- Flywheel (grinding plate) — a spinning disc inside the chamber
- Impellers (lugs) — two or more small metal pieces mounted on the flywheel that swing outward when spinning, forcing food waste against the grind ring
- Grind ring — a stationary ring with sharp grooves that shreds food into tiny particles
- Reset button — a thermal overload switch on the bottom that trips if the motor overheats
- Allen wrench hole — a hex socket on the bottom center for manually rotating the flywheel when jammed
Contrary to popular belief, garbage disposals don’t have blades. Food is ground by centrifugal force — the impellers throw food against the grind ring, which shreds it into particles small enough to flow through plumbing.
Safety First: Before Any Repair
Never put your hand inside a garbage disposal. Even with the power off, the impellers and grind ring can cause serious cuts. Follow these safety rules:
- Turn off the wall switch controlling the disposal
- Unplug the unit from the outlet under the sink, or turn off the circuit breaker if hardwired
- Never use your fingers to retrieve items — use pliers, tongs, or an Allen wrench
- Use a flashlight to inspect the interior before and during repairs
- Keep water running during operation (after repair) to flush debris
Quick Troubleshooting Guide
| Symptom | Most Likely Cause | Difficulty | Fix Time |
|---|---|---|---|
| Won’t turn on at all (no sound) | Tripped reset button or no power | Easy | 2 minutes |
| Hums but won’t spin | Jammed flywheel | Easy | 5–10 minutes |
| Leaking from bottom | Failed internal seal | Replace unit | 1–2 hours |
| Leaking from top (flange) | Loose mounting or dried plumber’s putty | Moderate | 30–60 minutes |
| Leaking from side (dishwasher connection) | Loose hose clamp | Easy | 5 minutes |
| Slow draining | Clogged drain pipe or P-trap | Easy–Moderate | 15–30 minutes |
| Bad smell | Food buildup inside chamber | Easy | 10 minutes |
| Makes grinding/rattling noise | Foreign object in chamber | Easy | 5 minutes |
Problem: Disposal Won’t Turn On (No Sound)
If your garbage disposal does absolutely nothing when you flip the switch — no hum, no sound at all — the issue is almost always electrical:
Fix 1: Press the Reset Button
Look at the bottom of the disposal unit (under the sink). There’s a small red or black button — the reset button. If the motor overheated from overloading or jamming, this button pops out. Press it firmly until it clicks. Try the switch again.
Fix 2: Check the Circuit Breaker
Go to your electrical panel and check if the disposal’s circuit breaker has tripped. Reset it by flipping it fully off, then back on.
Fix 3: Test the Switch
If the reset button and breaker are fine, the wall switch itself may be faulty. Test by plugging a lamp or phone charger into the outlet under the sink (if the disposal is plug-in). If there’s no power, the switch or wiring needs attention from an electrician.
Fix 4: Check the Power Cord
If the disposal is plugged into an outlet, ensure the plug is fully seated. Check the cord for damage. If the outlet is controlled by a GFCI, press the GFCI reset button (usually on the outlet itself or in the bathroom).
Problem: Disposal Hums but Won’t Spin
A humming disposal means the motor is getting power but the flywheel is stuck. This is the single most common garbage disposal problem, and it’s an easy fix:
Step 1: Turn Off Power
Immediately turn off the switch. A humming motor that can’t spin will overheat and trip the thermal overload (or worse, burn out the motor).
Step 2: Use the Allen Wrench
Insert a 1/4″ Allen wrench (hex key) into the hole at the bottom center of the disposal. Most disposals come with a wrench — check the area under your sink. Turn the wrench back and forth to manually rotate the flywheel. You should feel resistance, then a pop as the obstruction clears.
Step 3: Remove the Obstruction
Shine a flashlight into the disposal opening. Using tongs or pliers (never your hand), remove any visible debris — common culprits include fruit pits, bones, glass, utensils, and bottle caps.
Step 4: Reset and Test
Press the reset button on the bottom of the unit. Turn on the cold water, then flip the switch. The disposal should spin freely. If it still hums, repeat the Allen wrench process more aggressively.
Problem: Disposal Is Leaking
Where the leak originates determines the repair:
Leaking from the Bottom
A leak from the bottom of the disposal indicates a failed internal seal. Unfortunately, internal seals are not user-replaceable. This means the disposal needs to be replaced. On the positive side, a new disposal costs $80–$250 for the unit, plus $100–$200 for professional installation (or free if you DIY). Place a container under the leak and some old towels on your kitchen flooring to prevent water damage until the replacement is done.
Leaking from the Top (Sink Flange)
- Disconnect the disposal from the mounting ring
- Remove old plumber’s putty from the sink flange
- Apply fresh plumber’s putty around the flange
- Reseat the flange and tighten the mounting bolts evenly
- Reattach the disposal
Leaking from the Side (Dishwasher Hose or Drain Connection)
Tighten the hose clamp on the dishwasher inlet (side of the disposal) with a screwdriver. For the drain connection, tighten the two screws holding the discharge tube flange. If the rubber gasket inside is worn, replace it ($3–$5 at any hardware store).
Problem: Slow Draining
If water pools in the sink and drains slowly when the disposal runs, the blockage is downstream of the disposal:
Fix 1: Run the Disposal Longer
Many clogs result from not running the disposal long enough. After food is ground, keep the water and disposal running for 15–20 extra seconds to flush all particles through the drain.
Fix 2: Clear the P-Trap
- Place a bucket under the P-trap (the U-shaped pipe under the sink)
- Unscrew the slip-joint nuts on both ends of the P-trap by hand or with pliers
- Remove the trap and clear the blockage (often a thick sludge of grease and ground food)
- Clean the trap with a bottle brush and hot water
- Reattach and tighten the slip-joint nuts
Fix 3: Snake the Drain
If the P-trap is clear but drainage is still slow, the clog is further down the line. Use a hand-crank drain snake (available for $15–$30) fed through the drain pipe opening after removing the P-trap. Never use chemical drain cleaners — they can damage disposal components and plumbing.
Problem: Bad Smell from Disposal
A foul-smelling garbage disposal is caused by food particles stuck to the grind ring, under the splash guard, and inside the chamber. Here’s how to deep clean it:
Method 1: Ice and Salt
Pour 2 cups of ice cubes and 1 cup of rock salt into the disposal. Run cold water and turn on the disposal. The ice and salt scour the interior surfaces, removing stuck-on debris. Run for 30 seconds.
Method 2: Baking Soda and Vinegar
Pour 1/2 cup baking soda into the disposal, followed by 1 cup white vinegar. Let it fizz for 10 minutes, then flush with hot water. This neutralizes odors and breaks down grease.
Method 3: Enzyme Cleaner
Pour 1/4 cup of enzyme cleaner into the disposal. Let sit for 30 minutes (or overnight for severe odors). The enzymes break down organic residue that chemical cleaners miss. Flush with cold water.
Method 4: Clean the Splash Guard
The rubber splash guard (the flappy rubber piece in the drain opening) traps food underneath. Lift each flap and scrub underneath with an old toothbrush dipped in dish soap. This is often the primary source of disposal odors.
When to Replace vs Repair
| Situation | Repair or Replace? | Why |
|---|---|---|
| Jammed flywheel | Repair | Free fix with Allen wrench |
| Tripped reset button | Repair | Press the button — done |
| Leaking from side/top | Repair | Tighten connections or replace gasket |
| Leaking from bottom | Replace | Internal seal failure is not repairable |
| Motor burned out (no hum, power confirmed) | Replace | Motor replacement costs more than a new unit |
| Unit is 8+ years old with multiple issues | Replace | New units are more efficient and reliable |
| Frequent resets/jams (daily) | Replace (upgrade HP) | Unit is undersized for your usage |
Replacement cost: Budget disposals (1/3 HP) cost $80–$120. Mid-range (1/2–3/4 HP) cost $150–$250. Premium (1 HP, stainless grinding, sound insulation) cost $250–$450. Professional installation adds $100–$200.
Prevention & Maintenance Tips
What NOT to Put in a Garbage Disposal
- Grease and oil — solidifies in pipes, causing clogs
- Fibrous vegetables — celery, artichokes, asparagus, corn husks (fibers wrap around impellers)
- Starchy foods in bulk — pasta, rice, potato peels (expand and create paste-like clogs)
- Bones (large) — small chicken bones are fine; beef bones and pork chops are not
- Coffee grounds — accumulate in pipes like sediment
- Eggshells — the membrane can wrap around the grind ring (debatable, but err on the safe side)
- Non-food items — glass, plastic, metal, rubber bands
Good Habits
- Always run cold water before, during, and for 15 seconds after using the disposal
- Feed food waste in gradually — don’t pack the chamber full
- Run the disposal regularly, even if you don’t have food to grind — this prevents corrosion and keeps parts moving
- Drop a few ice cubes in monthly to clean the grind ring
- Grind citrus peels occasionally to freshen the smell
Broken Sink Disposal? Check the Hidden Failure Points First
A disposal that seems broken is often fine, and the actual fault sits in a part most troubleshooting guides skip. Before you shop for a new unit, rule out the less obvious causes below. Before every check, turn off the wall switch and unplug the disposal or switch off its breaker, and never put a hand into the grinding chamber. Use tongs, pliers, or a flashlight.
Kitchen Garbage Disposal Repair: Less Obvious Culprits
- Countertop air switch: If you start your disposal with a button on the sink deck and not a wall switch, a thin air tube runs from that button down to a control box under the sink. A tube that has popped off, split, or kinked makes the disposal look dead even though the motor is fine. Push the tube back onto both fittings, or replace it.
- Dishwasher knockout plug: On a newly installed disposal, the dishwasher inlet has a plastic plug that has to be knocked out. If it was left in place, the dishwasher backs up into the sink and the disposal gets the blame.
- Loose mounting ring: A rattle or a vibration that shakes the whole sink often comes from a mounting ring that has worked loose. Retighten it until the unit hangs firmly.
- Seized from disuse: A disposal left unused for months, for example in a vacation home or a rental between tenants, can corrode stuck. Work the flywheel free with the hex wrench from below before you decide the motor is gone.
- Cracked housing: A drip from the side of the body, away from any fitting, means the grinding chamber has cracked. No patch holds on that, so the unit needs replacing.
When It Truly Is Broken
If the reset button, the breaker, and the outlet all check out, the flywheel turns freely, and the motor still does nothing, the unit has probably reached the end of its life. When you buy a replacement, check whether it uses the same mounting system as your old one. Staying with the same system can let you keep the existing sink flange and skip redoing the putty seal. Match the new unit’s drain outlet height to your trap as well, so you do not have to rework the drain line.
If the disposal is hardwired and you see scorched insulation, melted connectors, or damaged cable where the wiring enters the unit, stop and call a licensed electrician before installing anything new. Once any disposal repair is done, restore power, run cold water, and check the flange, the dishwasher inlet, and the discharge tube for leaks.
Frequently Asked Questions
Why is my garbage disposal humming but not spinning?
The flywheel is jammed. Insert a 1/4″ Allen wrench into the hex hole on the bottom of the disposal and turn it back and forth to free the obstruction. Then use tongs to remove the debris from inside, press the reset button, and test. This is the most common disposal problem and takes under 5 minutes to fix.
How much does garbage disposal repair cost?
Most common repairs (jamming, reset, loose connections) are free DIY fixes requiring only an Allen wrench or screwdriver. If you hire a plumber, expect $150–$350 for a service call plus repair. Replacement disposal units cost $80–$450 depending on power and features, plus $100–$200 for professional installation.
Can I fix a leaking garbage disposal?
It depends on where the leak is. Top leaks (sink flange) are fixable by reapplying plumber’s putty and retightening the mounting hardware. Side leaks (dishwasher hose or drain pipe) are usually fixed by tightening connections or replacing a gasket. Bottom leaks indicate a failed internal seal and require replacing the entire unit.
How long should a garbage disposal last?
A well-maintained garbage disposal lasts 8–15 years. Budget models (1/3 HP) tend toward the lower end, while premium 1 HP units with stainless steel grinding components can exceed 15 years. Avoid putting inappropriate items down the disposal and run cold water during every use to maximize lifespan.
Should I use hot or cold water with my garbage disposal?
Always use cold water. Cold water solidifies grease and fats so they can be ground up and flushed away. Hot water melts grease, which then re-solidifies further down the pipe and causes clogs. Run cold water for 15–20 seconds before and after grinding to fully flush the system.
Why does my garbage disposal smell bad?
Food residue accumulates on the grind ring, inside the chamber, and especially under the rubber splash guard. Clean with ice and rock salt to scour interior surfaces, baking soda and vinegar to neutralize odors, or an enzyme cleaner for deep biological cleaning. Scrub under the splash guard flaps with an old toothbrush and dish soap — this is often the main odor source.
Last updated: March 2026