If you have ever opened the cabinet under your kitchen sink to find a puddle and traced it up to the top of the disposal, the culprit is almost always one small part. The garbage disposal sink flange is the metal ring that connects the disposal to the sink drain, and it is the most common source of leaks in the entire assembly. It seems like a simple piece, yet a poorly sealed or worn flange can drip for weeks before you notice the water damage. This guide explains what the flange does, how to install and seal it correctly, and how to fix the leaks it causes.
- What the Sink Flange Is and Does
- Parts of the Mounting Assembly
- Installing a Sink Flange Correctly
- Why the Sink Flange Leaks
- Fixing a Leaking Flange
- When to Replace vs Reseal
- Putty vs Silicone: Which to Use
- Diagnosing Where a Leak Really Comes From
- Tools and Materials for a Flange Job
- Keeping the Seal Watertight Long Term
What the Sink Flange Is and Does
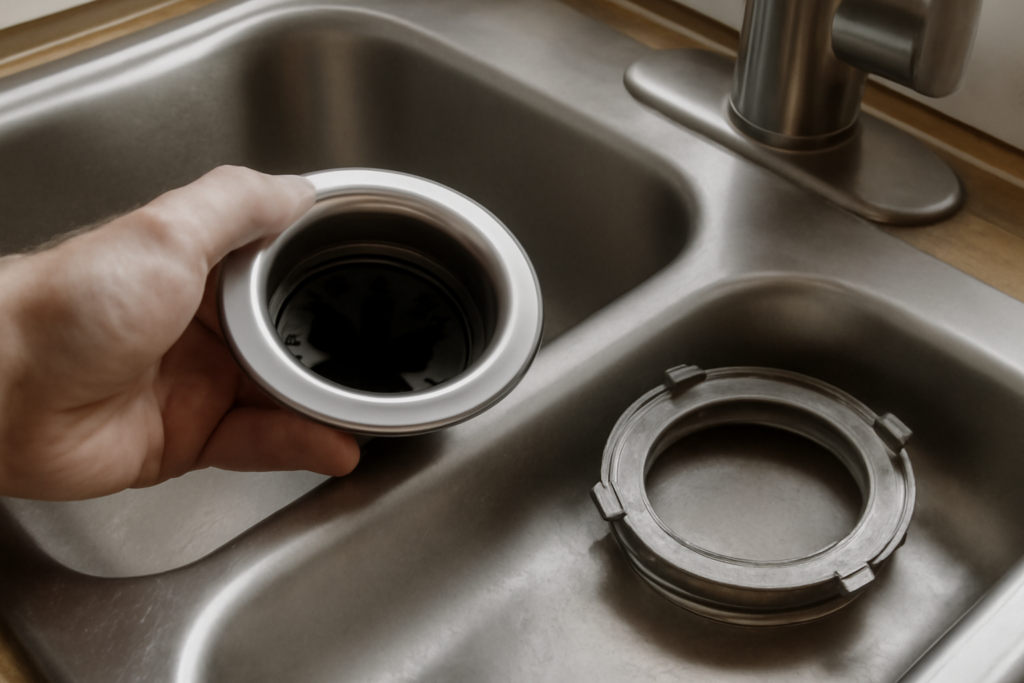
The sink flange, sometimes called the disposal flange or drain flange, is the visible metal fitting that sits inside the sink drain opening. It is the top of the mounting assembly that holds your garbage disposal in place. Water and food scraps pass from the sink through this flange, into the mounting ring below, and down into the disposal’s grinding chamber. Because it sits at the junction between the sink basin and everything below, the flange must form a watertight seal against the sink; if that seal fails, water escapes into the cabinet instead of flowing down the drain.
Parts of the Mounting Assembly
The flange does not work alone. Understanding the full mounting assembly helps you diagnose and fix problems:
- Sink flange: The chrome or stainless ring seated in the drain hole from above.
- Rubber or fiber gasket: Sits under the flange in some designs to help seal it.
- Backup ring and mounting ring: Metal rings below the sink that clamp the assembly tight.
- Snap ring: A retaining clip that holds the lower rings in place on the flange sleeve.
- Mounting bolts: Three screws that tighten the assembly against the underside of the sink.
- Plumber’s putty: The soft sealant packed under the flange to create the watertight bond with the sink.
Installing a Sink Flange Correctly
A leak-free flange comes down to good sealing and even tightening. Whether you are installing a new disposal or resealing an old flange, the process is the same:
- Clean the drain opening thoroughly, removing all old putty and residue so the new seal bonds cleanly.
- Roll a rope of plumber’s putty about the thickness of a pencil and press it evenly around the underside lip of the flange.
- Seat the flange firmly into the drain hole from above, pressing straight down so putty squeezes out evenly all around.
- From below, slide on the gasket, backup ring, and mounting ring, then snap the retaining clip onto the sleeve to hold them.
- Tighten the three mounting bolts evenly and in small increments, alternating between them so the flange draws down flat rather than cocked.
- Wipe away the excess putty that squeezed out around the top of the flange inside the sink.
The even, alternating tightening is the key step people skip. Cranking one bolt fully before the others tilts the flange and breaks the seal on the opposite side.
Why the Sink Flange Leaks
When water shows up in the cabinet, the flange is the prime suspect, and a few specific causes explain most leaks:
- Insufficient or old putty: Too little sealant, or dried-out putty that has cracked, lets water seep past the flange.
- Uneven tightening: Bolts tightened unevenly leave a gap on one side.
- Loose mounting bolts: Vibration from the running disposal can loosen the bolts over time.
- Worn or corroded flange: An old flange can pit or corrode, preventing a proper seal.
- Damaged snap ring or gasket: A failed lower component lets the assembly shift and drip.
Before assuming the worst, confirm the leak really comes from the top flange and not the discharge tube or the dishwasher connection lower down, since those need different fixes.
Fixing a Leaking Flange
Most flange leaks are fixable in under an hour. Here is the reliable approach:
- Turn off the power to the disposal at the breaker and clear out the cabinet so you can work.
- Support the disposal and detach it from the mounting ring by turning its collar, since the weight will drop once released.
- Loosen the mounting bolts and remove the snap ring, then push the flange up and out of the sink.
- Scrape away all old putty from both the flange and the sink opening.
- Inspect the flange for corrosion or pitting; replace it if it is worn rather than trying to reseal a damaged part.
- Apply fresh plumber’s putty and reinstall following the steps above, tightening evenly.
- Restore power, run water, and check for drips before declaring victory.
When to Replace vs Reseal
Not every flange needs replacing. If the metal is smooth and sound, a fresh bead of putty and proper tightening will usually stop the leak. Replace the flange when you see corrosion, pitting, cracks, or when the surface is so rough that putty cannot form a clean seal. Replacement flanges are inexpensive, often $10 to $20 for a complete mounting kit, so if the old one is questionable, swapping it is cheap insurance against a repeat leak. Stainless steel flanges resist corrosion better than plain chrome and are worth the small upgrade.
Putty vs Silicone: Which to Use
Most installations call for plumber’s putty because it stays pliable, seals well, and is easy to remove later for servicing. However, some sink materials, including certain natural stone, quartz, and plastic composite sinks, can be stained by the oils in standard putty. For those, use a stain-free putty formulated for stone or a bead of clear silicone caulk instead. Check the disposal manufacturer’s instructions and your sink material before choosing, since the wrong sealant can leave a permanent ring around a stone drain.
Diagnosing Where a Leak Really Comes From
Before you tear apart the flange, confirm that is actually where the water originates, because under-sink leaks have several possible sources and each needs a different fix. A leak at the very top, where the flange meets the sink, points to the flange seal. A leak from the side of the disposal where a hose connects usually means the dishwasher connection or the discharge tube gasket has failed. Water dripping from the bottom seam of the disposal body often signals a cracked housing, which means the whole unit needs replacing.
To pinpoint the source, dry everything completely, then run water and watch closely with a flashlight. Fill the sink basin and release it to test the flange under a full load of water, since a slow flange leak may only show up under volume. Feel along the discharge tube and the P-trap connections for moisture. Marking the exact origin first saves you from resealing a perfectly good flange while the real leak continues at a hose clamp two inches away.
Tools and Materials for a Flange Job
Gathering the right supplies before you start keeps the job moving. For a typical flange reseal or replacement you will want:
- Plumber’s putty or a stain-free equivalent for stone and composite sinks
- A screwdriver for the mounting bolts and a pair of pliers for the snap ring
- A putty knife or scraper to remove old sealant cleanly
- A bucket and rags to catch water and wipe up residue
- A replacement flange mounting kit if the old one is corroded
- A flashlight and, ideally, a helper to support the disposal weight
Having everything within reach before you drop the disposal means you are not scrambling through a wet cabinet mid-job. The whole task typically takes 30 to 60 minutes once you have the parts on hand, and the plumber’s putty is by far the cheapest and most important item on the list.
Keeping the Seal Watertight Long Term
A properly installed garbage disposal sink flange should stay dry for years, but a quick seasonal check pays off. Every few months, run your fingers around the base of the disposal and under the sink to feel for moisture, catching a slow leak before it warps the cabinet floor. If you notice the disposal has developed play or wobble, snug the mounting bolts. Should you ever remove the disposal for any reason, always apply fresh putty on reinstallation rather than reusing the old, dried seal. With correct installation and a little vigilance, this small metal ring will do its quiet job of keeping water where it belongs for the life of your disposal.