
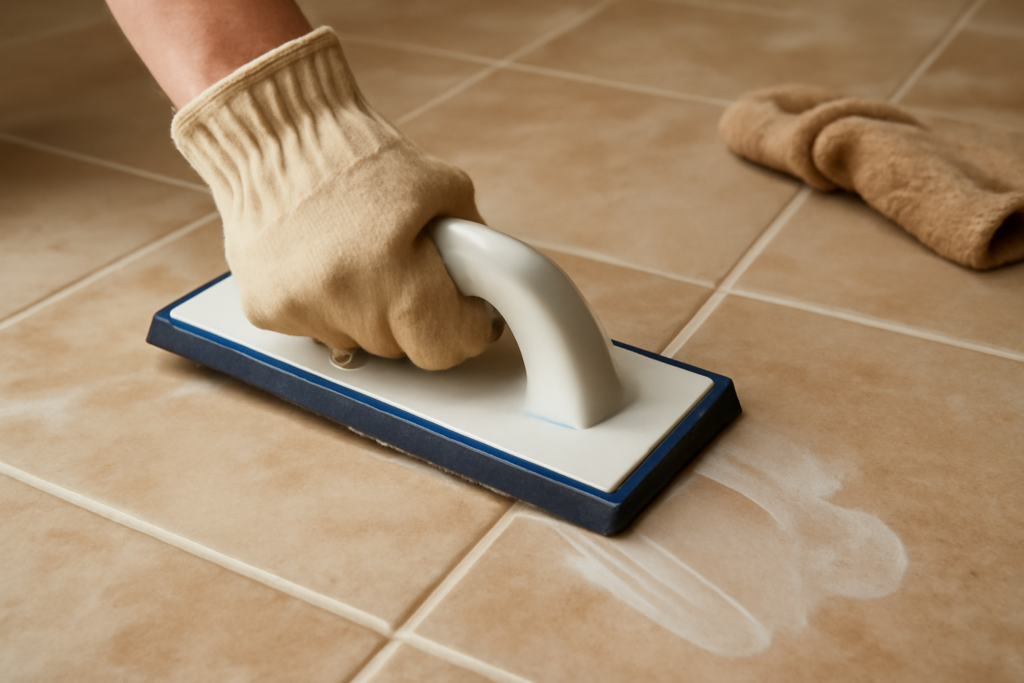
Skip the right tool and your tile job shows it within a week. A grout float is the flat, rubber-faced trowel that packs grout into tile joints and scrapes the excess off the surface, and it is the single most important piece of gear separating a clean install from a streaky, pitted mess. Most homeowners already own a notched trowel for setting tile, then try to spread grout with a putty knife or sponge. That shortcut leaves voids in the joints and grout smeared across every face. Spend $8 to $20 on a proper float and the work goes faster with a far better result.
Part of our Tile & Grout guide — explore the full guide →
What a Grout Float Actually Does
The tool looks simple: a flat plastic or wood backing plate with a soft rubber or gum-rubber pad bonded to the bottom, plus a handle on top. That rubber face does two jobs. Held at a low angle, the flat pad presses grout down into the gaps between tiles, fully filling them. Tipped up onto its edge at roughly 45 degrees, the same float drags across the tile and squeegees the surplus grout off the surface without digging it back out of the joints.
Compared to a metal trowel, the rubber pad flexes slightly and will not scratch glazed ceramic, porcelain, or glass tile. That flexibility is why a dedicated float matters. A stiff steel edge skips over the joints and gouges grout out of them; the soft float rides the tile and leaves the joints packed.
Types of Grout Floats
Not every float suits every job. Match the pad to the grout and the tile.
- Standard gum-rubber float: The all-purpose choice for sanded and unsanded cement grout. Firm enough to pack joints, soft enough to protect glaze. Expect to pay $8 to $15.
- Epoxy grout float: Made with a harder, more chemical-resistant rubber so sticky epoxy grout releases instead of grabbing. Use this for epoxy products; a standard float will tear and smear.
- Margin or detail float: A smaller version for narrow areas, backsplashes, and tight corners where a full-size float will not fit.
- Foam float: Softer face used mainly for delicate tile or for a final cleanup pass; too soft to pack joints firmly on its own.
For a typical homeowner regrouting a bathroom floor or running a kitchen backsplash, a single standard gum-rubber float around 9 by 4 inches handles almost everything.
How to Use a Grout Float Step by Step
Technique beats muscle here. Work in small sections so the grout does not skin over before you clean it.
- Mix the grout to a smooth, peanut-butter consistency and let it slake for the time on the bag, usually about 10 minutes, then remix.
- Load the float by scooping grout onto the pad with a margin trowel.
- Pack the joints by holding the float at about a 30-degree angle and sweeping diagonally across the tile, forcing grout into every gap. Go over each area from two directions so no joint is left hollow.
- Strike off the excess by tilting the float up to roughly 45 degrees and dragging it diagonally across the tile. Diagonal passes keep the edge from dipping into and pulling grout out of the joints.
- Wait, then sponge for 10 to 20 minutes until the surface haze firms up, then wipe lightly with a damp, well-wrung sponge to shape the joints and clear the faces.
Picking the Right Float for Your Tile
Size and firmness should follow the project. Large-format floor tile and wide grout lines call for a full-size, firmer float that covers ground quickly. Mosaic sheets and glass tile do better with a slightly softer pad and a smaller float so you can feel the joints. If you are working with epoxy or urethane grout, buy the float the grout maker recommends; the chemistry of the rubber affects how cleanly the product releases.
Check that the handle is comfortable and the pad is bonded flat with no peeling at the edges. A warped or separating pad leaves streaks no matter how good your technique is.
Common Mistakes to Avoid
Pressing straight along the joint lines instead of diagonally is the top error; it rakes grout right back out. Working too large an area at once is second, because the grout hardens before you can clean it and you fight haze for an hour. Using too wet a sponge floods the joints and pulls the color uneven. And skipping the slake step leaves the grout grainy and hard to pack.
One more: do not press so hard on the strike-off pass that you dish out the joints. Light, steady angled strokes leave the joint surface flush and even.
Caring for Your Grout Float
Rinse the float in a bucket, not your sink, the moment you finish; dried cement grout is nearly impossible to peel off the rubber and ruins the flat face. Wipe it dry and store it flat or hanging so the pad does not curl. A well-kept gum-rubber float lasts through many projects, while a neglected one warps and starts leaving lines on the very next job.
Grout Float vs Other Tools
People often ask whether they really need a dedicated float when they already own trowels and putty knives. The answer is yes, and the reason comes down to the rubber face. A margin trowel is great for mixing and loading grout onto the float, but its steel edge cannot pack joints without scratching tile or raking grout back out. A putty knife is far too narrow to clean a tile face evenly and will leave ridges. A grout bag, which pipes grout into joints like icing, has a niche for very rough or porous tile that you do not want to smear, but it does not strike off excess; you still finish with a float.
For the cleanup stage, the float and the sponge are partners. The float removes the bulk of the surplus grout from the surface, and the damp sponge does the fine finishing once the grout firms up. Trying to do all the cleanup with a sponge alone floods the joints and washes color unevenly, while trying to do it all with the float leaves a thin haze that has to be buffed off later. Use each tool for the stage it does best.
Pro Tips for a Cleaner Result
A few small habits separate a smooth job from a frustrating one. Keep a second clean bucket of water and change it often; dirty rinse water just smears grout film back onto the tile. Wring the sponge until it is barely damp, since excess water is the most common cause of weak, crumbly, blotchy joints. Work in sections no larger than about 10 square feet at a time so the grout does not skin over before you can shape it. And resist the urge to do final detailing too soon; if the sponge pulls grout out of the joint, wait a few more minutes for it to set up.
The Bottom Line
A grout float is cheap insurance for any tile project. The right pad packs joints solid, protects the tile face, and clears excess in a fraction of the time a makeshift tool takes. Buy a standard gum-rubber float for cement grout, step up to an epoxy float when the product calls for it, work in small diagonal passes, and rinse the tool before the grout sets. Do that and your joints will look like a pro packed them, because in every way that matters, you did.


