You finished tiling, the grout has cured, and now your beautiful new floor looks dull and cloudy. That filmy residue is grout haze, and it’s one of the most common frustrations in any tile project. The thin layer of cement and minerals left behind during grouting dries into a stubborn film across the tile surface. The good news is that grout haze is almost always removable if you tackle it correctly and choose a method safe for your specific tile. Wait too long or use the wrong approach, though, and it gets much harder to clear.
Part of our Tile & Grout guide — explore the full guide →
What Causes Grout Haze
Grout haze forms when residue from the grouting process dries on the face of the tile instead of being fully wiped away. As you spread grout into the joints, a thin slurry of cement, sand, and minerals inevitably spreads onto the tile. Even careful sponging during installation leaves a microscopic film that, once dry, scatters light and gives the surface a cloudy, dull appearance.
Cement-based grouts are the usual culprits. The more you can clean during and immediately after grouting, the less haze you’ll battle once everything cures.
Timing Is Everything
Haze is far easier to remove when it’s fresh. Within the first day or two after grouting, a damp sponge and clean water often handle light haze. As the residue cures and hardens over the following days, you’ll need stronger methods. After several weeks, fully hardened haze may require an acidic grout haze remover and real effort.
If you’ve just grouted and notice haze forming, address it promptly rather than waiting. The window for an easy fix closes quickly.
Removing Light, Fresh Haze
For haze that’s only a day or so old, start with the gentlest approach.
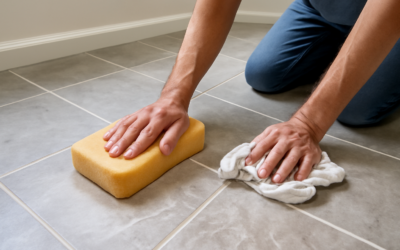
- Dampen a sponge: use clean water and wring it nearly dry so you don’t flood the grout lines
- Wipe in circles: work the tile surface to loosen the film, rinsing the sponge often in clean water
- Buff dry: dry the tile with a clean microfiber or cheesecloth, which lifts remaining residue as it polishes
- Repeat as needed: change your rinse water frequently so you’re not just spreading the haze around
Removing Stubborn, Cured Haze
When water and a sponge aren’t enough, step up the approach based on your tile type. A dry microfiber or terry cloth buff alone removes a surprising amount of dried haze on glazed tile. For tougher cases on porcelain and ceramic, a commercial grout haze remover, typically a mild acid, dissolves the cement film. Always follow the product’s dilution and dwell-time instructions, ventilate the room, and wear gloves and eye protection.
A useful trick for cement haze on durable tile: rubbing alcohol or a 50/50 solution of white vinegar and water can cut light residue. Apply, let it sit briefly, scrub gently, then rinse thoroughly with clean water.
Be Careful With Natural Stone
This is the critical warning. Never use acidic cleaners, including vinegar or standard acidic haze removers, on natural stone like marble, travertine, limestone, or slate. The acid etches and permanently damages the surface. For stone tile, use only a haze remover specifically labeled as safe for natural stone, or stick to a dry buff and pH-neutral cleaner.
When in doubt about your tile, test any product on a small, hidden area first and wait to confirm it causes no dulling or discoloration before treating the whole floor.
Tools That Help
- Microfiber and cheesecloth: the gentlest and often most effective tools for buffing away dried film
- Nylon scrub pad: safe on glazed ceramic and porcelain for stubborn spots; avoid on polished stone
- Grout haze remover: a commercial product matched to your tile type for heavy, cured haze
- Bucket of clean water: changed often so you rinse rather than redistribute residue
Preventing Grout Haze Next Time
The best haze is the one you never let form. During your next tiling project, wipe excess grout off the tile face as you go, before it dries. Use a well-wrung damp sponge and a gentle diagonal motion across the joints so you don’t pull grout out of the lines. Once the grout has firmed up but is still fresh, do a final pass with a clean damp sponge, then a dry-cloth buff.
Some installers also apply a grout release or seal porous tiles before grouting, which keeps residue from bonding to the surface. A little prevention during installation saves hours of haze removal afterward.
Telling Haze From Sealer or Efflorescence
Before you attack a cloudy film, make sure it’s actually grout haze. A similar-looking film can come from a sealer applied too heavily and left to dry on the surface, which needs a sealer stripper rather than an acid haze remover. Another lookalike is efflorescence, a white, powdery mineral deposit that surfaces as moisture moves through tile and grout. Efflorescence wipes or brushes away dry and tends to return if the moisture source isn’t addressed.
Diagnosing correctly saves effort and prevents damage. Using an acid on what is really a sealer problem won’t help, and treating efflorescence like haze only masks an underlying moisture issue.
Working in Small Sections
Whatever method you use, work in manageable sections rather than treating the whole floor at once. This keeps any cleaning solution from drying on the tile before you can rinse it, and it lets you control your rinse water so you’re lifting residue away instead of spreading it. Keep two buckets handy, one for cleaning and one with clean rinse water, and change the rinse water frequently. Methodical, section-by-section work produces a far more even, streak-free result than rushing across the entire surface.
The Bottom Line
Grout haze looks alarming but is almost always fixable. Act fast while it’s fresh, start with the gentlest method, and escalate to a tile-appropriate haze remover only when needed. Above all, protect natural stone from acidic products. Clean as you grout on your next project and you may avoid haze entirely, leaving your tile with the crisp, clear finish it deserves.