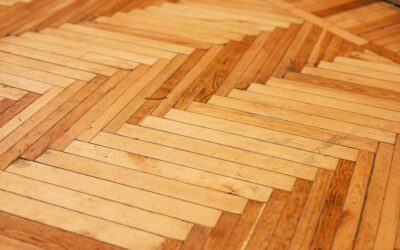
Gluing down hardwood flooring creates a solid, quiet, stable floor that feels permanently attached to the subfloor. Unlike floating installations that can feel hollow or shift slightly, a properly glued hardwood floor has zero movement, minimal sound transfer, and a premium feel underfoot.
But not all hardwood adhesives are the same, and choosing the wrong one leads to bond failure, moisture problems, and expensive repairs. This guide covers every adhesive type, when glue-down installation is the right choice, and how to apply adhesive for a lasting bond.
When Is Glue-Down Installation Needed?
Glue-down is required or preferred in several situations:
Concrete Subfloors
You cannot nail into concrete, so glue-down is one of only two options (the other being a floating installation). For solid hardwood over concrete, glue-down is the only viable method. For engineered hardwood, glue-down produces a more stable, quieter result than floating.
Wide Plank Flooring
Planks wider than 5 inches are more prone to cupping, warping, and expansion movement. Gluing them down restrains this movement and keeps the floor flat. Many wide-plank manufacturers require or strongly recommend glue-down installation.
Radiant Heat Systems
Glue-down installation maximizes heat transfer from a radiant floor system to the wood surface. Floating floors with an air gap between the flooring and the subfloor insulate against heat transfer, reducing the system’s efficiency. Use a flexible adhesive designed for radiant heat applications.
Sound Requirements
In condominiums and multi-story buildings with sound transmission requirements (IIC and STC ratings), glue-down installation with a sound-rated adhesive provides better acoustic performance than floating. Some adhesives double as sound membranes.
High-Traffic Commercial Spaces
Commercial installations benefit from the stability of a glued floor. There is no risk of planks shifting under heavy foot traffic, rolling carts, or furniture movement.
Types of Hardwood Floor Adhesive
Urethane Adhesive (Most Common)
Urethane-based adhesives are the industry standard for hardwood floor installation. They form a strong, flexible bond that accommodates the natural expansion and contraction of wood.
Characteristics:
- Strong initial grab and high bond strength
- Flexible when cured, allowing wood movement
- Good moisture resistance
- Works on concrete, plywood, and most subfloor types
- Cure time: 12 to 24 hours for initial set, 24 to 72 hours for full cure
- Open time (working time before skinning): 60 to 90 minutes typically
- Price: $50 to $100 per 3.5-gallon bucket (covers 40 to 60 square feet per gallon)
Best for: Most hardwood floor installations. Solid and engineered hardwood on concrete or plywood.
Drawback: Difficult to clean up after curing. Requires mineral spirits or adhesive remover for cleanup. Can stain the face of some light-colored floors if squeeze-up is not cleaned promptly.
Acrylic Adhesive (Water-Based)
Acrylic adhesives are water-based alternatives to urethane. They are popular for engineered hardwood installations where the lower bond strength is adequate and easier cleanup is preferred.
Characteristics:
- Lower VOC emissions than urethane
- Easy cleanup with water while still wet
- Less aggressive bond (adequate for engineered hardwood, not recommended for solid hardwood on concrete)
- Faster initial tack than urethane
- Cure time: 12 to 24 hours
- Open time: 30 to 60 minutes (shorter than urethane)
- Price: $40 to $80 per 3.5-gallon bucket
Best for: Engineered hardwood on plywood subfloors. Installations where low-VOC requirements are a priority.
Drawback: Not strong enough for solid hardwood on concrete. Shorter open time means you must work faster. Not recommended for wide planks or high-moisture environments.
Epoxy Adhesive
Two-component epoxy adhesives provide the strongest bond of any hardwood flooring adhesive. They consist of a resin and a hardener that are mixed immediately before application.
Characteristics:
- Extremely strong, rigid bond
- Excellent moisture resistance
- Works on challenging subfloors (problematic concrete, residual adhesive, metal)
- Can act as a moisture barrier when applied at full coverage
- Cure time: 8 to 24 hours depending on formulation
- Open time: 30 to 60 minutes (must work quickly)
- Price: $80 to $150 per 2-gallon unit (most expensive option)
Best for: Problem subfloors, moisture-compromised concrete (when combined with moisture mitigation), exotic hardwoods that are difficult to bond, and critical commercial installations.
Drawback: Most expensive option. Rigid bond does not flex, which can stress wood during seasonal changes. Mixing required adds complexity. Very difficult to remove if the floor ever needs to be replaced.
Hybrid Adhesive (MS Polymer / Silane Modified Polymer)
MS polymer adhesives are a newer category that combines the best properties of urethane and silicone technologies. They are gaining popularity rapidly in the professional flooring industry.
Characteristics:
- Zero-VOC or ultra-low-VOC formulations available
- Excellent flexibility and bond strength
- Built-in moisture barrier properties (some products approved for up to 12 pounds MVER)
- No mixing required
- Good open time (60 to 120 minutes)
- Cure time: 24 to 48 hours
- Price: $70 to $130 per 3.5-gallon bucket
Best for: Installations where moisture mitigation and adhesive are needed in one product. Green building projects requiring zero-VOC products.
Application Technique
Proper adhesive application is critical for a successful glue-down installation. Here is the process:
Subfloor Preparation
- The subfloor must be clean, dry, flat, and free of dust, paint, sealers, and old adhesive.
- Concrete must be profiled (slightly rough) for adhesive to grip. Smooth, power-troweled concrete may need light grinding or a primer.
- Fill cracks and low spots with appropriate patching compound.
- The floor must be flat to within 3/16 inch over a 10-foot span.
- Perform a moisture test and ensure levels are within the adhesive and flooring manufacturer’s specifications.
Trowel Selection
The trowel notch size determines how much adhesive is applied per square foot (the spread rate). Using the wrong trowel is the most common adhesive application mistake.
- 1/4 x 1/4-inch square notch: Standard for most engineered hardwood (3 to 5 inches wide)
- 1/4 x 3/8-inch square notch: Common for solid hardwood and wider planks
- 3/16 x 5/32-inch V-notch: Used for some thinner engineered products
Always use the trowel size specified by the adhesive manufacturer. Too little adhesive creates weak spots and hollow areas. Too much adhesive causes excessive squeeze-up between planks.
Spread Rate
Spread rate is measured in square feet per gallon. Typical rates are:
- Urethane adhesive: 40 to 60 square feet per gallon
- Acrylic adhesive: 40 to 50 square feet per gallon
- Epoxy adhesive: 30 to 50 square feet per gallon
- MS polymer adhesive: 35 to 50 square feet per gallon
Calculate your total flooring area and divide by the spread rate to determine how many gallons you need. Add 10 percent for waste.
Application Process
- Spread adhesive over an area you can cover with flooring within the adhesive’s open time (typically 60 to 90 minutes). For most installers, this means working in sections of 30 to 50 square feet.
- Hold the trowel at a 45-degree angle to create consistent ridges.
- Lay planks into the adhesive by setting them in place and pressing down. Do not slide planks through the adhesive, as this smears the ridges and reduces bond strength.
- Press each plank firmly to collapse the adhesive ridges and create full contact.
- Clean any adhesive squeeze-up from the face of the planks immediately using the manufacturer-recommended solvent.
- After installing several rows, use a 100-pound floor roller to ensure full contact between the planks and the adhesive.
Cure Time
After installation, respect the adhesive’s cure time:
- Light foot traffic (socks): 12 to 24 hours after installation
- Normal foot traffic: 24 to 48 hours
- Heavy furniture placement: 48 to 72 hours
- Full cure: 5 to 7 days (avoid wet mopping until fully cured)
Top Hardwood Floor Adhesive Brands
Bostik
Bostik is one of the most widely used adhesive brands in the professional flooring industry. Their hardwood floor products include:
- Bostik Best: Urethane adhesive, industry standard for solid and engineered hardwood. Excellent bond strength and moisture resistance.
- Bostik GreenForce: Zero-VOC hybrid polymer adhesive with built-in moisture control up to 12 pounds MVER.
Bona
Bona is best known for hardwood floor finishes but also produces premium adhesives:
- Bona R850T: Silane-based adhesive with moisture barrier properties. Elastic bond accommodates wood movement. One of the most popular premium adhesives among professional installers.
- Bona R851: Two-component silane adhesive for extreme conditions and exotic hardwoods.
Sika
Sika produces industrial-strength adhesives used in both residential and commercial flooring:
- SikaBond T-54: Polyurethane adhesive suitable for solid and engineered hardwood. Good balance of performance and price.
- SikaBond T-55 J: High-performance urethane for wide-plank and exotic hardwood installations.
Other Notable Brands
- Taylor: Taylor 2075 is a popular urethane adhesive among professional installers for its reliable performance.
- Mapei: Ultrabond ECO 985 is a premium urethane adhesive with a good balance of open time and bond strength.
- Franklin: Titebond series includes wood floor adhesives at competitive prices.
Common Adhesive Mistakes to Avoid
- Wrong trowel size: This single mistake causes more adhesive failures than any other. Always match the trowel to the manufacturer’s specification.
- Working past the open time: If the adhesive skins over before you set the planks, the bond will be weak. Work in smaller sections if you are a slower installer.
- Dirty subfloor: Dust, paint, and old adhesive prevent the new adhesive from bonding to the concrete. Clean thoroughly.
- Ignoring moisture: Even the best adhesive fails if moisture levels exceed specifications. Test the concrete first.
- Sliding planks: Set planks straight down into the adhesive. Sliding them smears the adhesive ridges and weakens the bond.
- Not rolling the floor: Skipping the 100-pound roller leaves voids under the planks that cause hollow sounds and potential bond failure.
- Temperature issues: Most adhesives require subfloor and room temperatures between 65 and 85 degrees Fahrenheit. Cold temperatures slow curing, and extreme heat shortens open time.
Glue-Down vs. Other Installation Methods
For hardwood and engineered wood flooring, here is how glue-down compares to other methods:
- Glue-down vs. nail-down: Nail-down is faster and less messy but only works on wood subfloors. Glue-down works on concrete and wood, produces less noise, and provides better moisture resistance.
- Glue-down vs. floating: Floating is the fastest and easiest method but produces more sound, allows slight movement, and does not work for solid hardwood. Glue-down is more labor-intensive but creates a more premium feel.
- Glue-down vs. staple-down: Stapling is common for engineered hardwood on plywood. It is faster than gluing but less secure and produces more noise underfoot.
The Bottom Line
For most residential hardwood floor installations on concrete, a quality urethane adhesive from a reputable brand is the right choice. Pay attention to the trowel size, respect the open time, and test the subfloor for moisture before you start. The adhesive is a relatively small portion of the total project cost, so investing in a premium product from Bostik, Bona, or Sika is worthwhile insurance against bond failure and costly repairs down the road.
Prefer to explore on your own?
See how new flooring looks in your actual room in seconds — free, no signup.
Try the free Floor Studio →