A proper heat pump system installation is equal parts math, plumbing, electrical work, and refrigeration craft. I’ve set hundreds of these units, and the ones that run quiet and cheap for 15 years all share the same trait: they were sized and commissioned correctly on day one. Skip the load calculation, rush the vacuum, or short the wire, and you’ll be back inside six months. This guide walks through the full process for a whole-home air-source system, ducted or ductless, so you know exactly what a good crew does and where the money goes.
- Start With a Manual J, Not a Rule of Thumb
- Pick the Right Equipment and Efficiency Ratings
- Permits, Disconnect, and Electrical
- The Physical Install, Step by Step
- Vacuum, Charge, and Commission
- Timeline, Cost, and the 25C Credit
- DIY or Hire It Out
- Ducted Versus Ductless Installation
- What to Confirm Before Sign-Off
Start With a Manual J, Not a Rule of Thumb
Before anyone touches a wrench, the system has to be sized. The industry standard is an ACCA Manual J load calculation, which accounts for your square footage, insulation R-values, window area and orientation, air leakage, and local design temperatures. A rough field shortcut is roughly 1 ton of capacity per 500 to 600 square feet, so a tight 2,000 square foot house often lands around 3 to 3.5 tons. That shortcut is a sanity check, not a substitute.
Oversizing is the most common mistake I see. A unit that’s too big short-cycles, never pulls humidity out of the air, and wears its compressor out early. Undersizing leaves you cold on the two design days a year and running expensive backup heat constantly. Modern inverter-driven heat pumps modulate, so they tolerate a slight oversize better than old single-stage gear, but you still want the Manual J number to drive the decision.
Pick the Right Equipment and Efficiency Ratings
Once you know the load, you match it to equipment that meets current federal minimums. As of 2023, ducted split heat pumps in the northern U.S. must hit at least 15.2 SEER2 and 7.8 HSPF2; southern regions require slightly higher SEER2. To qualify for the 25C federal tax credit, you generally need to exceed those numbers and buy a CEE-tier-qualifying unit.
- SEER2 measures cooling efficiency. Better systems reach 18 to 30 SEER2.
- HSPF2 measures heating efficiency. Look for 8.1 or higher, and 9-plus for cold climates.
- Cold-climate rating matters if you’re north of the Mason-Dixon line; look for units that hold rated capacity down to 5°F and operate to -13°F.
Ducted systems use your existing or new ductwork with an air handler. Ductless mini splits mount indoor heads on walls and skip ducts entirely, which is ideal for additions, older homes, or zoned comfort.
Permits, Disconnect, and Electrical
Nearly every jurisdiction requires a mechanical permit, and many require a separate electrical permit. Pull them. An inspector signing off protects your warranty and your home sale later. Your electrical service has to support the new load: most residential heat pumps land on a dedicated 30 to 60 amp double-pole breaker, fed with the appropriate wire gauge and a fused or non-fused disconnect mounted within sight of the outdoor unit.
If you’re replacing an old AC and gas furnace, the panel may already have capacity. If you’re going all-electric in a home with a 100 amp service, budget for a possible panel upgrade to 200 amps, which typically runs $1,500 to $4,000 on its own. Don’t discover this on installation day.
The Physical Install, Step by Step
With permits in hand and equipment on site, a two-person crew works through a predictable sequence.
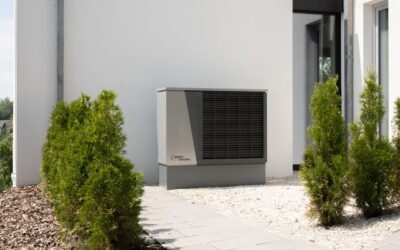
- Set the outdoor condenser on a composite pad on grade, or on wall brackets if snow load or flooding is a concern. Keep it a few inches off the ground and clear of overhangs.
- Mount the indoor air handler or the wall heads, then route the refrigerant line set, condensate drain, and control wiring back to the outdoor unit.
- Flare and connect the line set, protecting joints and insulating the suction line. Sloppy flares are the number one source of slow refrigerant leaks.
- Land the high-voltage feed at the disconnect and the low-voltage control wiring at both units.
- Pressure-test the refrigerant circuit with dry nitrogen to check for leaks before opening any refrigerant.
Vacuum, Charge, and Commission
This is where good installers separate themselves. After the leak check, you pull a deep vacuum on the line set to remove moisture and non-condensables. The target is 500 microns or below, held stable with the pump valved off. Moisture left in the system turns acidic and destroys the compressor over time, so this step is non-negotiable. On short factory-charged line sets a mini split may need no added refrigerant; longer runs require weighing in additional charge per the manufacturer’s spec.
Commissioning means verifying superheat and subcooling, checking airflow, confirming the thermostat controls staging correctly, and documenting the readings. On a ductless system you also confirm each zone responds and the condensate drains freely. A commissioning report is your proof the install was done right.
Timeline, Cost, and the 25C Credit
Most residential jobs finish in one to three days. A straightforward ductless single-zone or an AC-to-heat-pump swap on existing ducts is often a single day. Adding ductwork, upgrading the panel, or running a multi-zone system with several heads pushes it to two or three days plus an inspection visit.
Installed cost typically runs $8,000 to $18,000 for a whole-home system, driven by tonnage, number of zones, ductwork, and electrical upgrades. Against that, the federal 25C tax credit covers 30% of qualifying equipment and labor, capped at $2,000 per year for heat pumps, and many utilities stack rebates of $500 to several thousand dollars on top. Between the credit and rebates, a lot of homeowners knock $2,500 to $5,000 off the net.
DIY or Hire It Out
Handy homeowners can absolutely do the prep: clearing the equipment location, running the pad, opening drywall for line sets, and even mounting brackets. But the refrigerant work is gated. Handling refrigerant legally requires EPA Section 608 certification, and warranties on major brands are typically void without licensed installation. Pre-charged DIY mini split kits exist and are legal for the homeowner to install because the quick-connect lines come sealed, yet they rarely match the efficiency, capacity range, or cold-climate performance of professionally installed inverter systems.
My honest take: do the grunt work yourself if you want to save labor, but bring in a licensed HVAC contractor for the sizing, refrigerant, electrical tie-in, and commissioning. The common install mistakes I get called to fix are almost always the same short list, and every one of them traces back to a step that got rushed.
- Oversized equipment from a guessed load instead of a Manual J.
- A weak vacuum, so the system runs with moisture inside.
- Undersized wire or a missing disconnect that fails inspection.
- An uninsulated or kinked line set that kills efficiency.
- No commissioning report, so nobody knows if the charge is right.
Get the sizing, the electrical, and the vacuum right, and a modern heat pump will heat and cool your home for less than almost anything else on the market. That’s the whole game.
Ducted Versus Ductless Installation
The install path forks early depending on whether you’re going ducted or ductless, and the labor differs a lot. A ducted retrofit reuses your existing trunk and branch ducts, so the crew swaps the air handler and outdoor unit, then verifies the ducts can actually move the required airflow. Undersized or leaky ductwork is a hidden killer here; a heat pump moves more air at a lower temperature than a furnace, so ducts that were fine for gas heat sometimes need sealing, resizing, or a larger return. Budget an extra half day and a few hundred dollars if the static pressure test comes back high.
Ductless installs skip all of that. Each indoor head needs only a 3-inch penetration through the wall for the line set, drain, and wiring, so a single-zone system goes in fast and clean. The trade-off is aesthetics and per-zone cost: you’re mounting visible heads on walls and running line-hide cover outside. For homes without ducts, additions, or spot comfort problems, ductless usually wins on both speed and efficiency.
What to Confirm Before Sign-Off
When the crew says they’re done, don’t just cut the check. A five-minute walkthrough catches the problems that turn into callbacks. Confirm the system heats and cools on demand, the thermostat staging is correct, and the outdoor unit is level and clear.
- Ask for the written commissioning report with superheat, subcooling, and airflow readings.
- Verify the disconnect is labeled and within sight of the condenser.
- Check that the condensate drain runs freely and won’t freeze or clog.
- Get the AHRI certificate and itemized invoice for your 25C tax credit filing.
- Confirm the installer registered the equipment so the full parts and compressor warranty is active.
Keep those documents together. When you sell the home or file a warranty claim years later, that paperwork is the difference between a smooth process and an argument. A clean install, properly documented, is what a good contractor delivers, and it’s exactly what you’re paying for.