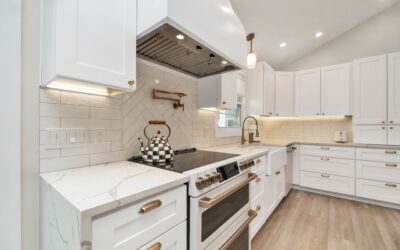
Choosing a heat resistant backsplash for behind stove areas is one of the smartest upgrades you can make in a working kitchen. The zone directly behind a range takes the worst abuse in the whole room, catching splattered oil, boiling starch, steam, and radiant heat every time you cook. Pick the wrong surface and you get scorch marks, warped panels, and a wall that never looks clean again.
- Why the Wall Behind Your Range Needs Special Attention
- Best Heat-Resistant Backsplash Materials
- Porcelain and Ceramic Tile
- Natural Stone: Granite and Slate
- Stainless Steel
- Glass Tile and Tempered Glass
- Materials to Avoid Behind a Stove
- Clearance and Code Requirements
- Cleaning Grease and Keeping It Looking New
- Installation Tips That Save Headaches
- Which Backsplash Should You Choose?
After 20 years of remodeling kitchens, I can tell you the material behind your burners matters as much as the countertop. Let me walk you through what actually holds up, what to avoid, and what you should budget per square foot.
Why the Wall Behind Your Range Needs Special Attention
The area behind a stove is not like the rest of the backsplash. A gas burner cranked to high can push flame temperatures over 2,000°F, and while that heat isn’t touching your wall directly, the surrounding surface can easily reach 150°F to 200°F during heavy cooking. Add grease vapor that bakes onto anything porous, and you have a recipe for permanent staining.
Standard drywall and painted surfaces simply cannot take it. They yellow, bubble, and trap grease in the paint film. A dedicated heat resistant material creates a wipeable, non-combustible shield that keeps your wall structurally sound and easy to clean for decades.
Best Heat-Resistant Backsplash Materials
Not every backsplash material behind a range is created equal. Here are the options I recommend to clients, ranked by how well they perform near real heat.
Porcelain and Ceramic Tile
This is my default recommendation for most homeowners. Porcelain is fired at roughly 2,200°F, so nothing your stove produces will faze it. It’s non-combustible, non-porous, and shrugs off grease. A basic ceramic subway tile runs $2 to $8 per square foot, while porcelain typically lands between $5 and $15. Both clean up with a soapy sponge, and you can find styles that mimic marble, concrete, or zellige for a fraction of the cost.
Natural Stone: Granite and Slate
Granite and slate handle heat beautifully because they were literally formed under it. A full granite slab backsplash creates a seamless, grout-free surface that wipes clean in seconds, though it costs $40 to $75 per square foot installed. Slate offers a matte, textured look for $15 to $30 per square foot. The one caveat: seal natural stone once a year, since unsealed stone can absorb oil and darken over time.
Stainless Steel
If you want a pro-kitchen look, stainless steel is the champion of heat resistance. It won’t melt, scorch, or stain, and it reflects the same clean lines you see in restaurants. Expect $20 to $35 per square foot for a fabricated panel. The downside is fingerprints and water spots, so keep a microfiber cloth handy.
Glass Tile and Tempered Glass
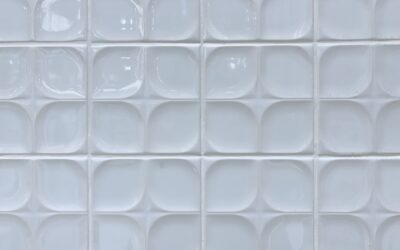
Glass mosaic tile is non-porous and heat-tolerant, running $10 to $30 per square foot. For a truly seamless look, a single sheet of tempered glass (often back-painted in a custom color) can be mounted over the wall for $25 to $45 per square foot. Tempered glass is rated to withstand rapid temperature swings, which makes it safe directly behind a cooktop.
Materials to Avoid Behind a Stove
Steer clear of peel-and-stick vinyl backsplash near any range, and especially near a gas burner. Those thin PVC and gel sheets are convenient and cheap at $5 to $10 per square foot, but they soften and can even ignite when exposed to sustained heat or an errant flame. I’ve been called to more than one kitchen where a peel-and-stick panel behind a gas stove warped, peeled at the corners, and had to be torn off within a year.
Also avoid untreated wood, wallpaper, and standard laminate directly behind burners. If you love the look of a material that isn’t heat-rated, keep it to the side walls and use tile or steel in the immediate cook zone.
Clearance and Code Requirements
Before you tile anything, know your clearances. Most building codes and range manufacturers require 24 to 30 inches of vertical clearance between the cooktop and any combustible material above it, such as a wood cabinet or a microwave hood. A common standard is 30 inches to an unprotected surface, reduced to 24 inches when a listed range hood is installed.
Your backsplash material itself should be non-combustible in the burner zone, and any outlet within the splash area needs to be a GFCI. If you’re running a heavy-duty gas range, double-check the manufacturer’s spec sheet, because commercial-style units often demand extra clearance and heat shielding.
Cleaning Grease and Keeping It Looking New
The best heat resistant backsplash for behind stove use is only as good as your cleaning routine. Grease vapor is the enemy, and it builds up invisibly until one day the wall feels tacky.
- Wipe the cook zone weekly with warm water and a few drops of dish soap.
- For baked-on grease, use a paste of baking soda and water, let it sit five minutes, then scrub gently.
- Degrease grout lines with an old toothbrush and an oxygen-based cleaner; skip harsh acids on natural stone.
- Buff stainless and glass with a microfiber cloth and a splash of vinegar to kill streaks.
Seal natural stone annually and reseal grout every year or two to keep moisture and oil from soaking in.
Installation Tips That Save Headaches
Whether you DIY or hire out, a few details make the difference between a backsplash that lasts and one that fails in the seams. Use a heat-rated thinset or mastic behind the burner zone rather than a general-purpose adhesive. Leave a clean expansion gap where the backsplash meets the countertop and caulk it with a mildew-resistant silicone, not grout, so the joint can flex.
Run your tile a few inches wider than the stove on each side, since splatter travels. If you’re mounting a stainless or glass panel, have the cutouts for outlets fabricated before installation, because cutting these materials on-site is difficult and risky. Finally, kill the power and pull the range fully out so you can tile behind it to the floor, giving you a truly finished, wipeable wall.
Which Backsplash Should You Choose?
For most families, porcelain or ceramic tile hits the sweet spot of price, durability, and style at $5 to $15 per square foot. If you want zero grout and a luxury feel, go with a granite slab. Cooks who fry and sear daily should look hard at stainless steel or a granite slab for the easiest cleanup. Whatever you pick, make sure the immediate burner zone is non-combustible, respect your 24 to 30 inch clearance, and you’ll have a wall that cooks with you for the long haul.
One last piece of advice: think about resale as well as your own cooking style. Neutral porcelain and natural stone appeal to the widest range of buyers, while bold colored glass or a heavily patterned tile is a personal choice that not everyone shares. A timeless material in the burner zone protects both your wall and your home’s value. Spend your splurge budget on the immediate cook area where heat and grease concentrate, then use a more affordable coordinating tile across the rest of the run to keep the whole project on budget.