The line between a kitchen that looks finished and one that looks half-done is almost always the wall behind the range. An easy backsplash project can transform a tired kitchen in a single weekend for under $300 in materials, no thinset, no wet saw, and no plumbing reroutes. The catch is that not all “easy” options are created equal. Some hold up for 15 years; others start peeling at the corner above the stove within 8 months. Knowing the difference is the whole game.
Part of our Kitchen Remodeling guide — explore the full guide →
The Five Genuine DIY Options
When homeowners ask for an easy install, they usually mean one weekend or less and no specialty tools. Five product categories meet that bar:
- Peel-and-stick vinyl tile sheets — fastest install, weakest behind a wet sink
- Self-adhesive metal or composite tiles — a step up in durability and price
- Beadboard or shiplap panels — classic look, takes paint, lifetime durability
- Thin sheet laminates (FRP, marble-look acrylic) — single panel, no grout lines
- Pre-mortared mosaic mats with peel-and-stick backing — looks like real tile
Peel and Stick Tile: Honest Pros and Cons
Brands like Smart Tiles, Aspect, and StickGoo Mosaic dominate this category at $7 to $13 per sq ft. A 30 sq ft kitchen backsplash costs $210 to $390 and goes up in 3 to 5 hours. The result looks remarkably close to real tile in photographs.
The catch: heat above 120 degrees F destroys the adhesive. Behind a gas range with a powerful burner, the corners curl within 6 to 18 months. Above a microwave or in an outer wall area away from the cooktop, the same product can last 8 to 10 years. Match product to location.
Beadboard and Shiplap: The Underrated Choice
A 4 by 8 sheet of MDF beadboard costs $30 at Home Depot and covers 32 sq ft. Cut to size with a circular saw, glue with construction adhesive, brad nail every 16 inches into studs, and caulk the edges. The whole job takes a Saturday and runs $80 in materials including primer and paint.
The look is farmhouse or transitional. Once painted with a quality semi-gloss enamel like Behr Marquee Cabinet & Trim, the surface wipes clean and resists splatter as well as ceramic tile. I have installed beadboard backsplashes that look perfect 12 years later with one repaint.
Self-Adhesive Metal Tiles
Aspect 6×3 brushed stainless or copper tiles at $11 per sq ft are an upgrade from vinyl peel-and-stick. The metal face will not curl from heat, and the adhesive is rated to 200 degrees F. They stick to any clean drywall or existing tile surface and cut with tin snips.
The downside is the metallic look does not suit every kitchen. They work well in modern, industrial, or transitional designs and look out of place in traditional or country styles. Sample a single sheet at home before committing to a full kitchen.
Single Sheet Laminate Panels
For a truly grout-free easy backsplash, FRP (fiberglass reinforced plastic) and acrylic marble-look panels at $30 to $80 per 4 by 8 sheet eliminate every visible seam. One sheet covers most kitchens with a single horizontal piece. Glue with manufacturer-recommended adhesive, set, and silicone the perimeter.
Modern acrylic panels from companies like LX Hausys and Wilsonart actually look like marble at conversational distance. They handle heat well, clean with any kitchen spray, and last 20+ years. Installation is faster than tile but the panel itself needs careful handling — drop it once and a crack telegraphs across the whole sheet.
Pre-Mortared Mosaic Mats
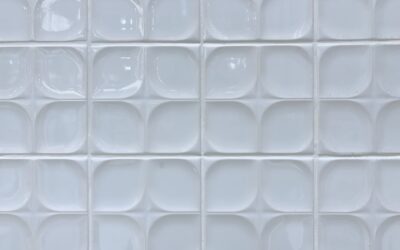
Bedrosians and MSI both sell pre-mortared mosaic mats with peel-and-stick backs at $14 to $22 per sq ft. The look is real glass or stone tile, the install is genuinely DIY, and the result is grouted and indistinguishable from a thinset job at arm’s length.
The mats need a clean, smooth, dry wall surface — old painted drywall is fine, raw drywall needs a sealing primer first. Press hard along every grid line for 30 seconds with a J-roller. Skipping the rolling step is the most common reason these installs fail at the corners.
Tools You Already Have
Almost every easy backsplash uses the same short toolkit:
- Sharp utility knife with fresh blades
- Tape measure, level, and pencil
- J-roller or hand roller, $9 at any hardware store
- Caulk gun and a tube of mildew-resistant kitchen silicone
- Painter’s tape for masking countertop and cabinet edges
If you go the beadboard route, add a circular saw, brad nailer, and a tube of construction adhesive. Total tool cost under $200 if you do not already own them.
Prep Work That Determines the Outcome
The wall must be clean and dry. Wipe it with a 50/50 isopropyl alcohol and water mix, let it dry 20 minutes, and check for any glossy painted finish. Glossy paint is the second leading cause of peel-and-stick failure (after heat). Lightly sand glossy walls with 220 grit, wipe again, and prime if you sanded through to bare drywall.
Check your outlets. Pull the cover plates off, turn off the breaker, and unscrew the receptacles so they sit forward 1/4 inch. After the backsplash goes up, you push the receptacles back to flush. Skipping this step leaves outlets recessed behind the backsplash, which is a code violation in most jurisdictions and visually obvious.
When Easy Is Not Worth It
If you plan to sell your house within two years, an easy backsplash shows well in listing photos and recoups its cost. If this is your forever kitchen and you want a backsplash that takes 30 years of cooking abuse, real tile installed properly is still the right call. The two-day project becomes a four-day project, and the budget jumps from $300 to $1,200, but the surface outlasts the cabinets.
For everything in between — a rental, a starter home, a kitchen refresh between major remodels — peel-and-stick or beadboard delivers 90 percent of the look at 20 percent of the cost and time. That is a fair trade in most lives.