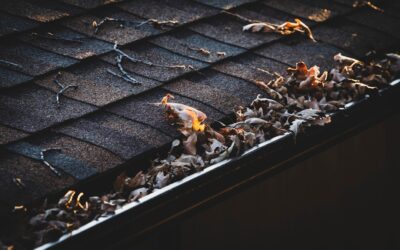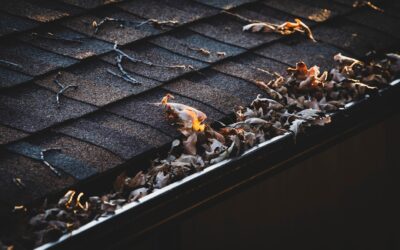
Every winter, thousands of homeowners discover that a gutter full of ice is heavier, messier, and more destructive than a gutter full of leaves. A heated gutter guard tries to solve both problems at once: an aluminum guard keeps debris out, while a heat cable tucked into a channel on its underside keeps meltwater moving so it never freezes into a dam. Yes, these combo systems work well when they are sized correctly, powered on a dedicated circuit, and paired with a clear downspout path.
Part of our Roofing guide — explore the full guide →
They are not magic, though. A heated guard keeps a narrow melt path open; it does not melt every inch of snow on your roof. If your house has poor attic insulation or heavy air leakage, warm air will still melt snow high on the roof, and that water can refreeze at the eaves faster than any cable can clear it. The best results come when you treat heated guards as one part of an ice-dam strategy rather than the whole fix.
This guide explains how integrated systems differ from loose heat cable and heated roof edge panels, what they cost to buy and run, how installation works, and where the safety lines are for electrical work and ladder use.
How a Heated Gutter Guard Works
A standard gutter guard is a perforated or micro-mesh cover that sits over the gutter trough. The heated version adds a formed channel, usually running along the underside of the guard’s centerline, that holds a self-regulating heat cable. Because the cable is sandwiched against aluminum, heat spreads across the guard surface and down into the trough. Snow sitting on the mesh softens, water drips through, and the warmed trough carries it to the downspout.
Most integrated systems use self-regulating cable, which increases its output as temperature drops and throttles back as it warms. That matters for both safety and energy use. Older constant-wattage cable runs at full output all the time and can overheat if it crosses itself or gets buried in debris, which is one reason the guard-and-cable combination is attractive: the channel holds the cable in a fixed, spaced position.
Integrated guard vs. separate heat cable
Loose heat cable is usually zigzagged across the lower roof edge with clips, then run along the bottom of the gutter and down the inside of the downspout. It is cheaper up front, but the cable is exposed to UV, ice, falling branches, and snow shovels. An integrated guard hides the cable, protects it, and removes the zigzag pattern from the shingles. The trade-off is cost and less flexibility; you are committed to one manufacturer’s guard profile.
Heated roof edge panels
Heated roof edge panels are aluminum or steel panels installed along the eaves, typically 12 to 36 inches up the roof, with heat cable mounted underneath. Some are sold as a companion to heated guards. They are the strongest option for homes with chronic ice dams because they keep the first few feet of roof clear, not just the gutter. Many homeowners searching for an “ice dam heater” end up with a combination: a heated guard in the gutter and a heated edge panel on the lowest roof course.
Is a Heated Gutter Guard Worth It for Your Home?
Heated systems earn their cost in specific situations. Consider one if several of these describe your house:
- You live in a region with repeated freeze-thaw cycles, where daytime sun melts snow that refreezes overnight.
- You have seen icicles more than a foot long, or water stains on interior ceilings near exterior walls in late winter.
- Your gutters sit on the north side or in heavy shade, where ice lingers for weeks.
- A valley, dormer, or low-slope section dumps a concentrated flow of meltwater into one gutter run.
- Attic insulation and air sealing are already reasonable, but problem spots persist.
If none of those apply, a regular gutter guard plus good attic ventilation usually does the job. Heated guards are also hard to justify on a home where the real problem is a warm attic. In that case, air sealing the attic floor and adding insulation often reduces ice dams more than any heating product, and it lowers your heating bill instead of raising your electric bill.
Power Draw and Operating Cost
Self-regulating cable is rated in watts per foot, commonly somewhere around 5 to 8 watts per foot at freezing temperatures. A 100-foot run of gutter with cable in the guard and down two downspouts might total roughly 130 feet of cable. At 6 watts per foot, that is about 780 watts, similar to a small space heater, whenever the system is running at full output.
How much that costs depends on your electric rate and how many hours the system runs. A system left on continuously through a long northern winter can add a noticeable amount to monthly bills. A system on a controller that only energizes when there is both moisture and a temperature below roughly 38°F might run a fraction of those hours. For most homes, a snow-and-ice sensor controller pays for itself in energy savings and is worth the extra cost.
Manual switches are the cheapest option, but people forget to turn them on before a storm or forget to turn them off in spring. A simple thermostat control is a middle ground, though it runs whenever it is cold even if the roof is dry.
Tools and Materials
- Integrated heated guard sections sized to your gutter width (5-inch or 6-inch K-style is most common)
- Self-regulating heat cable rated for roof and gutter use, plus the manufacturer’s end-seal and power-connection kits
- Downspout hangers or clips so cable can run to the bottom of each downspout
- Controller: manual switch, thermostat, or moisture-and-temperature sensor
- Outdoor-rated, GFCI-protected receptacle or a hardwired connection box installed by an electrician
- Stainless steel screws, a cordless drill, tin snips, and a tape measure
- Stable extension ladder with a standoff, ladder leveler if the ground slopes, and a helper
- Non-contact voltage tester, work gloves, and safety glasses
Installation Steps
Most manufacturers require or strongly recommend certified installers, and some warranties depend on it. If you plan a DIY install on a single-story home, read the entire manual first, because the cable routing and connection kits differ between brands.
- Measure every run. Measure each gutter length and each downspout height. Add cable for the drop into every downspout, plus a few feet at the power end. Heat cable cannot be spliced casually, so order enough.
- Clean and repair the gutters. Remove debris, fix sagging sections, and confirm the gutter slopes about 1/4 inch per 10 feet toward the outlets. A heated guard will not fix standing water in a sagging trough.
- Plan the power location. The cable must start near a GFCI-protected outdoor receptacle or a dedicated circuit. Adding a new outdoor outlet or circuit is a job for a licensed electrician.
- Seat the cable in the guard channel. Lay the cable into the formed channel on the underside of each guard section before mounting. Keep it straight; never cross or overlap self-regulating cable on itself unless the manufacturer allows it.
- Mount the guards. Attach the guard to the gutter lip and under the first shingle course or to the fascia, following the instructions. Use the supplied fasteners, and do not pierce the cable.
- Route cable through the downspouts. Drop the cable down each downspout to its outlet so meltwater has an open path all the way to the ground. A frozen downspout will back water up into the gutter no matter how warm the trough is.
- Seal the end and connect power. Install the end seal exactly as instructed, then attach the power connection kit. Before plugging in or wiring anything, turn off the breaker and confirm power is off with a non-contact voltage tester.
- Test at the start of the season. Energize the system on a cold day and confirm the guard surface is warm to the touch along the whole run. Check the GFCI or ground-fault breaker trips correctly using its test button.
Electrical and Fire Safety
Heat cable is a line-voltage product, usually 120 volts, and it lives outdoors in water and ice. That combination demands care. Use only cable and connection kits that are UL-listed for roof and gutter de-icing, and match the circuit to the total load with headroom rather than running it at the breaker’s limit. The National Electrical Code requires ground-fault equipment protection for these systems, so the circuit should be GFCI or equipment ground-fault protected.
Never coil excess cable in a pile, bunch it inside a downspout elbow, or cover it with insulation, roofing underlayment, or debris. Keep cable away from other heat sources such as dryer vents and flue pipes. Cut cable only if the manufacturer permits it and only with their termination kit. If you see melted insulation, discoloration, or tripping breakers, switch the system off and have it inspected.
Any change to wiring, such as a new receptacle, a hardwired junction box, or a dedicated circuit, should be handled by a licensed electrician. Always turn off the breaker and confirm power is off with a non-contact voltage tester before touching connections, and never probe or test a powered circuit yourself.
Ladder Safety
Gutter work puts you at the top of a ladder with your hands full, which is exactly how falls happen. Set the ladder on firm, level ground at roughly a 4-to-1 angle, extend it at least 3 feet above the roofline if you step onto the roof, and use a standoff so it does not rest on the gutter itself. Keep three points of contact, never overreach past your belt buckle, and move the ladder rather than stretching. Avoid working on wet, icy, or windy days. On a two-story home or higher, hire a professional installer with fall protection and scaffolding.
Cost Ranges
Pricing varies widely by region, brand, and roof complexity, so treat these as general ranges:
- Integrated heated guard materials: often several times the cost of an ordinary aluminum guard per foot, because the cable and connection kits add up.
- Professional installation: total project costs for an average home commonly run from the low thousands into five figures for large or multi-story homes, especially when edge panels are included.
- Electrical work: a new GFCI outdoor receptacle or dedicated circuit is usually a few hundred dollars or more, depending on panel access.
- Controllers: basic thermostats are inexpensive; moisture-and-temperature sensor controllers cost more but reduce run time.
Get at least two quotes, and ask each installer to itemize cable length, controller type, downspout routing, and electrical work separately so you can compare.
Troubleshooting
- Ice still forms at the downspout outlet: the cable may not reach the bottom, or the outlet discharges onto frozen ground that backs up. Extend the cable or redirect the discharge.
- Gutter warm but icicles hang from the guard edge: meltwater is running over the front lip. Check gutter pitch and whether the guard is angled too steeply.
- GFCI keeps tripping: moisture has reached a connection or the cable is damaged. Turn the system off and call an electrician or the installer.
- Ice dams form higher on the roof: the gutter is working, but the attic is too warm. Add heated roof edge panels or fix insulation and air leaks.
When to Call a Pro
Call a professional for any two-story installation, any new circuit or outlet, and any roof with steep pitch, slate, tile, or metal. Pros also make sense if your warranty requires certified installation. If ice dams have already caused interior leaks, bring in a roofer to check the underlayment and decking before adding heat, because a heated gutter guard cannot fix water that is already getting under the shingles.
Frequently Asked Questions
Do heated gutter guards really prevent ice dams?
They keep the gutter and downspouts clear so meltwater can drain, which prevents ice from building up at the gutter. They do not stop ice dams caused by a warm attic higher on the roof, so combine them with insulation, air sealing, or heated roof edge panels where needed.
Can I leave heated gutter guards on all winter?
You can, but it wastes electricity. A controller that senses both moisture and freezing temperatures runs the system only when snow or ice is present, which cuts operating costs substantially.
Can I install a heated gutter guard myself?
Handy homeowners can install some systems on a single-story home if the manufacturer allows DIY installation. Any new outlet or circuit should be done by a licensed electrician, and multi-story homes should be left to professionals.
How long do heated gutter guard systems last?
Aluminum guards often last decades, and quality self-regulating cable commonly lasts many years when it is protected in a channel and not damaged. Inspect connections and end seals every fall before the first freeze.
Are heated roof edge panels better than heated guards?
They solve a different part of the problem. Edge panels keep the lowest few feet of roof clear, while heated guards keep the gutter flowing. Homes with severe ice dams often benefit from both together.