The hexagon has been on American bathroom floors for more than a century, and it keeps coming back because it simply looks right. Hex floor tile pairs a timeless, slightly nostalgic geometry with genuinely practical performance, which is a rare combination in flooring. Whether you picture a crisp white one-inch mosaic in a period bathroom or a large matte-black hexagon in a modern mudroom, the six-sided shape brings a handcrafted, considered quality that squares and planks cannot quite match. This guide walks through the sizes, materials, and installation realities so you can buy with confidence.
Choosing a Hexagon Size
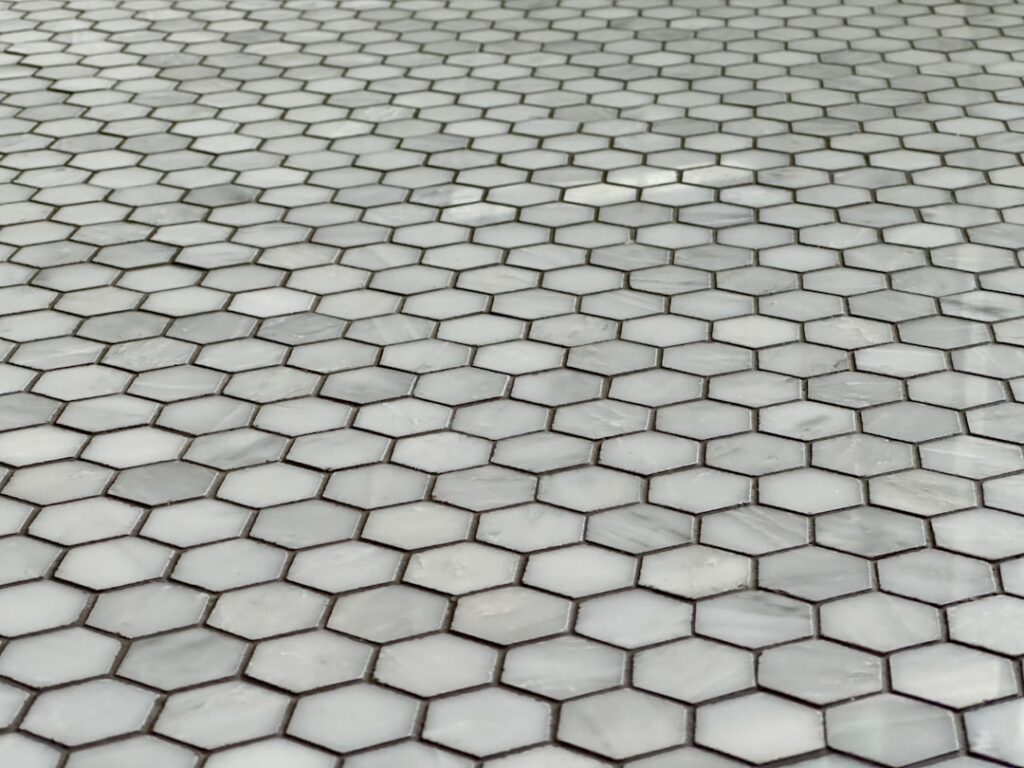
Size is the first and most consequential decision, because it changes both the look and the feel underfoot. The classic small hex, measuring one inch across, is the traditional choice for vintage-style bathrooms and reads as fine, detailed, and slightly formal. Two-inch hexagons are the versatile middle ground, familiar but a little more relaxed, and they suit most bathrooms and laundry rooms. Four-inch and larger hexagons feel decidedly modern, cover ground quickly, and give a bold, architectural look with fewer grout lines.
There is a practical dimension to size beyond aesthetics. Smaller hex floor tile has far more grout joints per square foot, which means more traction and better conformity to a slightly uneven or sloped surface, exactly why it has always been popular in showers and around toilets. Larger hexagons show off the tile material itself and are faster to set, but they demand a flatter substrate. If your subfloor has any waviness, a smaller hex will hide it while a large one will telegraph every low spot.
Materials: Porcelain, Ceramic, Marble, and Penny Hex
Porcelain is my default recommendation for hex floor tile in almost any home. It is dense, water-resistant, extremely hard, and available in everything from crisp glazed white to convincing marble looks and warm matte earth tones. Glazed ceramic is a slightly softer and less expensive cousin that works well in low-traffic bathrooms. Both are frost-resistant enough for a covered porch in most climates, and both clean up easily, which matters on a floor.
Natural marble hex, often in Carrara or a marble-and-accent blend, delivers a genuinely luxurious period look but comes with real maintenance: marble is porous, etches with acids, and needs sealing. Penny round tile is technically a circle rather than a hexagon, yet homeowners frequently shop it alongside hex for the same vintage mosaic feel, and the two are often mixed in the same project. If you love the classic look but want zero sealing and maximum durability, a marble-look porcelain hex gives you the appearance without the upkeep.
Slip Resistance and the Bathroom Question
Bathrooms are the natural home for hex floor tile, and slip resistance is where the small formats quietly shine. Because a one-inch or two-inch hex packs many grout joints into each square foot, the grid of joints gives bare wet feet extra grip that a large smooth tile cannot. That is precisely why old-fashioned tiny hex has survived in showers and bathroom floors for generations, long before anyone was quoting coefficient of friction numbers.
When you shop, look for the tile’s slip rating, usually expressed as a COF or DCOF value, and aim for a DCOF around 0.42 or higher on any floor that will get wet. Choose a matte or textured glaze rather than a high-polish finish for bathrooms, entries, and mudrooms. Polished marble hex looks gorgeous but can be genuinely slick when wet, so if you love that look, reserve it for a powder room that never sees a shower, or accept that a bath mat becomes mandatory.
Grout Color and Joint Width
Grout is not an afterthought with hexagons; it is half the design. High-contrast grout, such as dark gray against white hex, outlines every tile and celebrates the honeycomb geometry in a graphic, contemporary way. A matched grout that blends with the tile creates a softer, more seamless field that lets the shape whisper rather than shout. Vintage-inspired bathrooms often use a light gray grout that reads clean but hides dirt better than bright white, which is a smart middle path.
Most hex floor tile is set with a tight one-sixteenth to one-eighth inch joint. Use unsanded grout on the narrowest joints and sanded grout as they widen past one-eighth inch. In a bathroom I lean toward epoxy or a high-performance grout, because a floor full of small hex joints offers a lot of places for staining and mildew to take hold, and epoxy grout never needs sealing and shrugs off the mildew that plagues cement grout in damp rooms.
Popular Hex Floor Tile Looks
A few combinations show up again and again because they simply work. Classic white one-inch hex with light gray grout is the enduring period-bathroom look that suits everything from a 1920s bungalow to a fresh new build. Matte black large hex reads modern and hides scuffs in a mudroom or powder room. Marble-look porcelain in a two-inch hex splits the difference, giving you a soft, upscale field without the sealing headaches of real stone. For a playful accent, some homeowners drop a single contrasting hexagon at regular intervals, or fade two colors across the floor, turning an ordinary bathroom into a custom statement without custom pricing.
Installation Tips for a Clean Job
The good news is that hex floor tile almost always arrives mounted on twelve-inch mesh mosaic sheets, so you are placing sheets rather than fiddling with individual hexagons. The critical skill is keeping the pattern continuous across sheet seams. The staggered edges of each sheet are designed to interlock, so take a minute to dry-fit several sheets and confirm the honeycomb flows without an obvious grid line where sheets meet. Rushing this step leaves a visible seam every twelve inches that you cannot unsee later.
Prep the substrate flat, spread thinset with a smaller notched trowel appropriate for mosaics, typically a three-sixteenths or one-quarter inch V-notch, and press each sheet with a grout float or a flat block to fully embed it and beat down high spots. Watch your thinset coverage, since a mortar that squeezes up between tiny hexagons is a nightmare to clean out before it sets. Budget roughly seven to eighteen dollars per square foot for porcelain hex and more for marble, buy about ten percent extra for cuts and future repairs, and you will have a floor that looks as good in twenty years as the day you set it.
Cutting is the part that intimidates first-timers, but it is manageable with a wet saw and patience. Because hexagons meet the wall at angles, you will trim partial tiles off individual sheets rather than making long straight rip cuts, so keep the removed pieces organized as you go. Work out from the most visible sight line, usually the doorway or the front of a vanity, so any compromised cuts land in less noticeable corners. Let the thinset cure fully, typically twenty-four hours, before you grout, and wait the recommended time again before sealing grout or subjecting a new hex floor tile installation to a shower or heavy foot traffic.
Prefer to explore on your own?
See how new flooring looks in your actual room in seconds — free, no signup.
Try the free Floor Studio →