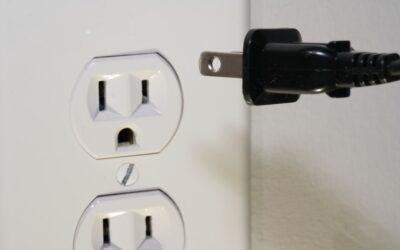
Most homes built before 2000 have fewer outlets per room than modern code recommends, which is why extension cords pile up behind furniture. Learning how to add an outlet is one of the higher-value DIY skills because the materials run about $25 while an electrician charges $150 to $400 for the same job. Done correctly with proper permits, it is also completely safe — but skipping any step can create a fire hazard you will not see for years.
Before You Touch Anything: Permits and Safety
Most municipalities require an electrical permit for adding circuits and many require one even for adding receptacles to an existing circuit. A typical homeowner permit costs $30 to $80 and includes inspection. Pulling the permit also forces you to follow the National Electrical Code, which protects you from insurance disputes if anything ever goes wrong.
Turn off the breaker for the circuit you are tapping, then verify with a non-contact voltage tester such as the Klein NCVT-2. Test the tester on a known live outlet first to confirm it is working. Lock or tape the breaker so no one flips it back on while you work.
Materials and Tools You Will Need
The shopping list is short and inexpensive.
- One 15- or 20-amp tamper-resistant duplex receptacle, around $3 to $5
- One old-work or new-work plastic electrical box, around $2
- 14/2 or 12/2 NM-B Romex cable to match the existing circuit, around $0.60 per foot
- Cable staples, wire nuts, and electrical tape, about $5 total
- One faceplate, $1
Tools include a wire stripper, lineman’s pliers, voltage tester, drywall saw, fish tape or coat hanger, drill with a 7/8-inch spade or auger bit, and a screwdriver. A stud finder helps locate joists and avoid surprises.
Step 1: Plan Where to Tap Power
The easiest source is an existing outlet on the same wall or in a back-to-back position in an adjacent room. Check that the source receptacle has spare capacity — code allows a maximum of about 8 receptacles on a 15-amp general lighting circuit and 10 on a 20-amp circuit, but heat-producing loads change the math.
Avoid tapping kitchen, bathroom, laundry, or garage circuits without expert guidance. Those are dedicated circuits with specific code requirements including GFCI and AFCI protection.
Step 2: Cut the New Outlet Box
Trace your old-work box on the drywall about 16 inches above the floor, matching the height of nearby outlets. Use a stud finder to confirm you are between studs, not over one. Cut the opening with a drywall saw, going slowly to avoid hitting wires.
Stick your hand inside the wall cavity and feel for cables, plumbing, and ductwork. Many a DIYer has cut into a copper pipe because they assumed an empty wall.
Step 3: Run the Cable
Run cable from the source outlet to the new opening. The route depends on the layout.
- Same wall: Drill a 7/8-inch hole through any studs in the path. Push fish tape from the new opening toward the source, attach the cable, and pull through.
- Adjacent wall: Drop the cable into the basement or attic, run horizontally, then pop back up at the new location.
- Across multiple rooms: Plan your route and account for any required cable supports — Romex must be stapled within 8 inches of every box and every 4.5 feet along its run.
Leave at least 8 inches of cable extending out of each box for working room.
Step 4: Wire the New Outlet
Strip 6 to 8 inches of outer sheath, then strip 3/4 inch of insulation off each wire. Connect the wires to the receptacle.
- Black (hot) to the brass screw
- White (neutral) to the silver screw
- Bare copper (ground) to the green screw
Wrap each wire clockwise around its screw and tighten firmly. Push the receptacle into the box, screw it to the box ears, and attach the faceplate.
Step 5: Wire the Source Outlet
This is where most DIYers make mistakes. The existing outlet has incoming and outgoing wires already, plus your new cable. The cleanest approach uses pigtails — short jumper wires that join everything to a single connection on the receptacle.
Combine all blacks (incoming, outgoing, new) plus a 6-inch black pigtail under one wire nut. Repeat for whites with a white pigtail, and for grounds with a green or bare pigtail. Connect only the pigtails to the source receptacle. This protects downstream outlets if you ever swap the source receptacle later.
Step 6: Restore Power and Test
Turn the breaker back on. Use a plug-in outlet tester such as the Klein RT250 to verify proper polarity, ground, and voltage at both the new and source receptacles. The tester shows three lights — two yellow and one red — when wiring is correct. Any other pattern indicates a wiring error you must fix immediately.
When to Call an Electrician Instead
Knowing how to add an outlet does not mean every project is DIY-appropriate. Hire a licensed electrician when the work involves a new circuit, a panel upgrade, AFCI/GFCI in older wiring, knob-and-tube circuits, aluminum wiring, or any work in a wet location like outside or in a bathroom.
Also call a pro if your panel has no spare slots, if you cannot locate a source circuit with capacity, or if anything looks corroded, scorched, or otherwise unfamiliar. The cost of one service call is far less than the cost of a house fire.
FAQ
Can I add an outlet to a circuit that already has many devices?
Only if the circuit has spare capacity. Add up the wattage of typical loads and divide by 120 — the total amps should not exceed 80 percent of the breaker rating.
Do I need a permit to add a single outlet?
In most US jurisdictions, yes. Check with your local building department. Permitted work protects your homeowner insurance and resale value.
What size wire should I use for a new outlet?
Match the existing circuit. 15-amp circuits use 14-gauge wire, 20-amp circuits use 12-gauge. Mixing sizes creates code violations and a fire risk.
How long does it take to add an outlet?
A first-time DIYer typically spends 3 to 4 hours on a same-wall tap. A skilled electrician finishes the same job in about 90 minutes.
Can I add an outlet to a kitchen or bathroom?
Yes, but those locations require GFCI protection, dedicated circuits in some cases, and careful code compliance. This is a job better suited to an electrician unless you are very experienced.