Figuring out how to add insulation to existing walls without tearing your house apart is one of the highest-value upgrades an older home can get, cutting drafts, lowering energy bills by 15 to 20 percent, and making rooms quieter. The good news is you rarely have to open the walls. Contractors have several methods for filling closed wall cavities, but before you insulate an older home, there is a serious safety issue you must address first.
- Critical Safety Warning: Knob-and-Tube Wiring
- Do Your Walls Even Have Insulation Now?
- Method 1: Injection Foam Insulation
- Method 2: Blown-In Cellulose or Fiberglass (Drill-and-Fill)
- Method 3: Open the Wall (When It Makes Sense)
- Interior vs. Exterior Access
- Should You DIY or Hire a Pro?
- Frequently Asked Questions
Critical Safety Warning: Knob-and-Tube Wiring
If your home was built before roughly 1950, stop and read this before doing anything else. Many older houses still have active knob-and-tube (K&T) wiring, an early electrical system where wires run exposed through the wall cavity, relying on open air around them to dissipate heat. Packing insulation around live knob-and-tube wiring traps that heat and creates a genuine fire hazard. This is not a minor code technicality; it is one of the most common causes of insulation-related house fires, and many insurance companies will void coverage if they discover insulation was blown over active K&T.
Before you insulate any older home, do the following:
- Hire a licensed electrician for an inspection to confirm whether knob-and-tube (or other outdated wiring) is present and still energized. This costs $150 to $400 and is non-negotiable.
- Have any active K&T removed or replaced before insulation goes in. Rewiring runs $8,000 to $15,000 for a typical home, but it is far cheaper than a fire.
- Get it in writing. A reputable insulation contractor will refuse to blow insulation into walls with live K&T, and any that agrees without an electrical sign-off should be a red flag.
Even beyond K&T, an older home may have brittle wiring, undersized circuits, or buried junction boxes. An electrical inspection before insulating protects your family and your investment. Do not skip it to save a few hundred dollars.
Do Your Walls Even Have Insulation Now?
Before choosing a method, find out what is behind the drywall or plaster. On an exterior wall, turn off the power to an outlet, remove the cover plate, and gently probe into the cavity beside the box with a thin, non-metallic stick. If you feel resistance and pull out fibers, you have some insulation. If it is hollow, the cavity is empty. A more reliable option is an infrared thermal camera or a professional energy audit ($200 to $600, sometimes free through utility programs), which maps exactly where insulation is missing or has settled.
Method 1: Injection Foam Insulation
Injection foam is my top pick for filling closed walls when done right. A contractor drills a series of small holes (about 1 to 2 inches) through the exterior siding or interior drywall into each stud cavity, then injects a slow-expanding foam that flows around wires and pipes and fills irregular spaces completely.
Why it works well
- Delivers a high R-value, roughly R-4 to R-5 per inch, so a standard 3.5-inch cavity reaches about R-14 to R-16.
- Creates an air seal, not just a thermal barrier, which stops drafts that loose-fill can miss.
- The slow expansion will not blow out plaster the way spray foam can.
Costs and considerations
Injection foam runs about $1.50 to $3.50 per square foot of wall, or roughly $2,000 to $6,000 for an average home’s exterior walls. The drilled holes must be patched and painted afterward, factor that into your budget or hire a crew that includes patching. It is more expensive than blown-in fiber but performs better in leaky older homes.
Method 2: Blown-In Cellulose or Fiberglass (Drill-and-Fill)
The classic retrofit method, drill-and-fill, uses the same small-hole approach but blows loose cellulose or fiberglass into the cavity under pressure with a hose.
Cellulose
Dense-packed cellulose (made from recycled paper treated with borate for fire and pest resistance) is packed to about 3.5 pounds per cubic foot so it resists settling. It delivers roughly R-3.5 per inch (about R-13 in a standard wall), dampens sound well, and is eco-friendly. Cellulose is my usual recommendation for the drill-and-fill approach.
Blown Fiberglass
Loose-fill fiberglass is lighter and moisture-resistant but must be dense-packed properly or it settles and leaves cold gaps at the top of the wall. It offers a similar R-3 to R-4 per inch.
Costs
Drill-and-fill with cellulose or fiberglass typically costs $1.00 to $2.50 per square foot, or about $1,500 to $4,000 for a home’s exterior walls, generally the most affordable no-tear-out option. From either the interior or exterior, the holes still need patching.
Method 3: Open the Wall (When It Makes Sense)
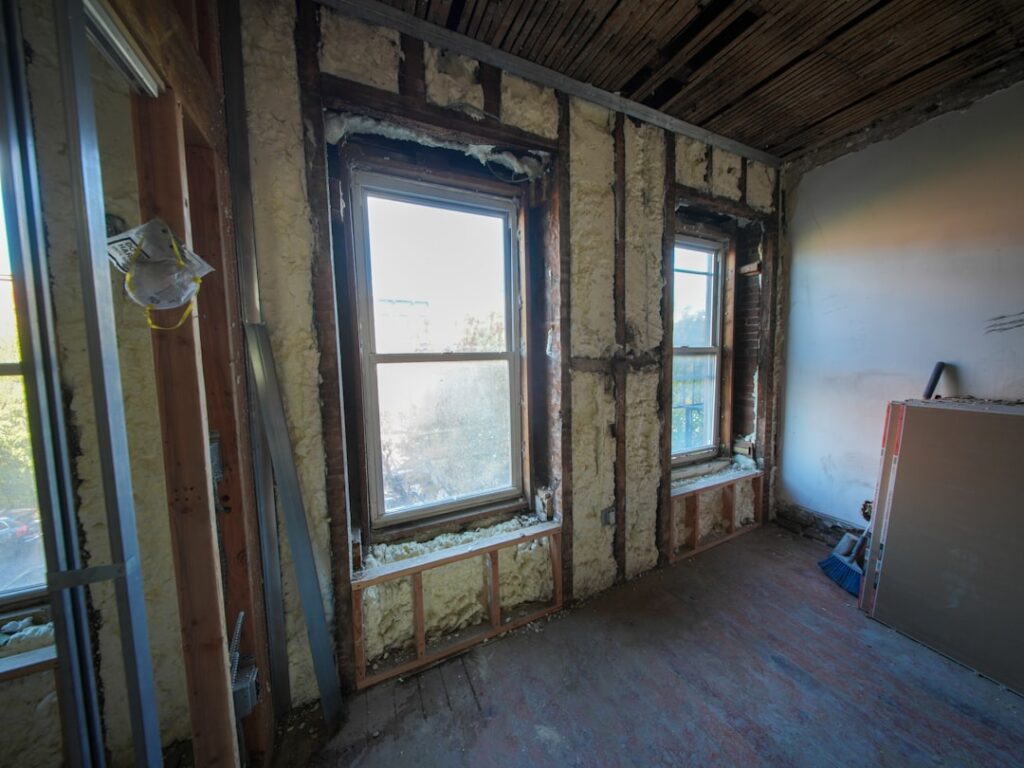
Sometimes removing the drywall or plaster is the smart move rather than a last resort. Open walls when:
- You are already renovating the room, replacing drywall, updating wiring, or moving plumbing.
- The existing insulation is water-damaged, moldy, or pest-infested and must come out.
- You want the maximum performance of spray foam or want to inspect for hidden moisture or wiring problems.
With the cavity open you can install fiberglass or mineral wool batts (R-13 to R-15 for a 2×4 wall) for around $1.00 to $1.50 per square foot in materials, or closed-cell spray foam (R-6.5 to R-7 per inch, an excellent air and vapor barrier) for $3 to $7 per square foot. Opening walls costs more in labor and finishing, but it is the only way to guarantee a complete, inspectable job.
Interior vs. Exterior Access
Contractors can drill from inside or outside, and each has tradeoffs. Drilling from the exterior keeps mess out of your living space and works well with vinyl or wood siding that can be removed and reinstalled to hide the holes. Drilling from the interior avoids disturbing masonry or stucco exteriors but leaves patch-and-paint work inside every room. Brick homes usually get insulated from the interior for this reason. Discuss access with your contractor based on your siding and how much interior repainting you are willing to do.
Should You DIY or Hire a Pro?
Blowing insulation into open attic floors is a reasonable DIY job with a rented blower. Filling closed walls is not, and I steer homeowners toward professionals here. Getting consistent density without voids, drilling clean holes, avoiding wires and pipes, and patching invisibly all take experience and specialized equipment. Improperly packed cavities settle and leave you paying for insulation that does not perform. Add the K&T wiring risk, and this is firmly a licensed-contractor job. Expect a professional whole-home wall insulation project to run $3,000 to $10,000 depending on size, method, and access, and to pay for itself in energy savings within five to ten years.
Frequently Asked Questions
Can I add insulation to walls without removing the drywall?
Yes. Injection foam and blown-in cellulose or fiberglass are both installed through small drilled holes, so the wall stays intact. The holes are patched and painted afterward. Only open the wall if you are already renovating or the existing insulation is damaged.
Is it safe to blow insulation over old wiring?
Not over active knob-and-tube wiring, which relies on open air to shed heat, insulating around it is a fire hazard and can void your home insurance. Always have a licensed electrician inspect an older home and remove or replace K&T before any insulation is added.
How much does it cost to insulate existing walls?
Expect roughly $1.00 to $2.50 per square foot for blown-in cellulose or fiberglass and $1.50 to $3.50 for injection foam, translating to about $1,500 to $6,000 for a typical home’s exterior walls. Opening walls for batts or spray foam costs more due to added labor and finishing.
Bottom line: you can add insulation to existing walls without a gut renovation using injection foam or drill-and-fill cellulose, and the energy savings are substantial. But in any older home, the first step is not insulation, it is an electrical inspection to rule out knob-and-tube wiring. Handle the wiring first, hire a qualified insulation contractor, and you will have a warmer, quieter, safer home for decades.