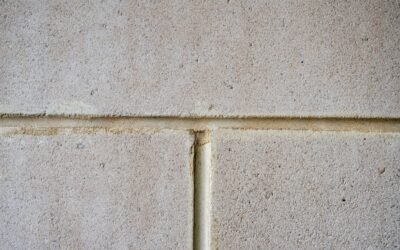
Few chores are as satisfying, or as easily neglected, as restoring dingy grout lines to their original color. Learning how to clean bathroom floor grout properly means understanding why grout gets dirty in the first place, then matching the right cleaner and technique to the grime you are facing. Grout is porous cement, so it absorbs soap scum, body oils, mildew, and mineral deposits that plain mopping never touches. The good news is that with a few inexpensive supplies and some patience, you can bring even badly stained grout back to life.
Part of our Bathroom Remodeling & Flooring guide — explore the full guide →
This guide moves from the gentlest methods to the most aggressive, so you can start soft and escalate only if you need to. It also covers sealing, the step most people skip that keeps grout clean far longer.
Why Bathroom Grout Gets So Dirty
Bathrooms combine constant moisture, warmth, and organic residue, which is a perfect recipe for grout discoloration. Every shower leaves behind soap scum and skin oils that settle into the porous surface. Standing humidity feeds mildew and black mold in the low points of the floor. In areas with hard water, mineral deposits build a chalky film. Because unsealed grout sits slightly below the tile surface, dirt collects in those recessed lines and resists ordinary mopping.
Start With the Gentlest Method
Before reaching for harsh chemicals, try a simple baking soda paste. Mix baking soda with just enough water to form a thick paste, then spread it over the grout lines. Spray or drizzle white vinegar over the paste and let it fizz for five to ten minutes. The mild abrasion of the baking soda plus the acidity of the vinegar lifts everyday grime effectively.
Scrub with a stiff nylon brush or an old toothbrush, working along the lines rather than across them. Rinse thoroughly with warm water and wipe dry. For lightly soiled grout, this alone often restores a clean, uniform look. Avoid vinegar on natural stone tile such as marble or travertine, since the acid etches the stone; use a pH-neutral cleaner there instead.
Step Up to Oxygen Bleach
When baking soda and vinegar are not enough, oxygen bleach (sodium percarbonate, sold as OxiClean and similar products) is the workhorse for grout. Unlike chlorine bleach, it is color-safe, less harsh on grout, and does a superb job on organic stains and mildew.
Dissolve a couple of tablespoons in warm water to make a slurry, spread it across the grout, and let it dwell for 15 to 30 minutes so it can penetrate. Scrub, then rinse well. For an entire bathroom floor, working in sections keeps the solution from drying out before you scrub. Oxygen bleach is the method professional cleaners most often reach for because it balances power and safety.
Tackling Mold and Mildew
Black spots in grout are usually mildew or mold rather than dirt. A solution of one part chlorine bleach to three parts water, applied with a brush and left for several minutes, kills surface mold and lightens the stain. Ventilate the room well, wear gloves, and never mix bleach with vinegar or ammonia, which creates toxic fumes.
For stubborn or recurring mold, a dedicated mildew-remover gel that clings to vertical and horizontal surfaces works well. If black staining returns quickly even after cleaning, moisture may be trapped beneath the tile, which points to a sealing or ventilation problem worth addressing.
Commercial Grout Cleaners and Steam
Ready-made alkaline grout cleaners cut through soap scum and grease with less scrubbing, and they are worth the modest cost for heavily soiled floors. Spray, let dwell per the label, agitate, and rinse. A powered scrub brush attachment on a drill speeds the job dramatically across a large floor.
A steam cleaner is arguably the best chemical-free option. The hot vapor loosens grime deep in the pores and sanitizes as it goes, and a narrow grout nozzle blasts dirt from the lines with almost no scrubbing. Steam is especially useful for households that want to avoid harsh chemicals around children and pets.
The Right Tools Make the Difference
Technique and tools matter as much as the cleaner. A stiff-bristled grout brush, an electric spin scrubber, or a drill-mounted brush all outperform a floppy mop. Always scrub along the grout line, not across the tile, so you concentrate effort where the dirt hides. Work in small sections, keep the surface wet with your cleaning solution while you scrub, and rinse each area before the residue dries and re-deposits. Finish by wiping the floor dry with a microfiber cloth to prevent new water spots.
What to Avoid When Cleaning Grout
A few habits do more harm than good. Skip metal brushes and steel wool, which scratch tile glaze and gouge grout, opening more pores for dirt to lodge in. Go easy on straight, undiluted acids like muriatic acid; they can eat away cement grout and etch the tile surface, especially on stone. Never combine bleach with vinegar, ammonia, or other cleaners, because the resulting fumes are genuinely dangerous in a small, enclosed bathroom.
Resist the urge to flood the floor and let cleaner sit indefinitely. Excess water works into the subfloor through grout lines and can loosen tile or feed hidden mold. Apply enough solution to keep the grout wet during the dwell and scrub, then rinse and dry promptly. Working smart protects both your grout and the tile it holds in place.
Keeping Grout Clean Between Deep Cleanings
Prevention beats scrubbing. A quick squeegee or towel wipe after showers removes the water that carries soap scum and feeds mildew. Running the exhaust fan for 20 to 30 minutes after bathing pulls humidity out of the room so mold never gets a foothold. A weekly spray of a daily shower cleaner or a light vinegar mist on ceramic tile keeps buildup from ever hardening.
Address spills and hair-dye or makeup drips immediately, since colored stains set fast in porous grout. With these small habits, deep cleaning shifts from a monthly battle to a quick quarterly refresh, and the grout stays noticeably brighter year-round.
Seal Grout to Keep It Clean
The step that saves you from repeating all this work is sealing. Once grout is clean and fully dry, apply a penetrating grout sealer with a small applicator or brush, let it soak in, and wipe away the excess. A quality sealer fills the pores so water, oil, and dirt bead up instead of soaking in. Reseal bathroom floor grout every one to two years, or when water stops beading on the surface. Sealed grout stays cleaner between deep cleanings and resists mildew far better. Wait at least 48 to 72 hours after any deep cleaning so the grout is bone dry before sealing, or you will trap moisture inside.
Frequently Asked Questions
What is the best homemade grout cleaner?
A baking soda paste activated with white vinegar handles most everyday grout grime cheaply and safely. For tougher stains and mildew, dissolved oxygen bleach is the most effective home solution. Skip vinegar on natural stone tile, since the acid can etch marble and travertine.
How often should I deep clean bathroom floor grout?
A thorough grout cleaning every one to three months keeps buildup manageable in a regularly used bathroom. Wiping the floor dry after showers and doing a quick weekly mop dramatically slows how fast the grout re-soils between deep cleanings.
Will bleach damage my grout?
Chlorine bleach is fine for occasional mold removal but can erode grout and discolor colored grout with repeated use. Oxygen bleach is gentler and color-safe, making it a better choice for routine deep cleaning. Always rinse thoroughly and ventilate the room whenever you use any bleach product.
Prefer to explore on your own?
See how new flooring looks in your actual room in seconds — free, no signup.
Try the free Floor Studio →