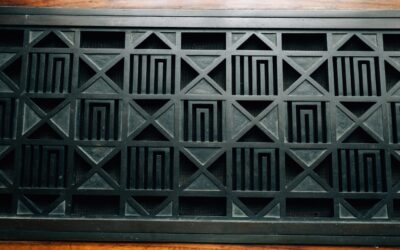
Dust on a ceiling vent is one of those chores that gets ignored until it leaves gray streaks on the ceiling paint. Figuring out how to clean vent covers without removing them saves you the ladder dance, the lost screws, and the bent louvers from prying with a putty knife. With the right tools, you can pull years of fuzz off return grilles and supply registers in under five minutes per vent. Better still, you can do it without shutting off the HVAC system.
Why Skipping Removal Makes Sense
Most ceiling grilles are held with painted-in screws that strip if you force them. Wall registers usually slide free, but the louvers are thin steel that bend with little provocation. Cleaning in place also lets you tackle high-traffic vents on a weekly basis rather than waiting for a full disassembly cycle. Less disruption equals more frequent cleaning, and clean grilles mean fewer dust streaks on your walls.
Tools That Work Best
Stock these before you start and you will not have to step off the ladder twice.
- Shop vac or HEPA vacuum with a brush attachment
- Microfiber cloth and a few clean shop towels
- Dust brush extender, sometimes called a duster wand, that reaches 3 to 5 feet
- Spray bottle with warm water and a few drops of Dawn dish soap
- Compressed air can or small electric blower
- Old toothbrush or paint brush for stubborn buildup
Vacuum First, Always
Run a vacuum brush over the grille before you introduce any liquid. Wet dust turns into glue that bonds to the slats and to the duct lip behind them. Hold the brush flush to the cover and work in the same direction as the louvers so the bristles slide between the slats instead of catching them. For ceiling vents, a vacuum with a telescoping wand keeps you off the ladder altogether.
If you have pets, expect a surprising amount of hair behind the grille on return-air vents. These vents pull air toward the furnace, so they collect 10 times the debris of a supply vent.
The Microfiber Wrap Trick
Dampen a microfiber cloth with the soap and water mix, then wrap it around the head of a butter knife or a thin paint stir stick. Slide the wrapped tool between each louver and drag it from one end to the other. You will see a black streak appear on the cloth from the oil-bound dust that the vacuum could not lift. Flip the cloth often. One vent typically blackens both sides.
For Kitchen and Bathroom Vents
Vents above the stove and inside bathrooms collect a film of cooking grease and aerosol residue that water alone cannot break. Mist the grille lightly with a kitchen degreaser like Krud Kutter or a 50/50 mix of white vinegar and warm water. Let it sit 60 to 90 seconds, then wipe with the microfiber wrap method. Avoid soaking the area, since liquid running into the duct can drip back out and stain the ceiling later.
For range hood filters that lift out, this is the moment to take them down. But the grille itself can stay put.
Cleaning Behind the Cover Without Pulling It
Once the face is clean, attack what you can reach behind the louvers. Shoot a 2-second burst of compressed air through the slats while holding the vacuum nozzle nearby to catch what blows out. Alternate sides to coax dust off the inside lip of the duct. For larger return vents, a long-handled duster like the OXO Good Grips Extendable Duster reaches 6 to 12 inches into the cavity and grabs anything the air missed.
How Often to Repeat
A reasonable schedule prevents the heavy buildup that forces a full removal.
- Supply vents in bedrooms: every 2 to 3 months
- Return-air grilles: monthly, sometimes weekly with pets
- Bathroom exhaust covers: every 4 to 6 weeks
- Kitchen vents near the cooktop: every 3 to 4 weeks
Add a calendar reminder. Out of sight is the enemy of clean ducts.
Mistakes That Make the Job Harder
Avoid these missteps and you will never need to take a grille down again.
- Spraying water directly into the slats. This drips inside the duct and grows mildew.
- Using a brittle plastic brush that snaps off bristles into the duct.
- Skipping the dry vacuum step before wet wiping.
- Cleaning while the HVAC is running on high. Set the thermostat to off for 10 minutes.
- Forgetting to dust the surrounding ceiling. Dirty edges make a clean vent look worse, not better.
When You Should Actually Remove the Cover
In-place cleaning handles 90 percent of household maintenance. But if you see visible mold on the louvers, smell a musty odor coming from the duct, or notice insulation fluff falling out, it is time to take the cover down and inspect deeper. At that point, a flashlight inspection inside the duct will tell you whether a professional cleaning is worthwhile.
Final Thoughts
Once you have the routine down, how to clean vent covers without removing them is a 5-minute task per vent that you can knock out while waiting for laundry to finish. The combination of vacuum first, microfiber wrap second, and compressed air third pulls 95 percent of the dust without unscrewing a single fastener. Your ceilings stay streak-free, your indoor air gets cleaner, and the louvers never get bent again.