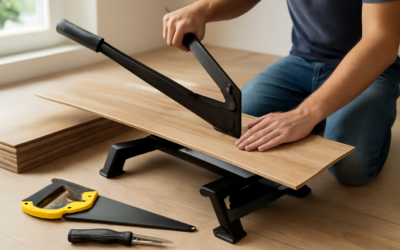
Knowing how to cut laminate countertop properly is the difference between a professional-looking installation and a chipped, ragged mess. Laminate is one of the most DIY-friendly countertop materials, but the thin decorative layer chips easily when cut with the wrong tool, wrong blade, or wrong technique.
Part of our Countertops guide — explore the full guide →
We have cut thousands of laminate countertops over our career, and the techniques we use today are the same ones that work perfectly for homeowners tackling their first installation. This guide covers every type of cut you might need, the right tools for each situation, and the tricks that prevent chipping every single time.
Tools You Need for Cutting Laminate
Having the right tools is critical when learning how to cut laminate countertop without damage. Here is what you need for each type of cut.
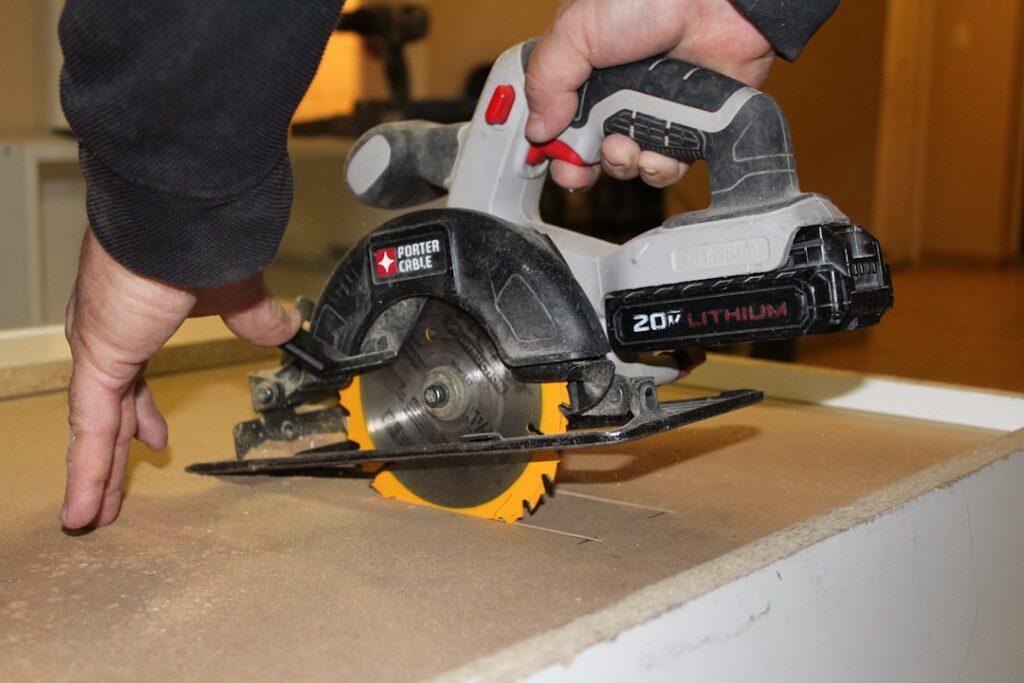
Circular saw: Your primary tool for straight cuts. Use a fine-tooth blade with 60-80 teeth (carbide-tipped). A standard 24-tooth framing blade will chip laminate badly. The blade investment ($15-25 for a quality fine-tooth blade) is the single most important factor in getting clean cuts.
Jigsaw: Essential for sink and cooktop cutouts. Use a fine-tooth, down-cut blade specifically designed for laminate. Down-cut blades push the material down instead of up, which prevents chipping on the visible surface. Bosch T101BR blades are the industry standard for laminate cutting.
Router with laminate trim bit: For trimming laminate edges after installation and fine-tuning cuts. A flush-trim bit with a bearing guide creates perfectly smooth edges.
Straightedge or clamping guide: A factory edge from a piece of plywood or a commercial saw guide clamped to the countertop ensures straight cuts with the circular saw.
Measuring and marking tools: Tape measure, combination square, pencil, and painter’s tape. The tape serves double duty: marking cut lines and protecting against chipping.
Drill with spade bit or hole saw: For starting internal cuts (sink and cooktop openings). A 3/8-inch or 1/2-inch drill bit creates the starting hole for your jigsaw blade.
File and sandpaper: A fine mill file and 150-220 grit sandpaper for smoothing cut edges after sawing.
How to Prevent Chipping
Chipping is the number one problem when cutting laminate. The decorative surface is a thin layer bonded to a particle board core, and it wants to flake away from the substrate during cutting. These techniques prevent it.
Apply painter’s tape along the cut line. This is the most important anti-chip technique. Apply two or three overlapping strips of quality painter’s tape directly over your cut line. Mark your measurement on top of the tape and cut through it. The tape holds the laminate fibers together during cutting and dramatically reduces chipping.
Score the cut line with a utility knife. After taping, use a sharp utility knife and a straightedge to score through the tape and into the laminate along your cut line. Score firmly enough to cut through the decorative layer. This pre-cut line prevents the saw blade from lifting and tearing the laminate.
Cut with the laminate face down when using a circular saw. Circular saw blades rotate upward through the material, which means the exit side (top) gets the most chipping. By cutting face down, any chipping occurs on the bottom where it will not be visible. This is the most critical rule for learning how to cut laminate countertop with a circular saw.
Cut with the laminate face up when using a jigsaw. Jigsaw blades cut on the upstroke (unless you use a down-cut blade). With a standard blade, cutting face down prevents visible chipping. With a down-cut blade, cut face up. Always match your cutting orientation to your blade type.
Use the right blade speed. Let the blade reach full speed before starting the cut. Move the saw steadily without rushing. Pushing too fast causes the blade to deflect and tear the laminate rather than cutting it cleanly.
Making Straight Cuts
Straight cuts are the most common when installing laminate countertops. You need them to cut the countertop to length and to fit it against walls.
Step 1: Measure and mark. Measure your required length and mark the cut line on the countertop. Remember to account for any overhang past the end cabinet (typically 1 inch). Mark on both the front and back edges, then connect the marks with a straightedge.
Step 2: Apply tape and score. Lay painter’s tape along the cut line on both sides of the countertop. Score the cut line with a utility knife using firm, consistent pressure.
Step 3: Set up the saw guide. Clamp a straightedge (factory edge of plywood works perfectly) parallel to your cut line, offset by the distance from your saw blade to the edge of the saw’s base plate. Measure this offset carefully; it is typically 1.5-3 inches depending on your saw.
Step 4: Flip the countertop face down. Support the countertop on sawhorses with the decorative face against the sawhorses. Ensure both sides of the cut are supported so neither piece falls after the cut is complete.
Step 5: Make the cut. Start the saw and let it reach full speed. Guide the base plate along the straightedge, applying steady forward pressure without forcing the cut. Let the blade do the work. Keep the saw moving at a consistent speed throughout the entire cut.
Step 6: Clean up the edge. Remove the tape, inspect the cut edge, and smooth any minor roughness with a fine file, working from the laminate surface toward the substrate to avoid lifting the laminate edge.
Cutting Sink Openings
Sink cutouts are the most nerve-wracking part of learning how to cut laminate countertop, but the technique is straightforward once you understand the process.
Step 1: Mark the opening. Most sinks come with a cardboard template. Center it over the sink base cabinet and trace the outline onto the countertop. If no template is included, flip the sink upside down on the countertop, trace around it, then draw a second line 1/2 inch inside the traced outline (this creates the actual cut line that leaves a ledge for the sink rim to rest on).
Step 2: Tape and score. Apply painter’s tape over the entire cut area, extending 2-3 inches beyond the cut lines in all directions. Trace the cut line onto the tape and score it with a utility knife.
Step 3: Drill starter holes. Drill a 1/2-inch hole at each corner of the cutout, positioned just inside the cut line. These holes give your jigsaw blade room to turn the corners smoothly.
Step 4: Support the cutout. Before cutting, screw a wood strip across the cutout area to support the waste piece. If the cutout falls before you finish cutting, it will tear the laminate on the last section. One strip of scrap wood screwed into the cutout piece and resting on the surrounding countertop prevents this.
Step 5: Cut the opening. Insert your jigsaw (with a fine-tooth down-cut blade) into one of the corner holes. Cut along the marked line, moving slowly and steadily. Let the blade do the work without forcing it. Cut all four sides, leaving the support strip holding the waste piece in place.
Step 6: Remove the waste. Unscrew the support strip and lift out the cutout piece. File the cut edges smooth, working from the top surface downward to prevent edge chipping.
Cutting Cooktop Openings
Cooktop cutouts follow the same basic process as sink cutouts but with a few important differences.
Precision matters more. Cooktop cutouts require tighter tolerances because the cooktop rim sits directly on the laminate surface with less overlap than a sink. Follow the manufacturer’s template exactly and verify your measurements twice before cutting.
Corners should be slightly rounded. Sharp 90-degree corners concentrate stress and can cause cracking in the laminate, especially with heat cycling from the cooktop. Use your drill holes to create naturally rounded corners, or extend each cut line about 1/4 inch past the corner to relieve stress.
Gas line considerations: If you are cutting for a gas cooktop, verify the location of the gas supply line before cutting. Hitting a gas line with a jigsaw is dangerous. Measure from above and below the counter to confirm the line position.
Clearance for controls: Some cooktops have knobs or controls that extend below the countertop surface. Verify that the cutout provides adequate clearance and that no cabinet components interfere with the controls.
Making Miter Cuts for Corners
L-shaped laminate countertop layouts require mitered joints where two pieces meet at a corner. This is the most challenging cut in laminate countertop work.
Pre-formed miter option: Many home improvement stores sell pre-mitered laminate countertop sections specifically designed to join at 90-degree corners. These include machined miter joints and miter bolts for a tight connection. If available in your color and configuration, pre-formed miters save significant time and produce better results than field-cutting miters.
Cutting your own miters: Set your circular saw to a 45-degree bevel. Use a clamped straightedge as your guide. Cut both pieces simultaneously if possible to ensure the angles match perfectly. Apply tape and score the cut lines before sawing.
Joining mitered pieces: Apply waterproof wood glue to both miter faces. Draw the joint tight using draw bolts (special hardware that pulls the two pieces together from underneath). Wipe away excess glue and ensure the top surfaces are perfectly flush. Seal the seam with color-matched laminate seam filler once the glue dries.
Common miter mistake: Not accounting for the backsplash when measuring. The built-in backsplash on one piece must align perfectly with the other. Dry-fit both pieces before applying any adhesive.
Trimming the Built-In Backsplash
Pre-formed laminate countertops come with a short built-in backsplash (typically 3-4 inches). You may need to trim or remove it.
Removing the backsplash entirely: Score the joint between the backsplash and the countertop surface with a utility knife. Use a circular saw with the blade depth set to match the backsplash thickness (usually about 5/8 inch). Run the saw along the base of the backsplash to separate it from the countertop deck. Clean up the cut with a file and sandpaper. Apply edge banding to the exposed back edge if it will be visible.
Trimming for uneven walls: If your wall is not perfectly straight, the backsplash needs to be scribed to fit. Hold the countertop in position against the wall. Use a compass to trace the wall’s contour onto the backsplash. Cut along the scribed line with a belt sander or jigsaw. Test the fit and adjust as needed.
End cap considerations: When a countertop ends against an exposed wall (not continuing around a corner), the end of the backsplash needs a finished edge. Apply a matching laminate end cap with contact cement, or use a pre-finished end cap piece if your countertop brand offers one.
Finishing and Smoothing Cut Edges
Proper edge finishing is the final step in learning how to cut laminate countertop like a professional.
Filing technique: Use a fine mill file held at a slight downward angle (about 10 degrees from horizontal). Always file from the laminate surface toward the substrate, never upward into the laminate. Upward strokes lift and chip the laminate edge. Use long, smooth strokes with moderate pressure.
Sanding: After filing, smooth the edge with 150-grit sandpaper followed by 220-grit. Wrap the sandpaper around a flat sanding block for consistent results. Again, work in a downward direction to avoid lifting the laminate edge.
Exposed edge treatment: Any cut edge that will be visible (end caps, where countertop meets an appliance) needs covering. Options include iron-on edge banding (matching laminate strips applied with a household iron), pre-made end caps (available for most pre-formed countertop styles), and custom laminate strips cut from a matching sheet and applied with contact cement.
Seam treatment: Where two pieces of laminate countertop join, apply color-matched seam filler (SeamFil is the standard product) to create a nearly invisible joint. Apply with a putty knife, wipe away excess with a rag dampened with SeamFil solvent, and let it cure for 24 hours.
Silicone at wall joints: Where the countertop meets the wall (backsplash area), apply a bead of color-matched silicone caulk. This creates a water-tight seal and a clean finished appearance. Tool the caulk with a wet finger for a smooth, professional look.
Frequently Asked Questions
What is the best blade for cutting laminate countertop?
For a circular saw, use a fine-tooth blade with 60-80 carbide-tipped teeth. For a jigsaw, use a down-cut (reverse-tooth) blade like the Bosch T101BR. These blades are specifically designed to cut laminate without chipping the decorative surface.
Should I cut laminate countertop face up or face down?
With a circular saw, cut face down because the blade exits upward and chips the top surface. With a jigsaw and standard blade, cut face down for the same reason. With a jigsaw and down-cut blade, cut face up because the blade pushes down into the material, protecting the top surface.
Can I cut laminate countertop with a table saw?
Yes, a table saw works well for straight cuts on laminate countertops. Place the laminate face up (the blade exits downward on a table saw, so chipping occurs on the bottom). Use a fine-tooth blade and push the material through at a steady, moderate speed. The challenge is handling the large, heavy countertop piece safely on the table saw.
How do I fix chips that happen during cutting?
Small chips along cut edges can be filled with color-matched laminate repair paste (SeamFil). Apply the paste, let it cure for 24 hours, then sand smooth with 400-grit sandpaper. For chips on exposed edges, iron-on edge banding covers the repair completely and gives a factory finish.
Can I cut laminate countertop in place after installation?
It is possible but not recommended for major cuts. Cutting in place creates dust, risks damaging cabinets, and limits your tool access. Minor trimming with a jigsaw or router for final fitting is fine. Major cuts (cutting to length, sink cutouts) should be done before installation when you can flip the countertop and work comfortably.