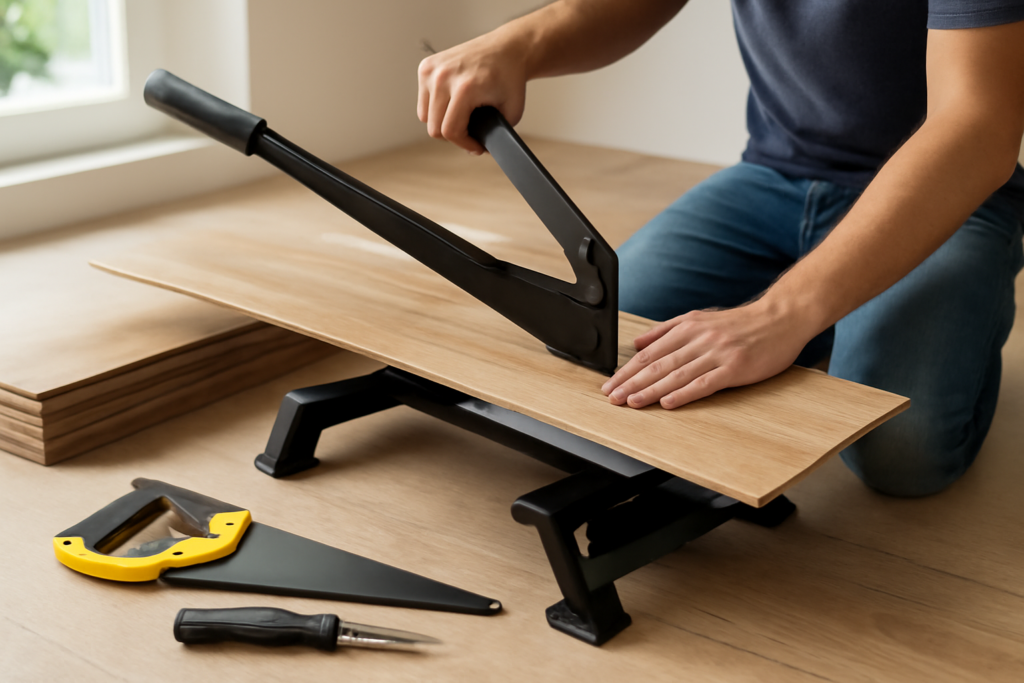
Ask ten installers what the best tool for cutting laminate flooring is and you will get a few different answers, because the honest truth is that no single tool does every cut best. Laminate needs straight crosscuts at the ends of rows, long rip cuts down the first and last rows, and curved cuts around door casings and pipes. Each of those calls for a different tool, and the hard, abrasive wear layer on laminate punishes the wrong blade. This guide ranks the main contenders by the cut they excel at, so you can pick the right one for your project and budget.
- The Quick Answer
- Miter Saw: Best for Fast, Clean Crosscuts
- Laminate Cutter: Best for Dust-Free, Quiet Cutting
- Jigsaw: Best for Curves, Notches, and Odd Shapes
- Circular Saw: Best Budget All-Rounder for Rips
- Table Saw: Best for Long Rip Cuts
- Choosing the Right Blade
- A Smart Two-Tool Combo
- Reducing Chipping and Getting Clean Edges
- Managing Dust and Noise During Cutting
- Frequently Asked Questions
The Quick Answer
For most DIY installs, a miter saw with a fine-tooth carbide blade is the best all-around tool for the straight crosscuts that make up the bulk of the work, paired with a jigsaw for curves and notches. If dust and noise are a concern, a manual laminate cutter replaces the miter saw for straight cuts. Below is how each option stacks up.
Miter Saw: Best for Fast, Clean Crosscuts
A 10- or 12-inch sliding miter saw is the workhorse of laminate installation. It makes precise, square cuts to length in a second, and a sliding model can crosscut wide planks in a single pass. With a fine-tooth carbide blade of 60 teeth or more, the edge comes out clean enough to sit tight against the next plank.
The tradeoffs are dust and noise. Laminate throws fine, gritty dust, so work outdoors or with a vacuum attached, and wear a mask and eye protection. Cut with the decorative face up on a miter saw to keep any chip-out on the underside. A capable miter saw runs $120 to $300 to buy or about $30 to $50 a day to rent.
Laminate Cutter: Best for Dust-Free, Quiet Cutting
A manual laminate cutter, sometimes called a guillotine cutter, works like a heavy-duty paper trimmer. You set the plank on the base, pull the lever, and a blade shears through the board. The advantages are compelling:
- Zero dust: Nothing airborne, ideal for occupied homes and apartments.
- Nearly silent: No motor, so you can work early or late without disturbing neighbors.
- No power needed: Cut right where you install.
- Fast for straight cuts: One pull per plank.
The limits are real too. A guillotine cutter only makes straight crosscuts; it cannot rip a plank lengthwise or cut curves. The sheared edge is also slightly less crisp than a saw cut, though it hides under baseboards and against adjoining planks. At $50 to $120, it is an affordable, pleasant tool to use for the repetitive end cuts.
Jigsaw: Best for Curves, Notches, and Odd Shapes
No laminate job avoids irregular cuts. Door casings, heating vents, pipes, and outside corners all demand a jigsaw, which makes it an essential companion tool no matter what you use for straight cuts. Fit it with a fine-tooth, down-cutting (reverse-tooth) blade so the teeth cut on the downstroke and leave the finished top face clean.
A jigsaw handles rip cuts too, though less precisely than a table saw. For cutting around a toilet flange or a curved threshold, nothing beats it. Corded models cost $40 to $100; a decent cordless one runs a bit more. Combined with a contour gauge to trace complex shapes, a jigsaw makes tricky fits straightforward.
Circular Saw: Best Budget All-Rounder for Rips
If you already own a circular saw, it can handle both crosscuts and long rip cuts, making it a versatile budget choice. The key is a fine-tooth carbide blade and cutting with the decorative side down, since a circular saw chips on the upper face. Clamp a straightedge guide for accuracy, because freehand cuts wander.
A circular saw is louder and dustier than a miter saw and less precise for repeated identical crosscuts, but for a homeowner who wants one tool to do everything except curves, it is hard to beat on value.
Table Saw: Best for Long Rip Cuts
When you need to rip many planks lengthwise, such as trimming the first and last rows to width across a whole room, a table saw is the most accurate and efficient tool. Its rip fence guarantees a consistent width plank after plank. Use a fine-tooth blade and cut with the good side up. Table saws are the least portable and most expensive option here, so they make sense mainly if you already have one or are tackling a large project.
Choosing the Right Blade
The blade matters as much as the saw. Laminate’s melamine wear layer is extremely hard and dulls standard wood blades quickly. Use these guidelines:
- Miter and table saws: A carbide-tipped fine-tooth blade, 60 to 80 teeth, for clean crosscuts.
- Circular saw: A fine-tooth carbide blade, and consider a dedicated laminate or melamine blade.
- Jigsaw: A fine-tooth, down-cutting laminate blade to minimize top-face chipping.
Cutting laminate face-down with tools that chip on top, and face-up with tools that chip on the bottom, keeps the visible surface clean no matter the saw.
A Smart Two-Tool Combo
For nearly any laminate project, the ideal, affordable pairing is a laminate cutter or miter saw for straight cuts plus a jigsaw for everything curved. That combination covers 100 percent of the cuts you will encounter, controls dust where it matters, and costs far less than a full pro tool set. Choose the laminate cutter if quiet, dust-free work is a priority; choose the miter saw if speed and a crisp edge matter more.
Reducing Chipping and Getting Clean Edges
Chipping, called tear-out, is the number one complaint when cutting laminate, and a few techniques nearly eliminate it. Beyond orienting the good face correctly for your tool, apply a strip of painter’s tape along the cut line before you saw; the tape supports the fragile surface fibers and reduces splintering. Feed the material slowly and let the blade do the work rather than forcing it, since rushing tears the wear layer. Keep your blade sharp, because a dull blade is the biggest cause of ragged edges. For visible cuts, such as the end of a plank that meets a doorway, a fine-tooth blade with more teeth produces a cleaner edge than a general-purpose blade. These small habits turn rough, chipped cuts into tight, professional-looking joints.
Managing Dust and Noise During Cutting
Where you cut matters as much as what you cut with. Powered saws throw a surprising amount of fine, gritty laminate dust that settles on everything and irritates the lungs, so set up your cutting station outdoors, in a garage, or by an open window whenever possible. Attach a shop vacuum to your miter saw’s dust port to capture much of it at the source, and wear a dust mask regardless. If you live in an apartment or share walls, a manual laminate guillotine cutter sidesteps both problems entirely, cutting silently with zero airborne dust. Planning your dust and noise strategy before you start keeps the peace with family and neighbors and leaves you with a much easier cleanup at the end of the day.
Frequently Asked Questions
What is the easiest tool for a beginner to cut laminate?
A manual laminate cutter is the most beginner-friendly for straight cuts because it is quiet, dust-free, and requires no blade changes or setup. Pair it with a jigsaw for curves.
Should I cut laminate face up or face down?
It depends on the tool. Cut face up on a miter or table saw and face down on a circular saw and jigsaw, so any chip-out lands on the hidden side of the plank.
Can I use a regular wood blade on laminate?
You can, but it will dull fast and chip more. A carbide-tipped fine-tooth blade designed for laminate or melamine gives cleaner cuts and lasts much longer.
Do I need a table saw to install laminate?
No. Most installs are done with a miter saw or laminate cutter plus a jigsaw. A table saw only helps when you have many long rip cuts to make.
Prefer to explore on your own?
See how new flooring looks in your actual room in seconds — free, no signup.
Try the free Floor Studio →