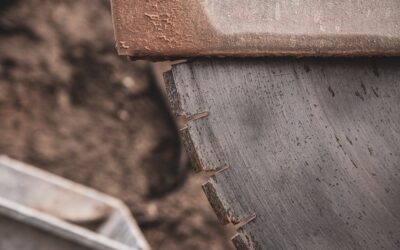
Knowing how to cut tile is the skill that separates a professional-looking tile job from an amateur one. Every tile installation requires cuts — around walls, doorways, outlets, pipes, and transitions. The right tool for each cut type makes the difference between clean, precise edges and chipped, ragged ones that ruin the finished look.
Part of our Tile & Grout guide — explore the full guide →
This guide covers every tile-cutting tool available, when to use each one, step-by-step techniques, safety essentials, the differences between cutting porcelain, ceramic, and natural stone, and whether you should buy or rent equipment.
Tile Cutting Tools Overview
There is no single tool that handles every tile cut. Professional tile installers carry multiple cutting tools because different situations demand different approaches. Here is a quick summary before we dive into each one.
| Tool | Best Cut Type | Tile Types | Cost Range | Skill Level |
|---|---|---|---|---|
| Manual tile cutter | Straight cuts | Ceramic, some porcelain | $25 – $200 | Beginner |
| Wet saw | All cuts (straight, diagonal, L-cuts) | All types | $80 – $1,200 (rent $50–$75/day) | Intermediate |
| Angle grinder | Curves, notches, small cuts | All types | $30 – $150 | Intermediate |
| Tile nippers | Small adjustments, curves | Ceramic, thin porcelain | $10 – $30 | Beginner |
| Hole saw / core bit | Round holes (pipes, drains) | All types | $15 – $50 per bit | Beginner |
Manual Tile Cutter (Snap Cutter)
The manual tile cutter — also called a snap cutter or rail cutter — is the simplest and quietest tile cutting tool. It scores a line on the tile surface with a carbide wheel, then snaps the tile along that scored line.
When to Use It
Use a manual cutter for straight cuts on ceramic tile and thinner porcelain tiles (up to about 12mm thick). It excels at cutting tiles to fit against walls where you need a straight, parallel cut. It is fast, portable, dust-free, and requires no electricity or water.
Technique
Step 1: Mark your cut line on the tile with a pencil or marker.
Step 2: Place the tile on the cutter platform and align the cut line with the scoring wheel.
Step 3: Press the handle down firmly to engage the scoring wheel, then push or pull it across the tile in one smooth, steady motion. Apply consistent pressure — you want to score the glaze in a single pass. Multiple passes create a jagged score line.
Step 4: Position the snapping foot over the scored line and press down firmly. The tile will break cleanly along the score.
Limitations
Manual cutters cannot make diagonal cuts, L-shaped cuts, or cuts narrower than about 1 inch from the edge (the tile piece is too small to snap cleanly). They also struggle with thick porcelain and natural stone, which require more force to score and snap. For those materials, use a wet saw.
Wet Saw
The wet saw is the most versatile tile cutting tool and the one professionals reach for most often. It uses a diamond-coated blade that spins through a stream of water, which cools the blade, reduces dust, and produces clean cuts.
When to Use It
Use a wet saw for virtually any cut: straight cuts, diagonal cuts, L-shaped cuts, plunge cuts, and miter cuts. It handles all tile materials including thick porcelain, ceramic, natural stone, and glass. If you are doing more than a small backsplash, a wet saw is essential.
Technique
Step 1: Fill the reservoir with water and ensure the pump is circulating water over the blade.
Step 2: Mark your cut line on the tile. For visibility through the water spray, use a wax pencil or make a mark on tape applied to the tile.
Step 3: Turn on the saw and let the blade reach full speed before starting your cut.
Step 4: Feed the tile into the blade slowly and steadily using the sliding table. Do not force the tile — let the blade do the work. Pushing too fast causes chipping and can bind the blade.
Step 5: For L-shaped cuts, make the longer cut first, then rotate the tile and make the shorter cut to remove the waste piece.
Pro Tips
- For chip-free cuts on glazed tile, cut with the glazed side up so the blade exits through the back.
- Support long tile pieces on both sides of the blade to prevent them from snapping before the cut is complete.
- Change the water regularly — muddy water reduces cooling efficiency and visibility.
- A sharp blade cuts cleanly; a dull blade chips. Replace the blade when cuts become rough even at slow feed rates.
Angle Grinder
An angle grinder fitted with a diamond blade is the go-to tool for curved cuts, notches, and any cut that a wet saw or manual cutter cannot handle.
When to Use It
Use an angle grinder to cut curves (around toilet flanges, for example), make notch cuts for door frames, cut sink openings, and trim tiles in place where removing them to use a wet saw is impractical. The angle grinder is also useful for cutting a straight line on a single tile when setting up a wet saw is not justified.
Technique
Step 1: Mark your cut line clearly. For curves, use a template or trace the obstacle’s outline onto the tile.
Step 2: Clamp the tile securely. An angle grinder requires two hands for safe operation, so the tile must not move.
Step 3: Start the cut by scoring the surface with a light pass, then gradually deepen the cut with subsequent passes. For curves, make a series of straight cuts tangent to the curve (like cutting facets on a gem), then clean up the curve with the edge of the blade or tile nippers.
Step 4: Smooth rough edges with a rubbing stone or diamond hand pad.
Important Safety Note
Angle grinders produce significant dust when cutting tile dry. Always wear a P100 respirator and safety glasses. If possible, have a helper direct a shop vacuum at the cut to capture dust. Some angle grinders accept dust shrouds that connect to a vacuum.
Tile Nippers
Tile nippers are handheld pliers with carbide-tipped jaws that bite small pieces off the edge of a tile. They are the simplest tile cutting tool — no electricity, no water, no setup.
When to Use Them
Use nippers for small adjustments — nibbling away 1/4 inch from an edge, shaping a rough curve after an angle grinder cut, or fitting mosaic tiles around obstacles. They are essential for any tile installation toolkit even if you have every other tool on this list.
Technique
Position the nipper jaws so they grip about 1/8 inch of tile at a time. Squeeze firmly and twist slightly to break away a small piece. Work gradually — removing too much at once cracks the tile unpredictably. Always nip from the edge inward, and smooth the final edge with a rubbing stone.
Limitations
Nippers are slow for anything more than minor adjustments and do not produce perfectly straight edges. They work best on ceramic and thin porcelain. Thick porcelain and stone are too dense for nippers to grip effectively.
Hole Saw (Core Drill Bit)
A diamond-coated hole saw (also called a core drill bit) cuts perfect round holes in tile. This is the tool you need for pipe penetrations, shower valve openings, and toilet bolt holes.
When to Use It
Any time you need a round hole in a tile. Common applications include water supply pipes, drain openings, shower mixer valves, and towel bar anchors.
Technique
Step 1: Mark the center of the hole on the tile.
Step 2: Attach the appropriately sized diamond hole saw to your drill. Use a drill with variable speed control.
Step 3: Start drilling at an angle to create a groove, then gradually bring the drill perpendicular to the tile surface. Apply moderate, steady pressure. Do not push hard — let the diamond grit do the cutting.
Step 4: Keep the bit wet throughout the cut. Use a spray bottle or have a helper trickle water over the cutting area. Dry drilling overheats the bit and can crack the tile.
Step 5: Drill from the glazed side to prevent chipping on the visible face.
Tool Comparison Table
| Feature | Manual Cutter | Wet Saw | Angle Grinder | Nippers | Hole Saw |
|---|---|---|---|---|---|
| Straight cuts | Excellent | Excellent | Good | Poor | N/A |
| Diagonal cuts | No | Excellent | Good | No | N/A |
| Curved cuts | No | Limited | Excellent | Fair | Circles only |
| Round holes | No | No | No | No | Excellent |
| L-shaped cuts | No | Excellent | Good | No | No |
| Noise level | Very low | High | Very high | Low | Moderate |
| Dust generated | None | None (water) | Very high | Low | Low (with water) |
| Portability | Excellent | Poor | Excellent | Excellent | Excellent |
Cutting Different Tile Materials
Ceramic Tile
Ceramic is the easiest tile to cut. Its softer body and glazed surface score and snap cleanly with a manual cutter. Wet saws, angle grinders, and nippers all work well on ceramic. This is the ideal material for beginners learning how to cut tile.
Porcelain Tile
Porcelain is significantly harder and denser than ceramic, which makes it more prone to chipping during cuts. Use a wet saw with a porcelain-rated diamond blade for best results. Manual cutters work on thin porcelain but produce rougher edges on thick, through-body porcelain. Cut more slowly than with ceramic and use a new or sharp blade to minimize chipping.
Natural Stone
Marble, granite, travertine, and slate each have unique cutting characteristics. Marble is relatively soft but chips easily — use a wet saw and cut slowly. Granite is extremely hard and requires a wet saw with a continuous-rim diamond blade. Travertine has voids that can catch blades, so support the tile fully and cut slowly. Slate tends to flake along its layers — cut from the face side to keep the visible surface clean.
Glass Tile
Glass tile chips and cracks easily if cut improperly. Use a wet saw with a glass-specific diamond blade that has a finer grit than standard blades. Score and snap methods work for straight cuts on some glass tiles but produce inconsistent results. Always cut glass slowly and support both sides of the cut to prevent cracking. For tile installation with glass, practice on waste pieces before cutting final tiles.
Safety Essentials
Tile cutting creates sharp edges, fine dust, flying chips, and significant noise. Proper safety equipment is non-negotiable.
- Safety glasses or goggles: Required for every cutting method. Tile chips are sharp and can fly unpredictably.
- Hearing protection: Wet saws and angle grinders produce 90 to 110 decibels. Wear earplugs or earmuffs.
- Dust respirator (P100 or N95): Essential when using an angle grinder or any dry-cutting method. Silica dust from tile is a serious respiratory hazard with long-term health consequences.
- Cut-resistant gloves: Fresh-cut tile edges are razor sharp. Wear gloves when handling cut pieces.
- Stable work surface: Never hold tile in your hands while cutting. Always use a clamping system, the saw’s sliding table, or a stable workbench.
Buying vs Renting Tile Cutting Tools
| Tool | Buy Price | Rental Price | Buy If… | Rent If… |
|---|---|---|---|---|
| Manual tile cutter | $25 – $200 | $15 – $25/day | You do tile work regularly | One-time project with ceramic only |
| Wet saw (tabletop) | $80 – $300 | $50 – $75/day | Budget models are close to rental cost for multi-day projects | One-room project; 1-2 day rental |
| Wet saw (professional) | $500 – $1,200 | $75 – $125/day | You are a contractor or frequent DIYer | Almost always rent unless you are a pro |
| Angle grinder | $30 – $150 | Rarely rented | Useful for many projects beyond tile | N/A — buying is almost always better |
| Tile nippers | $10 – $30 | Not available for rent | Always buy — they are inexpensive and essential | N/A |
| Diamond hole saw set | $15 – $50 | Rarely rented | You have multiple holes to cut | N/A — buy individual bits as needed |
For a typical single-room tile project, the most economical approach is to buy a manual cutter ($30 to $50), rent a wet saw for 1 to 2 days ($50 to $75/day), buy tile nippers ($15), and buy a diamond hole saw if pipe penetrations are needed ($15 to $25). Total tool cost: $110 to $165.
Frequently Asked Questions
What is the easiest tool to cut tile with?
A manual tile cutter (snap cutter) is the easiest tool for straight cuts on ceramic tile. It requires no electricity, produces no dust, and works with a simple score-and-snap action. For beginners, it is the best starting point. However, it only handles straight cuts on softer tile materials.
Can you cut tile without a wet saw?
Yes. A manual tile cutter handles straight cuts on ceramic tile. An angle grinder with a diamond blade handles curves, notches, and cuts on harder materials. Tile nippers make small adjustments. However, a wet saw produces the cleanest cuts on all materials and is recommended for porcelain, stone, and any project with complex cuts.
How do you cut porcelain tile without chipping?
Use a wet saw with a sharp, porcelain-rated diamond blade. Cut slowly, letting the blade do the work without forcing the tile. Cut with the glazed side up so the blade enters through the face and exits through the back, placing any chipping on the hidden side. A new blade and slow feed rate are the two biggest factors in chip-free porcelain cuts.
Do I need a wet saw for a backsplash?
For a small ceramic backsplash, a manual tile cutter and tile nippers may be sufficient. For a larger backsplash, porcelain tile, or any backsplash requiring L-shaped cuts around outlets and windows, a wet saw makes the job significantly easier and produces cleaner results. Renting one for a day ($50 to $75) is worthwhile for most backsplash projects.
How much does it cost to rent a tile saw?
Tabletop wet saws rent for $50 to $75 per day or $150 to $250 per week at most home improvement stores and tool rental centers. Professional-grade saws with larger cutting capacity rent for $75 to $125 per day. A weekend rental is usually sufficient for a single-room tile project.
Can I cut tile with a circular saw?
Technically yes, with a diamond blade designed for tile. However, circular saws produce enormous amounts of dust (they cannot use water cooling like wet saws), and the cuts are rougher. An angle grinder is a better dry-cutting option because it is easier to control and available with dust shrouds. A wet saw remains the best tool for clean, dust-free tile cuts.
Prefer to explore on your own?
See how new flooring looks in your actual room in seconds — free, no signup.
Try the free Floor Studio →