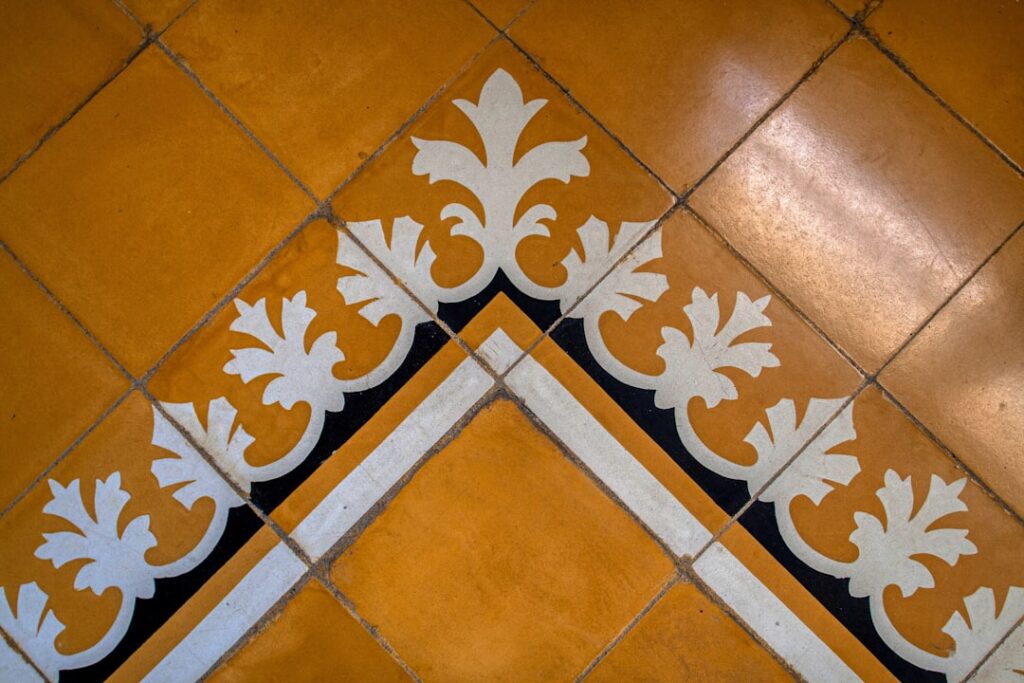
A proper tile installation transforms kitchens, bathrooms, entryways, and living spaces with a floor that lasts decades. Ceramic and porcelain tile remain among the most durable flooring options available, but their longevity depends entirely on how well the installation is executed. Shortcuts during subfloor preparation, layout planning, or grouting lead to cracked tiles, hollow spots, and grout failure within a few years.
Part of our Tile & Grout guide — explore the full guide →
This guide walks you through every step of tile installation — from gathering the right tools and preparing your subfloor to setting tiles, grouting, and sealing. Whether you plan to tackle the project yourself or hire a professional, understanding the full process helps you make better decisions and avoid the most expensive mistakes.
- Tools and Materials You Need
- Subfloor Preparation
- Layout Planning and Dry Fit
- Thinset Mixing and Application
- Setting Tiles and Using Spacers
- Cutting Tiles
- Grouting Process
- Sealing Grout and Tile
- DIY vs Professional Tile Installation
- Tile Installation Cost Breakdown
- Installation Timeline
- Common Tile Installation Mistakes
- Frequently Asked Questions
Tools and Materials You Need
Before starting any tile installation, gather every tool and material so you do not have to stop midway through a section with thinset drying on the floor.
Essential tools: notched trowel (sized to your tile — 1/4″ x 3/8″ for most floor tiles), tile cutter or wet saw, tile spacers, rubber grout float, mixing drill with paddle attachment, level (48-inch preferred), chalk line, tape measure, knee pads, sponge, and buckets.
Materials: tile (order 10% extra for cuts and breakage), thinset morite (modified or unmodified depending on substrate), grout (sanded for joints wider than 1/8″, unsanded for narrower joints), grout sealer, cement backer board (if over plywood subfloor), backer board screws, fiberglass mesh tape, and transition strips for doorways.
Optional but helpful: tile leveling system (clips and wedges), angle grinder with diamond blade for intricate cuts, laser level for long reference lines, and a grout removal tool for corrections.
Subfloor Preparation
Subfloor preparation is the most critical phase of tile installation. More tile jobs fail because of poor subfloor prep than any other reason. The subfloor must be flat, clean, structurally sound, and appropriate for tile.
Concrete subfloors are ideal for tile. Check for flatness using a 10-foot straightedge — the surface should not deviate more than 1/4 inch over 10 feet. Fill low spots with a self-leveling compound and grind down high spots. The concrete must be fully cured (at least 28 days for new pours) and free of sealers, paint, or contaminants that prevent thinset adhesion. A moisture test is essential — use the calcium chloride test or relative humidity probe method to confirm levels are within acceptable ranges.
Plywood subfloors require cement backer board as an intermediate layer. Tile installed directly over plywood will eventually crack because wood expands and contracts with humidity changes while tile does not. Install 1/2-inch cement backer board (such as HardieBacker or Durock) over the plywood using modified thinset and backer board screws every 8 inches. Tape all seams with alkali-resistant fiberglass mesh tape embedded in thinset. The combined subfloor assembly (plywood plus backer board) should be at least 1-1/8 inches thick to minimize deflection.
Existing flooring: Tile can be installed over existing tile if the old tile is firmly bonded, level, and cleaned with a deglossing agent. You cannot tile over vinyl, carpet, or floating laminate — these must be removed first. For a complete guide to subfloor requirements, see our flooring installation resource.
Layout Planning and Dry Fit
Layout planning determines how your finished floor looks. Poor layout results in thin slivers of tile along walls, misaligned grout lines with adjacent rooms, and wasted material.
Find center lines. Measure and snap chalk lines at the center of the room in both directions. These perpendicular lines create four quadrants and serve as your starting reference. Check that the lines are perfectly square using the 3-4-5 triangle method.
Dry fit a full row. Lay tiles along both center lines without adhesive, using spacers, from the center to each wall. If the last tile against the wall would be less than half a tile wide, shift your center line by half a tile width. Slivers smaller than half a tile look amateur and are prone to cracking.
Account for the focal point. In kitchens, align the layout to the most visible wall or the island. In bathrooms, center on the vanity or the doorway. The eye naturally goes to the most prominent feature, and grout lines that are visually off-center at that point will always look wrong.
Plan for transitions. Where tile meets other flooring types, you need a transition strip. Plan these locations before you start so you know exactly where to end your tile field.
Thinset Mixing and Application
Thinset mortar is the adhesive that bonds tile to the subfloor. Mixing it correctly is essential — too wet and it will not hold the tile; too dry and it will not bond properly.
Mixing instructions: Add thinset powder to clean water (never the reverse) following the manufacturer’s ratio, typically about 5 quarts of water per 50-pound bag. Mix with a drill and paddle at low speed until you achieve a smooth, peanut-butter-like consistency with no lumps. Let the mixture slake (rest) for 10 minutes, then remix briefly. The thinset should hold its shape when scooped with a trowel without sliding off.
Modified vs unmodified thinset: Modified thinset contains latex polymers for better adhesion and flexibility — use it for plywood subfloors, backer board, and most floor tile jobs. Unmodified thinset is used over uncoupling membranes (like Ditra) and over concrete in situations where the manufacturer specifies it.
Application technique: Spread thinset over a small area (about 3 to 4 square feet at a time) using the flat side of your notched trowel, then comb through it with the notched side held at a 45-degree angle. The ridges should be consistent and all run in the same direction. This technique ensures even coverage and makes it easier to set tiles level.
Working time: Most thinset remains workable for 20 to 30 minutes after spreading. If the surface skins over (forms a dry film), scrape it off and apply fresh thinset. Setting tile into skinned-over thinset produces a weak bond that will eventually fail.
Setting Tiles and Using Spacers
With your layout planned and thinset applied, you can begin setting tiles. Work from the center of the room outward, completing one quadrant at a time.
Back-buttering large tiles. For tiles larger than 12 x 12 inches, apply a thin coat of thinset to the back of each tile in addition to the floor. This ensures full coverage — the industry standard requires at least 80% coverage for interior floors and 95% for wet areas and exterior installations.
Setting the tile. Press each tile into the thinset with a slight twisting motion, then push it into alignment with your reference lines. Do not slide tiles through the thinset, as this pushes adhesive into the joint space where grout belongs.
Using spacers. Insert tile spacers at each corner to maintain consistent grout joints. Standard floor tile joints are 1/8 to 3/16 inch wide. Larger format tiles (16 inches and up) typically look better with 1/8-inch joints. Smaller tiles and rustic styles may use 3/16-inch or wider joints.
Checking level. After every few tiles, lay your level across the surface in multiple directions. Tap high tiles down gently with a rubber mallet. If a tile sits too low, pull it up, add more thinset, and reset it. Tile leveling systems (clip-and-wedge type) are extremely helpful for large-format tiles and ensure lippage stays below 1/32 inch.
Allow the thinset to cure for at least 24 hours before walking on the tiles or beginning grouting. In cool or humid conditions, allow 48 hours.
Cutting Tiles
Every tile installation requires cuts along walls, around obstacles, and at transitions. The right tool depends on the cut type.
Manual tile cutter (snap cutter): Best for straight cuts on ceramic tile. Score the surface once with firm, even pressure, then snap. Fast and dust-free, but limited to straight lines and does not work well on porcelain or natural stone.
Wet saw: The most versatile cutting tool. A diamond blade cooled by water handles ceramic, porcelain, and stone with clean, precise cuts. Essential for porcelain tile, L-cuts, and any job with many cuts. Rental cost is typically $50 to $75 per day.
Angle grinder with diamond blade: Used for notches, curves, and outlet cutouts that a wet saw cannot handle. Creates significant dust — always wear a respirator and eye protection.
Tile nippers: For small, irregular nibbles around pipes and curved obstacles. Work slowly, removing small pieces at a time to avoid cracking the tile.
Grouting Process
Grouting fills the joints between tiles, creating a finished surface that is water-resistant and visually cohesive. The process is straightforward but requires attention to timing.
Remove spacers and clean any thinset from the joints before grouting. Thinset left in the joints prevents grout from filling the full depth, creating weak points.
Mix the grout to the manufacturer’s specifications. Like thinset, grout should have a smooth, toothpaste-like consistency. Allow it to slake for 10 minutes and remix. Mix only as much as you can apply in 20 to 30 minutes.
Apply grout using a rubber grout float held at a 45-degree angle to the floor. Press grout diagonally across the joints, forcing it into every gap. Work in sections of about 10 square feet. After filling the joints, hold the float at a steeper angle (nearly 90 degrees) and scrape excess grout from the tile surface, moving diagonally across the joints to avoid pulling grout out.
Clean the surface. After 15 to 20 minutes (when the grout is firm but not fully hard), wipe the tile surface with a damp — not soaking wet — sponge. Rinse the sponge frequently. Two or three passes are typically needed. A haze will remain on the tile surface; remove this with a dry cloth or cheesecloth the following day.
For more details on maintaining grout after installation, see our guide on how to clean grout.
Sealing Grout and Tile
Grout is porous and will absorb stains and moisture unless sealed. Seal all cement-based grout 48 to 72 hours after installation, once it has fully cured.
Penetrating sealers soak into the grout and block moisture from within. They do not change the appearance of the grout and last 3 to 5 years before reapplication. This is the standard choice for most floor installations.
Topical sealers form a film over the grout surface. They provide stronger stain protection but can peel or wear in high-traffic areas and may give the grout a slight sheen.
Epoxy grout does not require sealing. If you chose epoxy grout during installation, you can skip this step. Epoxy grout is more expensive and harder to work with but is virtually stain-proof and ideal for kitchen and bathroom floors.
Natural stone tiles (slate, marble, travertine) also need sealing before grouting and again after. Stone is porous and will permanently stain if grout residue gets into its surface during installation.
DIY vs Professional Tile Installation
Tile is one of the more challenging flooring materials to install yourself. The skill threshold is higher than click-lock vinyl or laminate, and mistakes are expensive to fix because tiles must be chiseled out and replaced individually.
| Factor | DIY Installation | Professional Installation |
|---|---|---|
| Cost (labor) | $0 (your time) | $4 – $12 per sq ft |
| Tool investment | $150 – $400 (wet saw rental + tools) | Included |
| Time (200 sq ft room) | 3 – 5 days (weekends) | 1 – 2 days |
| Skill level required | Intermediate to advanced | N/A |
| Warranty | Material warranty only | Labor + material warranty |
| Best for | Small rooms, simple layouts, experienced DIYers | Large areas, complex patterns, heated floors |
When to DIY: A small bathroom floor with standard 12×12 ceramic tiles on a concrete slab is a reasonable first tile project. The room is small enough that mistakes are contained, and the layout is usually straightforward.
When to hire a pro: Large-format porcelain tiles (24×24 or larger), diagonal or herringbone patterns, shower tile installations, heated floor systems, and any job involving natural stone should be left to experienced tile setters. The cost difference between DIY and professional installation is often less than the cost of fixing a failed DIY job.
Tile Installation Cost Breakdown
The total cost of tile installation includes materials, labor, and commonly overlooked extras. Here is what to budget in 2026.
| Cost Component | Price Range |
|---|---|
| Ceramic tile (material) | $1.00 – $4.00 per sq ft |
| Porcelain tile (material) | $3.00 – $8.00 per sq ft |
| Natural stone tile (material) | $5.00 – $20.00+ per sq ft |
| Thinset mortar | $0.25 – $0.50 per sq ft |
| Grout | $0.15 – $0.40 per sq ft |
| Cement backer board | $0.40 – $0.75 per sq ft |
| Professional labor | $4.00 – $12.00 per sq ft |
| Old flooring removal | $1.00 – $3.00 per sq ft |
| Subfloor leveling | $2.00 – $5.00 per sq ft |
Total installed cost: For a standard ceramic tile floor with professional installation, expect to pay $6 to $15 per square foot. Porcelain runs $8 to $20 per square foot installed. Natural stone ranges from $12 to $35+ per square foot depending on the stone type. Visit our tile flooring page for specific product recommendations and pricing.
Installation Timeline
A typical tile installation for a 150 to 200 square foot room follows this timeline when done by professionals:
Day 1: Demolition of existing flooring and subfloor preparation (leveling, backer board installation if needed).
Day 2: Layout, tile setting, and cuts. Most of the tile field is completed.
Day 3: Remaining cuts, threshold tiles, and thinset cure time (24 hours minimum before grouting).
Day 4: Grouting and initial cleanup.
Day 5 – 7: Grout curing, sealing, and transition strip installation. Light foot traffic is usually safe after 48 hours; heavy furniture should wait 72 hours.
DIY timelines typically stretch to 5 to 10 days depending on experience and the complexity of cuts required.
Common Tile Installation Mistakes
Avoiding these common errors saves you from costly repairs and early tile failure.
Skipping the flatness check. Tile does not bend. If your subfloor has dips or humps exceeding 1/4 inch over 10 feet, tiles will rock, crack at high spots, and develop hollow areas at low spots. Self-leveling compound is cheap insurance.
Inadequate thinset coverage. Insufficient adhesive leaves voids beneath tiles. These hollow spots crack under foot traffic and produce a distinctive hollow sound when tapped. Always back-butter large format tiles and periodically pull up a freshly set tile to check coverage.
Not mixing enough thinset at once. Mixing tiny batches leads to inconsistent consistency and rushed work. Mix enough for a reasonable work area, but not more than you can use in 30 minutes.
Grouting too soon. Grouting before the thinset has fully cured can shift tiles and trap moisture beneath them. Wait at least 24 hours — 48 in cool or humid conditions.
Using the wrong trowel size. A trowel that is too small leaves insufficient adhesive beneath the tile. A trowel that is too large wastes material and creates too much squeeze-out. Match your trowel size to your tile size: 1/4″ x 1/4″ for tiles up to 8 inches, 1/4″ x 3/8″ for 12- to 16-inch tiles, and 1/2″ x 1/2″ for tiles 16 inches and larger.
Forgetting expansion gaps. Tile floors need a small gap (1/8 to 1/4 inch) at all walls, columns, and transitions. This gap allows the subfloor and tile assembly to expand and contract without cracking. Cover the gap with baseboard or shoe molding.
Ignoring tile calibration. Not all tiles from the same box are exactly the same size. Check tiles from different boxes before starting and blend boxes during installation to distribute any minor size variations evenly across the floor.
For detailed guidance on the full range of flooring installation options, visit our comprehensive installation resource.
Frequently Asked Questions
How long does tile installation take?
Professional tile installation for a standard room (150–200 sq ft) takes 2 to 4 days including subfloor prep, tile setting, and grouting. Add 2 to 3 days for grout curing and sealing before the room is fully usable.
Can I install tile over existing tile?
Yes, if the existing tile is firmly bonded to the subfloor, level, and in good condition. Clean the old tile with a deglossing agent or abrade the surface to improve adhesion. This adds height to your floor, so check that doors still clear and transitions to adjacent rooms work.
What size spacers should I use for floor tile?
For most floor tiles, use 1/8-inch to 3/16-inch spacers. Large format tiles (16 inches and larger) typically use 1/8-inch spacers for a clean, modern look. Rustic or handmade tiles look better with wider 3/16-inch or 1/4-inch joints that accommodate size variation.
Do I need cement backer board?
Over plywood subfloors, yes — cement backer board is required to provide a stable, rigid surface for tile. Over concrete subfloors, backer board is not needed. In wet areas like showers, backer board plus a waterproofing membrane is standard practice.
How soon can I walk on newly installed tile?
Wait at least 24 hours after setting tiles before walking on them, and 24 hours after grouting before allowing foot traffic. Heavy furniture should wait 72 hours after grouting. Full cure for the entire system takes about 28 days.
Is tile installation a good DIY project?
Small, simple tile jobs (like a bathroom floor with standard ceramic tiles on concrete) are reasonable for intermediate DIYers. Complex layouts, large-format tiles, shower floors, and natural stone are best left to professionals due to the precision and experience required.
What is the most common reason tile floors fail?
Poor subfloor preparation is the number one cause of tile failure. An uneven, deflecting, or improperly prepared subfloor leads to cracked tiles, loose tiles, and grout failure regardless of how well the tile itself was installed.
Prefer to explore on your own?
See how new flooring looks in your actual room in seconds — free, no signup.
Try the free Floor Studio →