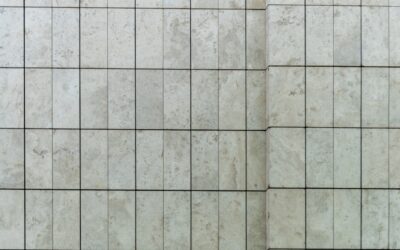
Gravity is the enemy of wall tile. Unlike a floor where tiles simply lie flat, every tile on a vertical surface fights to slide downward before the thinset cures. That single difference is why how to install tile on wall trips up beginners who assume it works like floor tiling. Master the right setting compound, a level starting line, and proper support, and you can tile a bathroom wall or kitchen backsplash that looks crisp and stays put for decades. Here is the process pros follow from bare wall to finished grout.
Gather Tools and Materials
Before you mix anything, assemble your kit. Having everything within reach prevents thinset from skinning over while you hunt for a tool. You will need the right notched trowel sized to your tile, which is the most overlooked detail in a clean job.
- Thinset mortar or, for small tiles, premixed tile adhesive (mastic)
- Notched trowel: 1/4-inch for tiles up to 8 inches, 1/2-inch for larger
- Tile spacers, a level, a tape measure, and a chalk line
- Tile cutter or wet saw, plus a notched nipper for cutouts
- Grout, a rubber float, sponges, and a margin trowel
Buy roughly 10 percent more tile than your square footage to cover cuts and breakage. Running short mid-project often means a dye-lot mismatch on the reorder.
Prepare the Wall Surface
A tile job is only as good as the surface under it. The wall must be clean, dry, flat, and structurally sound. For wet areas like showers and tub surrounds, install cement backer board or a waterproof membrane rather than tiling over regular drywall, which fails when it absorbs moisture.
In dry areas such as a kitchen backsplash, clean, primed drywall is acceptable. Scuff glossy paint with sandpaper so the thinset bonds, fill any holes, and check the wall for flatness with a level. High and low spots over 1/8 inch in 10 feet should be corrected, because a wavy wall produces lippage where tile edges sit proud of each other.
Plan Your Layout
Smart layout is what separates a professional result from an amateur one when learning how to install tile on wall. Find the horizontal center of your wall and dry-lay a row of tiles with spacers to see where the cuts land. You want to avoid thin sliver cuts at the corners, so shift the layout to balance partial tiles on both ends.
Never trust your floor or countertop to be level. Snap a level chalk line for your first full row, and screw a straight wood batten, called a ledger board, along that line. The ledger supports the weight of the tiles so they cannot slump while the thinset sets. You tile the bottom row last, after removing the batten.
Mix and Apply the Thinset
Mix thinset to a peanut-butter consistency, stiff enough to hold a ridge but spreadable. Let it slake for about 10 minutes, then remix. Working in sections no larger than you can tile in 15 minutes, spread mortar on the wall with the flat side of the trowel, then comb it into even ridges with the notched edge held at a 45-degree angle.
Press each tile firmly into the ridges with a slight twisting motion to collapse them and ensure full contact. For large or heavy tiles, also butter the back, a technique called back-buttering, to guarantee a strong bond. Insert spacers as you go to keep grout lines uniform, and check your work with a level every few tiles.
Cut Tiles for Edges and Outlets
Few walls accept only full tiles. For straight cuts along edges, a manual snap cutter handles most ceramic and porcelain quickly. For curves, outlet cutouts, and notches around fixtures, use a wet saw or tile nippers, smoothing rough edges with a rubbing stone.
Measure each cut individually rather than assuming uniformity, since walls are rarely perfectly square. Around electrical boxes, turn off the power, remove cover plates, and cut tiles so the box opening is concealed by the plate once reinstalled. Leave a small gap at inside corners and along the tub or counter for a flexible caulk joint instead of grout.
Grout and Seal the Tile
Let the thinset cure for at least 24 hours before grouting, and remove the ledger board to tile the final bottom row. Mix grout to a thick, smooth consistency and force it into the joints with a rubber float held at a 45-degree angle, working diagonally across the tiles to pack the lines fully.
Wait about 15 to 20 minutes, then wipe the surface with a damp, well-wrung sponge in gentle circles, rinsing often. A hazy film will appear as the grout dries, which you buff off with a dry cloth after a few hours. Apply a grout sealer after the grout cures for 48 to 72 hours to resist stains and moisture, especially in showers.
Finishing Touches
Caulk all the changes of plane, the inside corners, and the joints where tile meets the tub, sink, or countertop, using a color-matched silicone instead of grout, which would crack at these flexible junctions. Reinstall outlet covers and fixtures, and avoid getting the new tile wet for at least 24 hours.
Once you understand how to install tile on wall properly, the project becomes a manageable weekend job rather than a gamble. Respect the cure times, support the weight with a ledger, and keep your lines level, and you will end up with a durable, watertight surface that looks like it was set by a seasoned tile setter.
Common Mistakes to Avoid
A handful of errors account for most wall-tile failures, and they are all preventable. Skipping the ledger board and trying to stack tiles from the floor up lets the entire wall slump before the thinset grabs. Using the wrong trowel notch leaves voids behind the tile that cause cracks and hollow spots later. Mastic in a wet shower instead of proper thinset and waterproofing leads to mold and bond failure.
- Tiling over unprepared, glossy, or moisture-prone surfaces
- Letting thinset skin over before pressing tiles in
- Forgetting to leave caulk joints at corners and changes of plane
- Grouting before the thinset has cured for 24 hours
- Sliver cuts at the corners from poor layout planning
Maintaining Your Finished Wall
A little upkeep keeps tile looking new for decades. Reseal the grout once a year in wet areas to guard against staining and moisture intrusion, and inspect the caulk joints periodically, replacing any that crack or pull away. Clean with a pH-neutral cleaner rather than harsh acids, which can erode grout and etch natural stone tiles. Address any loose or hollow-sounding tile promptly before water gets behind it, and your installation will stay watertight and attractive for the long haul.
Prefer to explore on your own?
See how new flooring looks in your actual room in seconds — free, no signup.
Try the free Floor Studio →