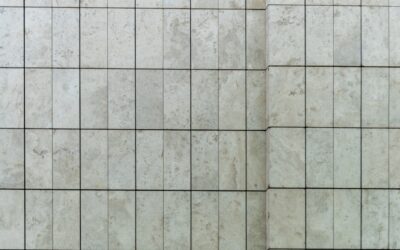
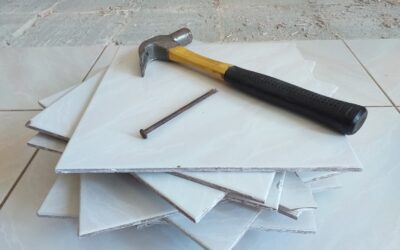
24 x 24 tile has become the default choice for homeowners who want a clean, modern, seamless-looking floor, and it’s easy to understand the appeal. These large two-foot squares cover ground fast, minimize grout lines, and make rooms feel bigger and more open than smaller tile ever could. Whether in porcelain, ceramic, or natural stone, large-format tile reads as upscale and contemporary, which is why you see it in so many new builds and high-end remodels. But bigger tile brings bigger installation demands, and knowing them up front is the difference between a flawless floor and a lippy, cracked disappointment.
Part of our Tile & Grout guide — explore the full guide →
This guide covers why 24 x 24 tile is so popular, the layout choices that make it look best, the critical subfloor preparation it requires, grout and cost considerations, and the installation challenges that make this a job to take seriously. Get the fundamentals right and large-format tile delivers a genuinely stunning result.
Why Homeowners Choose Large Format
The main draw is the clean, expansive look. With fewer tiles covering the same area, you get far fewer grout lines, which makes a floor look more seamless and continuous. That uninterrupted expanse tricks the eye into perceiving a room as larger, so 24 x 24 tile is a favorite for making small bathrooms, entryways, and open living areas feel more spacious.
Fewer grout lines also mean less grout to clean and maintain, which is a genuine practical benefit since grout is the part of any tiled floor that stains and shows dirt. Large-format porcelain in particular offers the durability and water resistance of tile with a modern, minimalist aesthetic that suits contemporary design. The look is polished and high-end, and the reduced maintenance is a bonus that appeals to busy households.
Layout and Design Choices
How you lay 24 x 24 tile shapes the whole room. A straight grid layout, with tiles aligned in clean rows, emphasizes the modern, orderly character of large format and is the most common and foolproof choice. Running the grid parallel to the longest wall reinforces the sense of space. A diagonal layout rotates the grid 45 degrees for a more dynamic look, though it creates more cut tiles and waste.
One important rule with large-format tile is grout-line offset. The old habit of a 50 percent brick-style offset does not work well with big tiles, because most large tiles have a slight curve or warp across their length, and a half offset places the high center of one tile against the low corner of its neighbor, causing lippage, where edges sit at different heights. Industry guidance is to keep any offset to no more than one-third of the tile length, and many installers simply use a straight grid. Planning the layout with this in mind prevents an uneven, lippy floor.
Subfloor Preparation Is Critical
This is the step people underestimate, and it’s the most important one. Large tiles are rigid and unforgiving, so the subfloor beneath them must be exceptionally flat, more so than for small tile. Industry standards call for flatness within roughly 1/8 inch over 10 feet for large-format tile, and any dips or humps in the floor will telegraph as lippage between tiles or, worse, cracked tiles down the road.
Before tiling, check the floor with a long straightedge and correct any low spots with a self-leveling compound and grind down high spots. The subfloor also needs to be rigid enough to resist deflection, since flex under a rigid tile leads to cracks and popped tiles. On wood subfloors, that often means adding an appropriate underlayment or backer board. Skipping or rushing this prep is the number one cause of large-format tile failures, so it’s worth the extra time and often the extra cost.
Grout, Thinset, and Cost
Large tiles require the right materials and technique. Use a large-and-heavy-tile mortar, sometimes called medium-bed thinset, which is formulated to support the weight and size without slumping, and achieve full coverage under each tile by back-buttering, spreading thinset on the back of the tile in addition to the floor. Voids under a large tile are weak spots that lead to cracks, so full support is essential.
On grout, a common myth is that big tiles need almost no grout gap. In reality, because large tiles vary slightly in size and shape, a grout joint of at least 1/8 inch, and often 3/16 inch, is recommended to absorb that variation and keep lines straight. As for cost, 24 x 24 porcelain typically runs from around $3 to $10 per square foot for the tile, with premium and stone-look options higher, and installation costs more than for small tile because of the prep and the special handling large pieces demand.
Installation Challenges to Expect
Handling is the first challenge, since a single 24 x 24 tile is heavy and awkward, and large porcelain in particular can crack if flexed or dropped. Cutting is another, as these big tiles usually require a good wet saw rather than a snap cutter, and precise cuts around cabinets and fixtures take patience. Tile leveling systems, the clips and wedges that hold adjacent tiles flush while the mortar cures, are strongly recommended for large format because they prevent lippage that’s nearly impossible to fix once set.
All of this makes 24 x 24 tile a more demanding install than standard tile, and it’s a project where hiring an experienced installer often pays for itself, especially over a large area. If you tackle it yourself, invest the time in a dead-flat subfloor, use the right mortar with full coverage, employ a leveling system, and don’t skimp on the grout gap. Respect what large-format tile requires, and 24 x 24 tile rewards you with the sleek, spacious, low-maintenance floor that made it so popular in the first place.
Where 24 x 24 Tile Works Best
Large-format tile isn’t only for floors, and knowing its best applications helps you get the most from it. On floors it excels in open-concept living areas, kitchens, entryways, and bathrooms, where the expansive, low-grout look reinforces a clean, contemporary feel and makes the space read larger. Porcelain versions handle the moisture and traffic of these rooms easily, and the reduced grout means less of the scrubbing that plagues small-tile floors.
On walls and showers, 24 x 24 tile creates a dramatic, seamless backdrop with minimal grout lines, which looks especially sharp in a modern shower or as a feature wall. Because the tiles are large and heavy, wall installations demand extra attention to support and setting so nothing slumps before the mortar cures, but the payoff is a spa-like, monolithic surface. The size does have limits: in very small or chopped-up rooms with lots of angles and fixtures, big tiles mean lots of cuts and waste, and the scale can overwhelm a tiny footprint. In those cases a smaller tile often suits the room better. But in medium-to-large open spaces where the tile can stretch out, 24 x 24 tile delivers a genuinely upscale, spacious result that smaller formats simply can’t match, which is exactly why it has become the modern standard.
Prefer to explore on your own?
See how new flooring looks in your actual room in seconds — free, no signup.
Try the free Floor Studio →