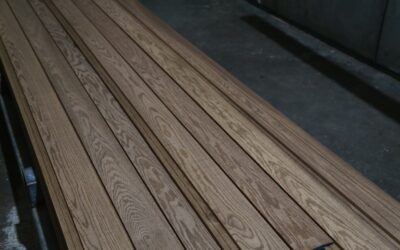
The reason so many homeowners tackle a floating floor themselves is the click. How to install Quick-Step flooring comes down to mastering one thing: the Uniclic angle-and-drop joint that lets planks lock together without glue or nails. Quick-Step is a real flooring brand made by Unilin, and its laminate and vinyl planks use this click system to float over a subfloor as a single connected surface. Get the prep, the expansion gap, and the click technique right, and a single room goes down in an afternoon. Rush the steps that don’t feel important, and the floor buckles or gaps within a season. Here is the proper sequence.
Acclimate the Flooring First
Before you open a single box for installation, let the planks adjust to the room. Lay the unopened or loosely stacked boxes flat in the room where they will be installed, away from walls, and leave them for the time the instructions specify, typically around 48 hours for laminate. The room should be at normal living temperature, roughly 64 to 75 degrees F, with stable humidity. This step matters because the planks expand and contract with the room’s conditions; install them cold or freshly delivered and they will move after locking, opening gaps or lifting at the joints.
Prepare the Subfloor
A floating floor is only as flat as what it sits on. Check the subfloor with a long straightedge; Quick-Step generally wants it flat within about 1/8 inch over roughly 6 feet, with no high spots or dips. Grind down high points and fill low spots with leveling compound. The subfloor must also be clean, dry, and structurally sound. On concrete, confirm the slab is dry, because trapped moisture is a leading cause of floating-floor failure, and use a moisture barrier where required.
Lay the Underlayment
Underlayment cushions the floor, smooths minor imperfections, and reduces sound. Some Quick-Step planks come with attached underlayment, in which case you skip this and simply add a separate moisture barrier over concrete if needed. Where you do lay underlayment, roll it out across the room, butt the seams together without overlapping, and tape them. Over concrete, use a combined or separate vapor barrier to keep slab moisture away from the planks.
Plan Your Layout
A few minutes of planning prevents an awkward finish. Measure the room and divide by the plank width to see how wide the final row will be; if that last row would be a sliver, trim the first row narrower so both edges look balanced. Lay planks parallel to the longest wall or toward the main light source for the cleanest look. Mix planks from several boxes as you go to blend any color and pattern variation across the floor rather than clustering it.
Set the Expansion Gap and Click the Planks
Here is the core of the job. The floor must be able to expand, so leave an expansion gap of about 5/16 inch (8 to 10 mm) around the entire perimeter and around every fixed object like pipes and posts. Use spacers against the walls to hold it.
- First row: place the first plank in a corner with the tongue side facing the wall and spacers in place. Connect planks end to end along the row by angling the new plank into the short-end joint and dropping it flat until it clicks.
- Stagger the seams: start the second row with a cut piece so end joints are offset from the previous row by at least the manufacturer’s minimum, commonly 8 inches or more. Staggering gives the floor strength and a natural look; never let end joints line up row to row.
- Angle-click the rows: lift the new row’s long edge to about a 20 to 30 degree angle, insert the tongue into the groove of the installed row, and lower it. The Uniclic joint snaps shut as it goes flat. Use the leftover cut from the end of one row to begin the next where the length allows.
- Snug the joints: if a joint needs persuasion, use a tapping block and a pull bar at the walls, never hammering the plank edge directly, which can damage the locking profile.
Fit Around Doors, Pipes, and Obstacles
Tricky spots are where DIY floors usually look amateur, so take your time. Undercut door jambs and casings: lay a scrap plank face-up next to the jamb, set a handsaw flat on it, and cut the jamb so the plank slides underneath for a clean, gap-free fit. For pipes, drill a hole slightly larger than the pipe to preserve expansion room, then cut a wedge to drop the plank around it and glue the wedge back. Maintain the expansion gap at every obstacle; the floor must float freely everywhere.
Finish the Last Row and Trim
The final row almost always needs ripping to width. Measure the remaining space minus the expansion gap, scribe and cut the planks lengthwise, then ease them home with a pull bar since there is no room to angle them. Once all planks are down, remove the spacers and cover the expansion gap with baseboard or quarter-round, fastening the trim to the wall, not the floor, so the floor can still move. Add transition strips at doorways and where the floor meets other surfaces.
Tools and Materials You’ll Need
Gather everything before you start so you are not breaking momentum mid-row.
- Spacers to hold the perimeter expansion gap consistently.
- Tapping block and pull bar to close joints without damaging the plank edges.
- A handsaw or jamb saw for undercutting door casings, plus a jigsaw or circular saw for rip cuts.
- A tape measure, pencil, and square for accurate layout and end cuts.
- Underlayment and tape (if not pre-attached) and a moisture barrier over concrete.
- A utility knife and a damp cloth to keep the work area clean as you go.
Quick-Step’s laminate cuts cleanly with the décor side up for a handsaw or jigsaw, and face-down for a circular saw, which reduces chipping on the visible surface.
Pro Tips for a Clean Result
Keep a few habits and the job goes smoothly: always tap with a block, not a bare hammer; check every few rows that the floor is staying square and tight; and save unopened planks and the SKU for future repairs. Respect the expansion gap above all else, because the single most common Quick-Step failure is a floor pinned against a wall or trim that has nowhere to expand and buckles. Acclimate properly, keep the subfloor flat and dry, master the angle-click, and your Quick-Step floor will lay flat, lock tight, and last for years.
Prefer to explore on your own?
See how new flooring looks in your actual room in seconds — free, no signup.
Try the free Floor Studio →