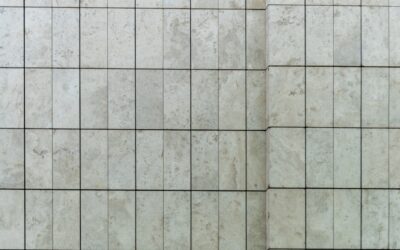
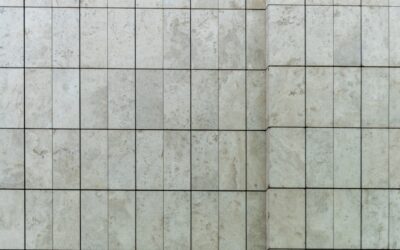
Knowing how to lay ceramic tile opens the door to durable, water-resistant, and beautiful floors and walls that can last for decades, and it is a project many homeowners can complete with patience and the right approach. Success comes down to three things: a flat, sound substrate, a carefully planned layout, and consistent technique with thinset and grout. Rush the preparation and even expensive tile will crack or lift; take the time to do it right and you will have a floor that looks professional and holds up to years of traffic and moisture.
Part of our Tile & Grout guide — explore the full guide →
This guide takes you through the full process in order, from preparing the subfloor to sealing the finished grout, with the specifics that make the difference between a lasting installation and a frustrating one.
Tools and Materials
Assemble everything before you begin so you can keep moving once the thinset is mixed. You will need:
- Ceramic tile (measure square footage and add about 10 to 15 percent for cuts and waste)
- Thinset mortar suited to your tile and substrate, and a mixing paddle and drill
- Notched trowel (size matched to your tile), grout float, and buckets
- Tile spacers, a level, and a chalk line and tape measure
- Tile cutter (snap cutter or wet saw) and tile nippers
- Grout, grout sponge, and grout sealer
- Cement backer board and screws if installing over a wood subfloor
- Knee pads, safety glasses, gloves, and a dust mask
Choosing the correct trowel notch and thinset for your tile size is not a detail to guess at; larger tiles need a larger notch and often a medium-bed mortar, so check the tile and adhesive manufacturer’s recommendations.
Step 1: Prepare a Flat, Solid Subfloor
Tile is rigid and unforgiving, so the surface beneath it must be flat, clean, dry, and stable. Any flex or movement will crack tile or grout. Over a concrete slab, clean it thoroughly and fill cracks or low spots with a leveling compound until the surface is flat. Over a wood subfloor, the floor must be stiff enough not to deflect; in most cases you install cement backer board over the plywood, set in thinset and screwed down, with seams taped and mortared.
Check the entire area with a long level or straightedge and correct any high or low spots, since a flat substrate is the single biggest factor in a successful tile job. Many installers add an uncoupling or waterproofing membrane in wet areas or over questionable subfloors for extra crack protection.
Step 2: Plan Your Layout
Never start tiling from a wall, because walls are rarely straight and you will end up with crooked lines and awkward slivers. Instead, find the center of the room by measuring and snapping two chalk lines that cross at 90 degrees in the middle. Dry-lay a row of tiles with spacers along both lines to see how the pattern falls.
Adjust your starting point so the cut tiles at opposite walls are roughly equal in width and no smaller than about half a tile, which looks far more balanced than a full tile on one side and a sliver on the other. Plan so the most visible areas get full tiles and cuts land along less noticeable edges. Mark your final reference lines clearly, since these guide the whole installation.
Step 3: Mix and Apply the Thinset
Mix the thinset to the consistency of thick peanut butter, following the bag’s water ratio, and let it slake (rest) for the time the manufacturer specifies before remixing. Work in small sections you can tile before the mortar skins over, typically a few square feet at a time.
- Spread thinset on the substrate with the flat side of the trowel, then comb it into ridges with the notched edge held at a consistent angle.
- Keep the ridges running in one direction, which helps air escape as you set the tile.
- Spread only as much as you can cover before the thinset starts to dry.
- For large tiles, also “back-butter” a thin layer onto the back of each tile for full coverage.
Full mortar coverage under each tile is critical; voids lead to cracks and hollow spots later. Periodically lift a set tile to confirm the back is fully coated.
Step 4: Set the Tiles
Working from your center lines outward, press each tile firmly into the thinset with a slight twisting motion to collapse the ridges and seat it fully. Insert tile spacers at each corner to keep grout lines uniform; spacer sizes commonly range from 1/16 to 1/4 inch depending on the look and tile.
Check frequently with a level and across the tops of adjacent tiles to keep the surface flat and avoid lippage, where one tile sits higher than its neighbor. Wipe away any thinset that squeezes up into the grout lines before it hardens, since dried thinset in the joints ruins the grout. Continue across the floor, cutting tiles as you reach walls and obstacles.
Step 5: Cut Tiles to Fit
For straight cuts at walls, a manual snap cutter scores and breaks the tile cleanly and quietly. For L-shaped notches, curves, and a high volume of cuts, a wet saw gives precise, chip-free results; its water keeps dust down and the blade cool. Use tile nippers to nibble small curves, such as around a pipe, and a hole saw for round penetrations.
Measure each cut tile individually, remembering to account for the grout-line spacing at the wall, and leave a small gap at the perimeter for expansion. Wear safety glasses when cutting, keep your hands clear of the blade on a wet saw, and follow the tool’s instructions. Cut tiles as you go rather than all at once, since walls are rarely perfectly straight.
Step 6: Let the Tile Set, Then Grout
Once all tiles are laid, let the thinset cure undisturbed for the time the manufacturer specifies, often around 24 hours, before walking on the floor or grouting. Removing the spacers and grouting too early can shift tiles and weaken the bond.
When the mortar has cured, remove the spacers and mix the grout to a smooth, spreadable consistency. Holding a grout float at roughly a 45-degree angle, work the grout diagonally across the joints, pressing it fully into each line and filling every gap. Spread only a manageable area at a time so you can clean it before it sets.
Step 7: Clean, Cure, and Seal
After the grout firms up for a short while, wipe the tile faces with a damp, well-wrung grout sponge, rinsing often and using light diagonal strokes so you do not pull grout out of the joints. A hazy film will remain; let it dry, then buff it off with a clean, dry cloth.
Let the grout cure fully, typically a few days, before exposing the floor to water or heavy traffic, following the grout manufacturer’s timeline. Once cured, apply a grout sealer to most cement-based grouts to resist staining and moisture, especially in kitchens and bathrooms; some modern grouts are pre-sealed or epoxy-based and skip this step. Reseal periodically as the product recommends.
Final Tips for Lasting Results
A few practices make all the difference. Never compromise on the flatness and stability of the substrate, because that is what most tile failures trace back to. Plan your layout from the center so cuts are balanced and lines stay true. Keep grout lines clean of thinset as you set tiles, and respect the cure times before grouting and before using the floor.
Work in small sections, keep your trowel angle and spacer sizes consistent, and check frequently for level and lippage. Follow these steps with patience, and you will lay ceramic tile that looks professional and stands up to daily life for many years. The care you put into preparation and layout is exactly what you will see, and walk on, every day afterward.
Prefer to explore on your own?
See how new flooring looks in your actual room in seconds — free, no signup.
Try the free Floor Studio →