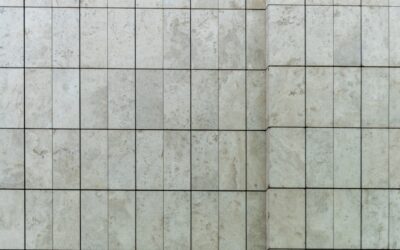
A tiled bathroom floor is one of the few DIY upgrades that pays off in both daily comfort and resale value, but it is also unforgiving of shortcuts because water finds every mistake. Laying tile in bathroom spaces successfully depends far more on what happens before the first tile goes down than on the tiling itself. Get the subfloor flat and waterproof, dry-lay a smart layout, and the actual setting becomes almost meditative. Skip those steps and you will be looking at cracked grout and loose tiles within a year. This guide walks the whole process from bare subfloor to sealed grout.
Part of our Bathroom Remodeling & Flooring guide — explore the full guide →
Preparing the Subfloor
Everything starts underfoot. Bathroom floors move, and tile does not, so the substrate has to be rigid and flat. Over a plywood subfloor, you cannot tile directly; you need a cement backer board like 1/4-inch or 1/2-inch HardieBacker, or an uncoupling membrane such as Schluter Ditra, which absorbs the small movements that otherwise telegraph into cracked tile. Check the floor with a long level and fill any dips deeper than 1/8 inch over 10 feet with a self-leveling compound before you go further.
Fasten backer board into the subfloor with the specified thinset underneath and backer screws every 8 inches, staggering the seams so they never align with the plywood joints. Tape the backer seams with alkali-resistant mesh tape and skim them with thinset. In a wet bathroom, this is also the moment to consider a liquid waterproofing membrane like RedGard rolled over the whole floor and up the walls a few inches, cheap insurance against the inevitable spills and splashes.
Planning Your Layout
Never start tiling against a wall and hope it works out. Find the center of the room by snapping two chalk lines between the midpoints of opposing walls, then dry-lay a row of tiles in both directions without adhesive. This tells you where the cut tiles will land. The goal is to avoid a sliver of tile at the most visible wall, usually the one you see when standing in the doorway, and to keep cuts balanced on both sides. Shift your starting lines as needed so the layout looks intentional.
Account for the toilet flange, the vanity footprint, and the door swing while you plan. Full tiles belong in the sightlines; the awkward cuts can hide under the vanity toe-kick or behind the door. Mark your reference lines clearly because once thinset is on the floor, you are committed.
Mixing and Spreading Thinset
Use a quality modified thinset mortar rated for your tile size, and mix it to a peanut-butter consistency that holds a ridge without slumping. Let it slake for the label’s rest period, usually about ten minutes, then remix briefly. Spread only as much as you can tile in fifteen or twenty minutes before it skins over. Hold a notched trowel at a 45-degree angle and comb the thinset in straight lines, choosing a notch size to match the tile: a 1/4-inch square notch for standard 12-inch tile, and larger notches for bigger formats.
For any floor tile 15 inches or larger, back-butter each piece by skimming a thin layer of thinset onto its back. This guarantees full coverage and prevents the hollow spots that crack under a footstep. You want at least 80 percent mortar contact under a bathroom tile, and back-buttering is the reliable way to hit it.
Setting the Tile
Press each tile into the thinset with a slight twisting motion to collapse the ridges and lock it in place, then set spacers at every corner to keep your grout lines consistent. A 1/8-inch or 3/16-inch joint is standard for bathroom floors. Work outward from your center lines, checking every few tiles with a level and a straightedge to keep the surface flat and the lines true. Wipe any thinset that squeezes up into the joints immediately, because cured mortar in a grout line is a nightmare to dig out.
Cut your border and obstacle tiles as you reach them using a snap cutter for straight cuts and a wet saw for notches around the flange and door casing. Let the entire floor cure undisturbed for at least 24 hours before you kneel on it or pull the spacers, longer in a humid, poorly ventilated bathroom.
Grouting and Sealing
Choose sanded grout for joints wider than 1/8 inch and unsanded for narrower lines. Mix a batch, then hold a rubber grout float at a 45-degree angle and press the grout diagonally across the joints to pack them full, working in small sections. After it firms up for about fifteen minutes, wipe the surface with a damp, well-wrung sponge in gentle circles, rinsing often and changing your water frequently. A light haze will remain; buff it off with a dry microfiber cloth once the grout has cured.
Wait the recommended cure time, typically 48 to 72 hours, then apply a penetrating grout sealer to every joint. In a bathroom, sealing is not optional. It keeps water, soap, and mildew out of the porous grout and dramatically extends the life of the floor. Reseal annually in a shower-adjacent bathroom.
Tools and Materials Checklist
Gathering everything before you start prevents the frustrating mid-job supply runs that let thinset skin over while you drive to the store. At minimum, plan for the tile plus about 10 to 15 percent extra for cuts and waste, cement backer board or an uncoupling membrane, modified thinset mortar, and grout matched to your joint width. On the tool side, you need a notched trowel sized to your tile, a margin trowel for mixing and detail work, tile spacers, a rubber grout float, large sponges, a bucket, a chalk line, and a level. For cutting, a snap cutter handles straight cuts while a wet saw, which you can rent for around $50 a day, manages the notches around the toilet flange and door casing.
Do not skimp on knee pads and a good LED work light; tiling is hours on the floor, and raking light across the surface reveals lippage and uneven joints you would otherwise miss until the thinset cured. Having a diamond hole saw on hand makes clean cuts for supply lines and the toilet flange far easier than trying to nibble them with nippers.
Final Tips for a Lasting Job
Rushing the cure times is the most common way homeowners undo good work, so build patience into your schedule. Keep the toilet off the floor until the grout is fully cured, and reinstall it with a new wax ring and a properly sized flange extender if the tile raised the floor height. When you are laying tile in bathroom spaces and treat the prep, layout, and cure times with respect, the finished floor will stay flat, watertight, and crack-free for decades.
Prefer to explore on your own?
See how new flooring looks in your actual room in seconds — free, no signup.
Try the free Floor Studio →