Most bad caulk jobs are lost before the trigger is ever pulled. Knowing how to open caulk tube tips correctly — where on the nozzle to cut, at what angle, and how to deal with the hidden inner seal — determines your bead size, your control, and whether the first squeeze delivers a smooth ribbon or a frustrating blowout around the nozzle threads. I’ve trained a lot of green helpers, and tube-opening is always lesson one, because a nozzle cut too big can’t be uncut. Ten careful seconds with a utility knife sets up the entire job. Here’s exactly how I do it, why each detail matters, and the handful of mistakes that ruin tubes before they’re started.
Part of our Paint & Walls guide — explore the full guide →
- Know What You're Cutting Into
- Step 1: Decide Your Bead Size Before You Cut
- Step 2: Cut at 45 Degrees — Mostly
- Step 3: Puncture the Inner Seal
- Step 4: Load and Take Up Slack Gently
- The Mistakes That Ruin Tubes at Opening
- Squeeze Tubes and Sausage Packs: Different Openings
- Re-Opening a Previously Used Tube
Know What You’re Cutting Into
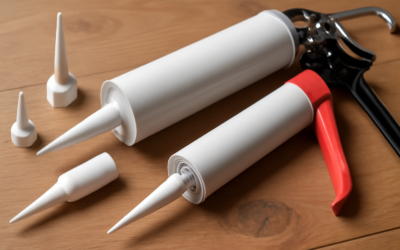
A standard 10-ounce cartridge has two barriers between you and the sealant. First is the tapered plastic nozzle (spout), which is solid at the tip — it must be cut open. Second, hiding at the base of the nozzle where it meets the cartridge body, most tubes have an inner foil or plastic seal that keeps the product airtight in storage. Cutting the nozzle without puncturing that inner seal is the number-one rookie stall: you squeeze, nothing comes out, you squeeze harder, and either the cartridge plunger deforms or sealant blows out around the nozzle base. Both barriers get opened, in that order.
Step 1: Decide Your Bead Size Before You Cut
The nozzle is a tapered cone, so where you cut sets the hole diameter, and the hole diameter sets the bead. The rule: cut for a bead slightly smaller than the joint looks like it needs — you can always run a second pass or squeeze harder, but you cannot shrink an oversized hole, and a too-fat bead means excess sealant smeared everywhere during tooling.
| Joint | Hole Size | Where on the Nozzle |
|---|---|---|
| Fine interior trim, hairline gaps | 1/16″–1/8″ | Near the tip |
| Tub surrounds, kitchen & bath joints | 1/8″–3/16″ | Lower-middle of taper |
| Exterior siding & window perimeters | 3/16″–1/4″ | Middle of taper |
| Wide gaps over backer rod, concrete joints | 1/4″–3/8″ | Upper taper, near base |
Many nozzles have faint molded rings or printed size marks along the taper as cutting guides — use them if they’re there. When in doubt, cut small, test a bead on cardboard, and re-cut bigger if needed. That test bead habit alone separates clean work from caulk-smeared regret.
Step 2: Cut at 45 Degrees — Mostly
The traditional cut is a 45-degree angle, and it’s the right default. An angled tip lets you hold the gun at a comfortable low angle to the joint while the opening’s ellipse rides flat against the two surfaces, feeding the bead into the corner as you pull. A few honest notes from the field:
- 45 degrees suits corner joints — tub-to-tile, baseboard-to-wall — which is most caulking. The angled ellipse nests into the 90-degree inside corner.
- A square (90-degree) cut has fans too, especially for flat-surface beads and for people who tool everything with a finger afterward anyway. Some pros prefer the straight cut for deep joints because it pushes sealant straight in rather than plowing sideways. If you tool your beads — and you should — the difference is smaller than the internet argues. Start with 45 and experiment.
- Make the cut in one clean slice. A sharp utility knife on a scrap-wood block, or the tube snipped in a single scissor-action with the cutter built into your caulk gun’s handle. Ragged, whittled tips drag and split the bead. If your first cut is ugly, slice one thin ring off cleanly to true it up.
- Cut away from your hand. Obvious, and yet nozzle-cutting is a genuinely common utility-knife injury. The block-of-wood method removes the risk entirely.
Step 3: Puncture the Inner Seal
With the nozzle open, deal with the foil seal at its base. Purpose-built options first: most decent caulk guns have a fold-out seal-punch rod under the barrel — a long stiff wire made exactly for this. Slide it down through the nozzle, jab through the membrane several times around the full circle, not just one polite poke in the middle. A single small puncture chokes flow and makes the gun feel like the caulk is frozen; three or four generous punctures let the sealant feed evenly. No punch rod on your gun? A long screw, a piece of coat hanger, or a 16d nail does the same job. It needs to reach 3 to 4 inches down the nozzle, so a stubby screwdriver won’t get there.
You’ll feel the membrane pop. Give the tube a gentle pre-squeeze by hand — sealant should rise visibly in the nozzle. Now it goes in the gun. Not every cartridge has an inner seal (some silicones and most sausage-pack systems don’t), but check every time; assuming its absence is how nozzles blow off their threads.
Step 4: Load and Take Up Slack Gently
Pull the gun’s plunger rod fully back, drop in the cartridge base-first, seat the nozzle end, then squeeze the trigger in small strokes until you feel the plunger contact the cartridge and see sealant just arrive at the tip. Stop there. If you run the trigger until sealant is flowing before you’re at the joint, pressure is stored in the tube and it will keep oozing while you get into position — the source of the classic caulk-blob-on-the-floor. On a ratchet-rod gun, flip the rod to release pressure between runs; on a dripless gun the mechanism backs off automatically.
The Mistakes That Ruin Tubes at Opening
- Cutting the tip off at the base for “just this one big gap.” Now every future job with that tube is a firehose. Cut for the smallest joint on today’s list; enlarge only when forced.
- Skipping the seal puncture, then squeezing harder. The back plunger caves in or the nozzle bursts off. If a new tube won’t flow with light pressure, stop and check the seal — never muscle it.
- Sawing at the nozzle with a dull blade. A chewed tip writes its raggedness into every inch of bead.
- Opening more tubes than the day needs. An opened cartridge starts curing from the tip inward. Open one, finish it, open the next.
- Forgetting which tubes are open. Mark opened tubes with a taped nozzle and a sharpie date. A tube opened last month may still be fine behind a cured plug you can pull or pick out — but only if the tip was capped or plugged well.
Squeeze Tubes and Sausage Packs: Different Openings
Two package types follow their own rules. Hand-squeeze tubes — the small 3-to-6-ounce tubes with no gun — usually have a threaded cap over a sealed neck: unscrew, puncture the foil with the spike molded into the cap’s top (or a nail), cut the tapered applicator to size the same way as a cartridge nozzle, and re-cap when done. The cutting rule is identical: smaller than you think. Foil sausage packs open differently again — there’s no nozzle on the package at all; you snip the metal clip end off the casing with snips, load it into the sausage gun, and the gun’s own screw-on cone becomes the nozzle you cut. If a package fights you in an unfamiliar way, thirty seconds with the label beats improvising; manufacturers print the opening instructions in the fine print precisely because every format differs.
Re-Opening a Previously Used Tube
Knowing how to open caulk tube packaging also means knowing how to do it the second time. A used tube usually self-plugs with a cured slug in the nozzle. Probe with your seal-punch wire; often the slug pushes out or comes free with a screw threaded into it and pulled with pliers. If the cure extends deeper, slice the nozzle back an inch to fresh material — accepting the bigger hole — or replace the nozzle entirely if it unscrews, as many silicone cartridges allow. If the tube feels rubbery when squeezed rather than fluid, it’s cured in the body and no amount of surgery brings it back.
None of this is glamorous, and that’s exactly the point — opening the tube is the cheapest place in the entire job to be careful. Small hole, clean 45-degree slice, seal fully punctured, pressure taken up gently, test bead on scrap. Do those five things and the gun becomes an easy tool to control; skip them and you’ll fight the tube through every joint in the house. Ten seconds of setup, and the rest is just pulling a straight line.