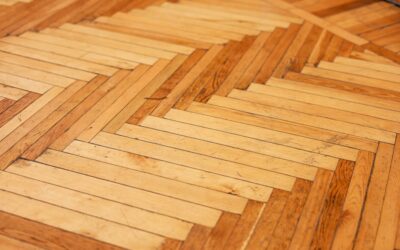
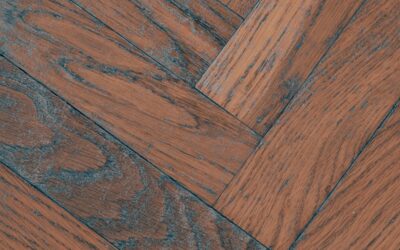
Wood veneer is real wood, just sliced extremely thin and glued onto a core of plywood, particleboard or solid secondary wood. Some veneers are thinner than a sheet of cardstock, which is why aggressive sanding is the biggest threat when you paint them. Learning how to paint veneer furniture successfully comes down to repairing loose veneer first, scuffing gently instead of sanding, sealing with a shellac-based primer to stop the wood’s tannins from bleeding through, and finishing with a paint suited to furniture.
Part of our Paint & Walls guide — explore the full guide →
Painting veneer is a great way to update a dated mid-century dresser, a worn china cabinet or an old nightstand with a chipped top. The flat, stable surfaces of veneer furniture actually take paint well once the prep is right.
Most pieces need two to four days including dry and cure times, with only a few hours of actual work.
How to Paint Veneer Furniture: Identify What You Have
Start by confirming it is veneer. Look at the edges of the top and doors: veneer often shows a thin line where the surface wood meets a different material, or edge banding glued around the perimeter. Look inside drawers and at the back, where plywood layers or particleboard may show. If the grain pattern on the top is perfectly repeated or bookmatched in mirror-image sections, that is another sign. Lifted edges or bubbles in the surface also confirm veneer.
Also tell veneer apart from laminate. Veneer has real wood grain texture you can feel and shows natural variation. Laminate is plastic or printed paper with a uniform, sometimes repeating pattern and no grain texture. Laminate needs a different bonding approach.
Tools and Materials
- Degreasing cleaner, rags and a scrub pad
- Wood glue, a syringe or thin palette knife, wax paper, clamps or heavy weights
- Sanding sponges or sandpaper in 220 grit, plus a tack cloth
- Shellac-based primer (the most reliable blocker of tannin bleed)
- Furniture paint: water-based enamel, urethane-modified alkyd, chalk-style or mineral paint
- Optional water-based polycrylic topcoat
- Quality synthetic brush, fine foam roller, or a sprayer
- Gloves, eye protection, a respirator for solvent primers, and a lead test kit for older pieces
Safety: Lead, Primer Fumes and Rags
Veneer furniture from before 1978 may have finishes containing lead. Test with a lead test kit before you scuff or sand anything. A positive result means lead-safe methods: minimal abrasion, plastic sheeting, wet cleanup and a HEPA vacuum, or hire a lead-safe certified pro.
Shellac-based primer contains alcohol and is highly flammable with strong fumes. Work with good ventilation or outdoors, wear gloves and eye protection, use a respirator as the label directs, and keep it away from pilot lights and open flames. Never mix chemicals during cleanup. Lay finish-soaked rags flat outdoors to dry, or store them in a water-filled, sealed metal can, since some finishes can cause rags to self-heat.
Step by Step: Painting Veneer Furniture
1. Remove Hardware and Clean
Take off pulls, hinges and drawers. Clean all surfaces with a degreaser to remove grime, polish and wax, then rinse and dry. Wax and silicone polish are the main cause of paint beading up, so clean thoroughly.
2. Reglue Lifted Edges and Bubbles
Painting over loose veneer locks in the problem, and the paint will crack along the lift. Slide a thin palette knife under lifted edges and work wood glue into the gap with a syringe or the knife. Press the veneer down, wipe excess glue with a damp cloth, place wax paper over it, and clamp or weight it overnight. For bubbles in the middle, slit the bubble with a sharp knife along the grain, inject glue, and press it flat. Missing chips can be filled with wood filler or epoxy putty and sanded smooth.
3. Scuff Lightly, Never Sand Hard
Use a 220 grit sanding sponge by hand to dull the finish evenly. You only want to remove the shine, not cut into the wood. Avoid power sanders with coarse paper, and take special care at edges and corners where veneer is easiest to sand through. Vacuum and wipe with a tack cloth.
4. Prime With Shellac-Based Primer
Many veneers, especially mahogany, oak, walnut and cherry, contain tannins and old stain that bleed through paint as pink, yellow or brown blotches, sometimes days later. Water-based primers often fail to stop this. A shellac-based primer seals the wood and blocks bleed-through, and it bonds well to old finishes. Brush or spray one thin coat and let it dry, usually within an hour. Look for any discoloration showing through; spot-prime those areas with a second coat. Lightly smooth with 320 grit and wipe clean.
5. Choose and Apply Paint
For pieces that get daily handling, choose a water-based enamel or urethane-modified alkyd for a hard, smooth finish. Chalk-style or mineral paints give a matte or distressed look but need a topcoat. Apply two to three thin coats with a foam roller on flat surfaces and a brush on edges. Lightly sand between coats with 320 grit for a smooth surface. If you distress the edges, remember that sanding through the paint can also cut through the veneer, so distress gently.
6. Seal High-Use Surfaces
Tops of dressers, desks and nightstands benefit from two coats of a non-yellowing water-based polycrylic. Chalk-style paint always needs wax or a clear coat.
7. Cure and Reassemble
Let paint dry at least 48 hours before reinstalling hardware, and allow two to three weeks before heavy use. Anchor dressers and tall cabinets to the wall with a tip-over restraint.
Painting Veneer Cabinets
Veneer kitchen or bathroom cabinets follow the same process, but they face moisture and frequent handling. Reglue lifted edges around sinks first, prime with shellac, and use a hard cabinet enamel. Allow extended cure time before heavy use of the doors.
Picking a Color and Finish Style
Veneer pieces often have elegant lines, especially mid-century designs with tapered legs and simple drawer fronts. Bold, saturated colors suit those shapes, and some people paint only the case while keeping a refinished wood top or drawer fronts for contrast. If you plan to keep part of the wood showing, mask it carefully and remember that the unpainted areas need their own clear finish. Anyone figuring out how to paint veneer furniture for a high-use spot, such as a nursery dresser or entry console, should pick a satin or semi-gloss enamel that wipes clean. Matte finishes look soft and modern but show fingerprints and scuffs more easily.
Hardware can change the whole look as much as paint. Updated pulls in brass, black or matte nickel freshen a painted dresser instantly. If the new pulls have different hole spacing, fill the old holes with wood filler before priming, sand them smooth, and drill new holes after the paint has cured to avoid chipping. Knowing how to paint veneer furniture well also means planning the order of work, so drilling, filling and repairs happen before primer rather than after the final coat.
Troubleshooting
- Pink or yellow stains through paint: tannin bleed. Apply another coat of shellac-based primer over the area and repaint.
- Sanded through the veneer: fill and smooth the spot, then prime. Paint will hide the repair.
- Paint crackles over an edge: veneer was loose underneath. Reglue and repaint the area.
- Brush marks: use thinner coats, a paint conditioner, and a foam roller.
- Paint peels in sheets: surface was waxy. Strip loose paint, clean with mineral spirits, and prime again.
Cost Ranges
Primer, paint, sandpaper and supplies typically cost $40 to $120 for a dresser or nightstand. A professional furniture painter often charges a few hundred dollars and up per piece.
When to Call a Pro
Bring in a restoration pro for valuable antique or mid-century pieces where paint would reduce their value, for extensive veneer damage, or for lead-positive finishes you cannot manage safely.
For pieces with sentimental value, ask a restorer whether the veneer could be refinished instead of painted, since a skilled stain and clear finish sometimes revives the original look for a similar price. A restorer can also replace missing veneer patches with matching wood before any paint goes on, so the finished surface is smooth.
Frequently Asked Questions
Can you paint directly on veneer?
Yes, after cleaning, regluing loose areas, scuffing lightly and priming. A shellac-based primer gives the best adhesion and blocks stains.
Do I need to sand veneer before painting?
Only a light scuff with 220 grit by hand. Heavy sanding can cut through the thin veneer layer.
Why is pink showing through my white paint?
That is tannin or old stain bleeding through. Seal with shellac-based primer and repaint.
What paint is best for veneer furniture?
Water-based enamel or urethane-modified alkyd paints give the most durable finish. Chalk and mineral paints work for a softer look with a topcoat.
How do I fix lifted veneer before painting?
Work wood glue under the edge, press it flat, and clamp or weight it overnight with wax paper between the clamp and the surface.