A vinyl floor that looks tired is usually not worn out. In most homes the dullness comes from layers of residue, old wax and grit scratches sitting on top of a wear layer that is still perfectly sound. Learning how to restore vinyl floors mostly means removing that buildup, repairing small surface damage and adding a fresh protective coat that brings back an even sheen.
The process works for sheet vinyl, vinyl composition tile (VCT), peel-and-stick tile and luxury vinyl plank (LVP). The steps differ slightly by type: older sheet vinyl and VCT often carry decades of wax or acrylic polish that must be stripped, while newer LVP usually has a factory urethane or ceramic-bead coating that only needs a deep clean and a compatible restorer. Get that distinction right first and the rest is straightforward.
- How to Restore Vinyl Floors: Start by Identifying Your Floor
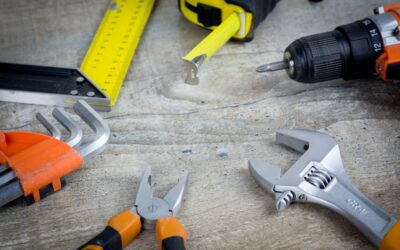
- Tools and Materials
- Step-by-Step: Restore a Dull Vinyl Floor
- Fixing Scuffs, Scratches and Yellowing
- Chemical Safety While Stripping and Coating
- Troubleshooting Restoration Problems
- When Replacement Beats Restoring
- Keeping a Restored Floor Looking New
- When to Call a Pro
- Frequently Asked Questions
Plan on a weekend for an average kitchen or bathroom. Most of the time goes into cleaning and drying, not the restoring itself.
How to Restore Vinyl Floors: Start by Identifying Your Floor
Before you buy a single product, figure out what you are working with and what is on its surface. Using a stripper on a floor that has never been waxed wastes time; using only a cleaner on a floor buried under old polish gets you nowhere.
- Sheet vinyl: large continuous pieces with few seams, common in kitchens and baths from the 1970s onward. Older types often have a no-wax finish that has worn off or been covered with acrylic polish.
- VCT and older vinyl tile: 12-inch square tiles, often in commercial-style patterns. These were designed to be waxed and almost always have multiple coats.
- LVP and LVT: thick planks or tiles with realistic wood or stone visuals and a factory wear layer. Most should not be waxed and do not need stripping unless someone applied a polish.
To test for wax or polish buildup, scrape a hidden spot (under the refrigerator line or in a closet corner) with a plastic putty knife or your fingernail. If a gummy, cloudy or yellowish film comes up, there is buildup to strip. You can also rub a small area with a cotton ball dampened with rubbing alcohol; a white or cloudy residue on the cotton suggests acrylic polish.
Safety Before You Scrape: Older Vinyl and Asbestos
Vinyl sheet and tile installed before the 1980s, and the black mastic adhesive beneath it, can contain asbestos. Cleaning, stripping with a liquid stripper and applying a restorer do not disturb the material. Sanding, aggressive scraping, grinding or pulling up old tile can. If your floor is that age and you plan anything beyond surface restoration, have a sample tested first.
Tools and Materials
- Broom or vacuum with the beater bar turned off (or a hard-floor setting)
- Two buckets, a microfiber flat mop and several microfiber cloths
- pH-neutral vinyl floor cleaner
- Wax and finish stripper labeled safe for vinyl (only if buildup is present)
- Non-abrasive scrub pads (white or blue pads, never green or black on vinyl)
- Vinyl floor restorer or polish compatible with your floor’s finish
- Applicator pad or clean flat mop head reserved for finish
- Plastic putty knife, melamine sponge and a tennis ball for scuffs
- Nitrile gloves, eye protection and knee pads
- Box fan for ventilation and drying
A dedicated vinyl floor restorer is the core product here. These are water-based acrylic or polyurethane-blend coatings that fill micro-scratches and level out the sheen. Choose one labeled for your floor type; some are made for no-wax sheet vinyl and others are formulated specifically for LVP and its factory coatings.
Step-by-Step: Restore a Dull Vinyl Floor
- Clear and dry-clean. Remove furniture, rugs and mats. Sweep or vacuum thoroughly; grit left behind will scratch the floor as soon as you start mopping.
- Deep clean. Mix a pH-neutral vinyl cleaner per the label in warm water. Mop in small sections, scrubbing traffic lanes and edges with a white pad. Rinse with clean water using the second bucket and let the floor dry completely.
- Check the result. If the floor is still hazy, sticky or blotchy after a full clean, there is old polish or wax on it. Move to stripping. If it looks even but dull, skip to step 6.
- Strip old wax or acrylic. Open windows and run a fan. Apply a vinyl-safe stripper to a 4 x 4 foot area, let it dwell for the label time (often 5 to 10 minutes), keep it wet, then scrub with a non-abrasive pad. The old finish will turn milky and lift.
- Rinse twice. Pick up the slurry with a mop or wet vacuum, then rinse twice with clean water. Stripper residue left on the floor will prevent the new finish from bonding and can make it peel. Let the floor dry for several hours.
- Repair scuffs and small damage. Handle marks, scratches and gaps now so the restorer seals over clean, smooth surfaces.
- Apply the restorer. Pour a small puddle and spread a thin, even coat with an applicator pad, working with the grain on LVP and toward an exit. Thin coats dry clear; thick coats stay soft and streak.
- Add coats as needed. Most products recommend two to three thin coats, with 30 to 60 minutes between coats depending on humidity. Keep foot traffic off for at least a few hours and furniture off for 24 hours.
Fixing Scuffs, Scratches and Yellowing
Black heel marks usually lift with a tennis ball rubbed firmly over them or a slightly damp melamine sponge used gently. Test the sponge in a hidden spot first, since it is mildly abrasive and can dull a glossy finish.
Light surface scratches mostly disappear under two coats of restorer, which fills the fine grooves. Deeper gouges in LVP can be filled with a color-matched vinyl repair kit or wax fill stick, then leveled with a plastic scraper. A single plank with a deep cut or burn is often easier to replace if the floor is a floating click-lock installation and you have a spare box.
Yellowing is the trickiest problem. If it comes from old wax, stripping will remove most of it. If it comes from the vinyl itself (common with older sheet vinyl near sunny windows, or where rubber-backed mats sat), it is a chemical change in the material and no cleaner will reverse it. Restorer can improve the sheen, but the color will remain. Lifting seams and curled edges can be reset with a vinyl seam adhesive and weighted overnight; bubbles in sheet vinyl may be flattened by slitting with a utility knife, injecting adhesive and rolling flat.
Chemical Safety While Stripping and Coating
Strippers and some restorers give off fumes and can irritate skin and eyes. Ventilate well with open windows and a fan blowing air out of the room. Wear nitrile gloves and eye protection, and use a respirator if the product label calls for one. Never mix stripper with bleach, ammonia or other cleaners, as some combinations release toxic gases. Keep products with flammable vapors away from gas water heaters, furnaces, stoves and any appliance with a pilot light, and keep kids and pets out until the floor is dry and the room has aired out.
Stripped floors are also very slippery while wet. Work toward the door, wear shoes with good grip, and do not stand in the slurry.
Troubleshooting Restoration Problems
- Streaky or patchy finish: coats were too thick or applied over residue. Let it cure, then strip lightly in that area and recoat thinly.
- Finish turns white or cloudy: moisture was trapped, usually from coating before the floor was fully dry or in high humidity. Strip and redo with better drying time.
- Finish peeling in sheets: stripper residue or cleaner film prevented bonding. Strip fully and rinse at least twice.
- Floor feels tacky days later: coats were too heavy. A light buff with a clean white pad and extra drying time often solves it.
- Dull again within weeks: grit and the wrong cleaner are wearing it down. Use doormats, felt furniture pads and only pH-neutral cleaners.
When Replacement Beats Restoring
Restoration has limits. Learning how to restore vinyl floors also means knowing when to stop. Replacement is usually the better call if the wear layer has worn through so the printed pattern is gone in traffic lanes, if there are many deep gouges or tears, if the floor is badly yellowed from within, or if seams keep lifting because the subfloor is moving or wet.
Water damage is a hard stop. Soft spots, mildew odor, dark staining at seams or bubbling across a large area point to moisture underneath, and covering it with restorer just hides the problem. Pull back a section, find the source, dry or replace the subfloor, and then reinstall.
Cost helps the decision too. A full DIY restoration often runs from tens of dollars to a little over a hundred for cleaner, stripper, restorer and pads in an average room. New LVP installed by a pro usually costs several dollars per square foot including labor, and sheet vinyl somewhat less. If the floor is structurally sound and the pattern is intact, restoring is almost always the better value.
Keeping a Restored Floor Looking New
Once the floor is revived, maintenance keeps it that way. Sweep or vacuum several times a week, damp mop with a pH-neutral cleaner, and avoid steam mops, oil soaps, ammonia and abrasive powders, which dull vinyl and can void warranties. Place walk-off mats at exterior doors (with floor-safe backing, not rubber or latex on LVP), add felt pads to chair legs, and refresh with a single thin coat of restorer every 6 to 12 months in high-traffic areas.
When to Call a Pro
Bring in a flooring professional when the floor is pre-1980s and needs scraping or removal (asbestos testing and abatement first), when large areas show water damage or soft subfloor, or when you have a big commercial-style VCT floor that needs machine stripping and burnishing. A pro with a floor machine can strip and refinish a large area in hours, and the cost is often modest compared with renting equipment and learning on your own floor.
Frequently Asked Questions
Can you make old vinyl flooring look new again?
Often, yes. A deep clean, stripping old buildup and two or three thin coats of a vinyl restorer can bring back even shine and hide light scratches. It cannot fix a worn-through pattern, deep tears or yellowing inside the vinyl.
Should you wax luxury vinyl plank?
Generally no. Most LVP has a factory wear layer designed to be maintained with a pH-neutral cleaner, and traditional wax can create buildup. If it needs a sheen boost, use a restorer labeled for LVP.
How do I know if my vinyl floor has wax buildup?
Scrape a hidden spot with a plastic putty knife. A gummy, cloudy or yellowish film coming up indicates wax or acrylic polish that should be stripped before restoring.
How long does a vinyl floor restorer last?
In busy kitchens and entries, expect 6 to 12 months before a refresh coat is needed. Low-traffic rooms can go longer, especially with good doormats and regular sweeping.
Can you restore yellowed vinyl flooring?
If the yellow is old wax, stripping usually removes it. If the vinyl itself has discolored from sunlight or a rubber-backed mat, the color change is permanent, and replacement is the only real fix.
Prefer to explore on your own?
See how new flooring looks in your actual room in seconds — free, no signup.
Try the free Floor Studio →