Vinyl flooring has become the go-to choice for bathroom floors, and for good reason. It is waterproof (or at least water-resistant), comfortable underfoot, available in stunning designs that mimic natural stone and wood, and significantly cheaper than tile. But not all vinyl is equal when it comes to bathroom use, and installation details matter more here than in any other room.
Part of our Bathroom Remodeling & Flooring guide — explore the full guide →
This guide covers everything you need to know about using vinyl flooring in bathrooms, including which type to choose, how waterproof it actually is, design options, installation tips, and realistic costs.
LVP vs. Sheet Vinyl for Bathrooms
Luxury Vinyl Plank (LVP)
LVP comes in individual planks that click together, creating a floating floor. It is the most popular vinyl option right now because it looks remarkably like real hardwood or stone. In bathrooms, LVP provides a warm, stylish alternative to cold ceramic tile.
Waterproof performance: The planks themselves are 100% waterproof. Water will not damage the vinyl core, even if it sits on the surface for hours. However, the seams between planks are the vulnerability. Click-lock joints resist water penetration well in normal use, but standing water that pools around a toilet base, overflows from a tub, or sits along the perimeter can seep through the joints and reach the subfloor.
Bathroom suitability: Excellent for powder rooms, half baths, and master bathrooms with showers (not tubs with frequent splashing). For full baths with kids who routinely flood the floor, sheet vinyl is safer.
Price: $2.50 – $7.00 per sq ft (material only)
Sheet Vinyl
Sheet vinyl comes in large rolls (6 or 12 feet wide) and is installed in a single seamless piece in most bathrooms. This makes it inherently more waterproof than LVP because there are no seams in the field of the floor for water to penetrate.
Waterproof performance: Sheet vinyl is the most waterproof resilient flooring option available. When properly installed with sealed edges, it creates a continuous barrier that prevents any water from reaching the subfloor. This is why sheet vinyl has been a bathroom standard for decades.
Bathroom suitability: Excellent for all bathroom types, including full baths, children’s bathrooms, and basements. The seamless installation makes it the safest choice for wet environments.
Price: $1.00 – $4.00 per sq ft (material only)
Which Should You Choose?
Choose LVP if aesthetics are a priority and the bathroom does not experience regular flooding or heavy splashing. LVP looks more premium and feels more substantial underfoot.
Choose sheet vinyl if waterproofing is the top concern, the bathroom serves young children, or you are working on a tight budget. Modern sheet vinyl looks far better than it did a decade ago, with realistic stone and wood patterns that rival LVP from a standing distance.
Design Options for Bathroom Vinyl
Marble-Look Vinyl
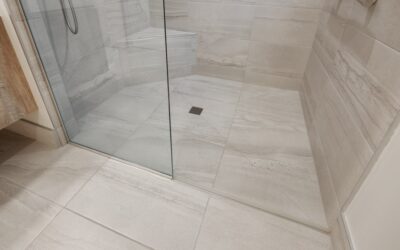
Marble-look vinyl is one of the most popular bathroom choices. It gives you the elegant appearance of Carrara or Calacatta marble without the cost, maintenance, or cold feel of natural stone. Both LVP tiles and sheet vinyl are available in marble patterns. White marble with gray veining is the current best-seller for bathrooms.
Wood-Look Vinyl
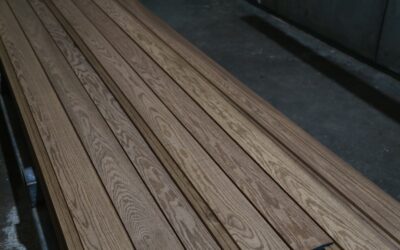
Wood-look vinyl brings warmth to a bathroom in a way that real wood never could (real hardwood and bathrooms are a bad combination). Light oak, gray-washed planks, and white-oak looks are trending. The contrast between a wood-look floor and white bathroom fixtures creates a spa-like atmosphere.
Concrete-Look Vinyl
For modern and industrial-style bathrooms, concrete-look vinyl provides a sleek, minimalist base. Gray tones in a matte finish pair well with black fixtures and frameless glass shower enclosures.
Classic Tile Patterns
Sheet vinyl and vinyl tile both come in traditional tile patterns, including hexagon, basketweave, penny round, and checkerboard. These designs offer vintage charm without the grout maintenance that comes with real tile.
Installing Vinyl in a Bathroom
Over Existing Floors
One of vinyl’s biggest advantages is that it can often be installed directly over an existing floor. You can install LVP or sheet vinyl over:
- Existing vinyl: As long as it is flat, well-adhered, and not cushioned (embossing can telegraph through new vinyl)
- Ceramic tile: If the tile is flat and in good condition. Fill grout lines with a floor leveler to prevent them from showing through
- Plywood subfloor: Standard installation surface, just ensure it is level and dry
- Concrete: Test for moisture first. Use a moisture barrier if levels exceed the manufacturer’s specification
Do not install vinyl over:
- Carpet or carpet padding
- Damaged, warped, or rotten subfloor
- OSB (oriented strand board) unless the manufacturer specifically approves it
LVP Bathroom Installation Tips
- Acclimate the planks: Leave LVP in the bathroom for 48 hours before installing to adjust to the room’s temperature and humidity.
- Leave an expansion gap: LVP floats and needs a 1/4-inch gap around all walls, cabinets, and fixtures. This gap allows the floor to expand and contract without buckling.
- Install around the toilet: Remove the toilet before installing. Cut the vinyl to fit around the toilet flange, install the floor, then reinstall the toilet on top of the new flooring. Never cut vinyl to fit around a toilet base, as this creates a gap that traps water and bacteria.
- Seal the perimeter: Apply a bead of 100% silicone caulk where the vinyl meets the bathtub, shower curb, and toilet base. This prevents water from seeping under the edges.
- Use a waterproof underlayment: If your LVP does not have an attached backing, use a moisture-barrier underlayment on concrete subfloors.
Sheet Vinyl Bathroom Installation Tips
- Make a template: Use rosin paper or butcher paper to create a template of your bathroom floor, including toilet flange, vanity, and doorway. Trace the template onto the sheet vinyl and cut before bringing it into the room.
- Full-spread adhesive is recommended: In bathrooms, gluing down sheet vinyl is better than loose-laying. Full adhesive prevents the edges from lifting and eliminates any gap where water could get underneath.
- Seam placement: If your bathroom requires a seam (wider than 12 feet), place it in the least wet area, away from the tub and toilet. Seal the seam with seam sealer.
- Cove the edges: For maximum waterproofing, cove the sheet vinyl up the wall by 2 to 4 inches (like a bathtub liner). Cover the coved edge with base molding. This is standard in commercial bathrooms and provides the best water protection in residential use.
Edge Sealing: The Critical Step
The most important installation detail for bathroom vinyl is edge sealing. Water finds its way under flooring at the perimeter, not through the surface. Every point where vinyl meets a fixture, wall, or transition must be sealed:
- Around the toilet base: Silicone caulk after the toilet is set
- Along the bathtub: Silicone caulk that matches the tub color
- At the shower threshold: Silicone caulk or a waterproof transition strip
- Along walls: Quarter-round or base molding pressed firmly against the vinyl, with optional caulk behind it
- At the door threshold: A transition strip that overlaps the vinyl edge
Vinyl vs. Tile in Bathrooms
Tile has been the default bathroom floor for decades, but vinyl is a legitimate alternative. Here is how they compare:
- Waterproofing: Tile with proper grouting is waterproof. Vinyl (especially sheet) is also waterproof. Advantage: tie, with sheet vinyl slightly easier to waterproof due to fewer joints.
- Comfort: Vinyl is warmer and softer underfoot. Tile is cold and hard. Vinyl wins for barefoot comfort, especially in the morning.
- Durability: Tile lasts 25+ years. Vinyl lasts 10 to 20 years. Tile wins on longevity.
- Maintenance: Both are easy to clean. Tile grout requires periodic sealing and cleaning. Vinyl has no grout to maintain. Vinyl wins on maintenance ease.
- Cost: Vinyl installed costs $3 to $8 per sq ft. Tile installed costs $7 to $15 per sq ft. Vinyl wins significantly on cost.
- Resale value: Tile is generally perceived as more premium. However, high-quality LVP is increasingly accepted by buyers. Tile has a slight edge here.
- DIY friendliness: LVP clicks together without special tools. Tile requires a wet saw, thin-set, grout, and more skill. Vinyl wins for DIY.
Cost of Vinyl Bathroom Flooring
Bathroom floors are typically small (40 to 80 sq ft), which keeps total costs low even with premium materials:
Small Bathroom (40 sq ft)
- Sheet vinyl (installed): $200 – $400
- Mid-range LVP (installed): $300 – $500
- Premium LVP (installed): $400 – $700
Master Bathroom (80 sq ft)
- Sheet vinyl (installed): $350 – $700
- Mid-range LVP (installed): $500 – $900
- Premium LVP (installed): $700 – $1,200
These prices include material, underlayment (if needed), and professional installation. Add $50 to $100 for toilet removal and reinstallation, and $50 to $150 for old floor removal if applicable.
Maintenance Tips for Bathroom Vinyl
- Wipe up standing water promptly: While the surface is waterproof, water that sits at seams and edges can eventually work its way underneath.
- Use bath mats: Place mats outside the tub and shower to catch water before it reaches the floor.
- Clean with mild solutions: Warm water and a few drops of dish soap is sufficient for weekly mopping. Avoid abrasive cleaners and bleach.
- Ventilate: Run the bathroom exhaust fan during and after showers to reduce humidity. High humidity over time can affect adhesive bonds and promote mildew.
- Check caulk annually: Inspect the silicone caulk around the toilet, tub, and shower every year. Reapply if it is cracking, peeling, or showing mildew.
Frequently Asked Questions
Is LVP truly waterproof for bathrooms?
The plank material is 100% waterproof. The risk is at the click-lock seams, where water can seep through to the subfloor during heavy flooding. For normal bathroom use (splashes, drips, wet feet), LVP performs very well. For tub overflows and kids’ bath time, sheet vinyl is safer.
Can I install vinyl in a shower?
Vinyl is not recommended for inside a shower stall. The constant water exposure and standing water exceed what vinyl is designed to handle. Use tile, solid surface panels, or acrylic liners inside showers. Vinyl works perfectly for the bathroom floor outside the shower.
Will vinyl flooring yellow in a bathroom?
Modern vinyl flooring resists yellowing. Older vinyl (pre-2000s) could yellow from sunlight and rubber-backed mats. If your bathroom gets direct sunlight, check that the vinyl has a UV-resistant wear layer.
How long does vinyl last in a bathroom?
With proper installation and maintenance, expect 10 to 15 years from mid-range vinyl and 15 to 20 years from premium LVP in a bathroom setting. Sheet vinyl typically lasts 10 to 15 years.
For more vinyl flooring information, visit our vinyl flooring guide and LVP flooring guide.
Prefer to explore on your own?
See how new flooring looks in your actual room in seconds — free, no signup.
Try the free Floor Studio →