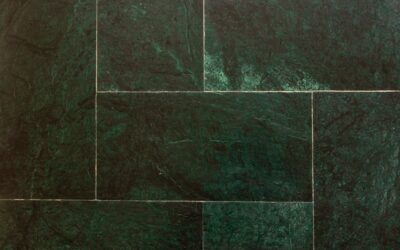
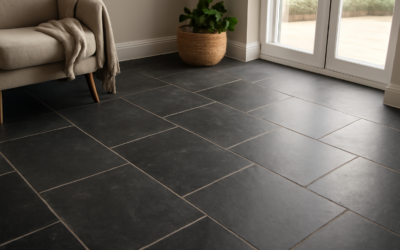
Cracked grout, loose tiles, and dated patterns are the top reasons homeowners tackle this project. Learning how to retile a bathroom floor yourself saves $800 to $2,500 in labor costs on a typical 40 to 70 square foot bathroom. The work takes most DIYers a full weekend, but the result lasts 20 years or more when done correctly.
Tools and Materials You Need
Gather everything before you start demolition. Running to the hardware store mid-project with a half-torn-up floor is not a good time. Here is what you need:
- Demolition: Cold chisel, 3-pound hand maul, pry bar, oscillating multi-tool with grout removal blade
- Subfloor prep: 0.25-inch cement backer board (HardieBacker or Durock), backer board screws, alkaline-resistant mesh tape, thinset mortar
- Tile installation: Notched trowel (0.25-inch x 0.25-inch for most floor tiles), tile spacers (1/8-inch or 3/16-inch), tile wet saw, tile nippers, level, chalk line
- Grouting: Sanded grout for joints 1/8-inch and wider, grout float, grout sponge, two 5-gallon buckets
- Safety: Safety glasses, knee pads, dust mask rated N95 or better, work gloves
Budget $3 to $10 per square foot for porcelain or ceramic tile at Home Depot or Lowe’s. Add $1.50 to $2 per square foot for thinset, backer board, and grout. Buy 10% extra tile for cuts and future repairs.
Removing the Old Tile
Start by removing the toilet. Shut off the water supply, flush to empty the tank, disconnect the supply line, and unbolt the closet bolts at the base. Stuff a rag into the open flange to block sewer gas. Remove baseboards carefully if you plan to reuse them.
Score the grout lines with an oscillating tool to free individual tiles. Then slide the chisel under each tile at a shallow angle and strike it with the hand maul. Work in small sections. Old tiles set in a thick mortar bed are harder to remove than those on backer board. If the tile was installed directly on plywood, you will likely damage the surface. Plan to install new backer board over it.
Preparing the Subfloor
A solid subfloor is everything. Tile cracks and grout fails when the floor flexes underfoot. The subfloor should be at least 1.125 inches thick total, which typically means 0.75-inch plywood plus 0.25-inch or 0.5-inch cement backer board. Check for soft spots, water damage, and delamination by walking across the exposed subfloor and pushing firmly with your hand.
Replace any damaged plywood before proceeding. Cut cement backer board to fit using a scoring knife or a circular saw with a masonry blade. Leave a 1/8-inch gap between sheets and a 1/4-inch gap at walls. Spread a thin layer of modified thinset on the plywood, lay the backer board, and fasten it every 8 inches with 1.25-inch backer board screws. Tape all seams with alkaline-resistant mesh tape bedded in thinset.
Planning Your Tile Layout
Dry-lay tiles before mixing any thinset. Snap a chalk line from the center of the doorway perpendicular to the threshold. Snap a second line at 90 degrees to create a crosshair in the room’s center. Lay tiles along both lines, using spacers, to see where cuts fall at the walls.
Adjust the starting point so no wall cut is narrower than half a tile. Slivers under 2 inches look unprofessional and are difficult to cut cleanly. For rectangular tiles in a brick or stagger pattern, offset each row by one-third to one-half the tile length. A one-third offset reduces lippage on tiles with any slight warping.
Setting the Tile
Mix thinset mortar to a peanut butter consistency. Spread it with the flat side of the notched trowel over a 3 to 4 square foot area, then comb it with the notched side at a 45-degree angle. Press each tile into the thinset with a slight twisting motion and push it down firmly. Insert spacers at each corner.
Check every few tiles with a 24-inch level. Tap high spots down gently with a rubber mallet. Back-butter the tile as well as the floor for large-format tiles over 12 by 12 inches to ensure full coverage. Thinset coverage below 85% leads to hollow spots that crack under weight. Work from the farthest wall toward the door so you do not trap yourself. Let the thinset cure for at least 24 hours before walking on the floor or grouting.
Cutting Tile Cleanly
A wet saw handles straight cuts and is essential for porcelain tile. Mark your cut line with a pencil, align the tile on the sliding tray, and feed it slowly through the blade. Let the blade do the work without forcing the tile. For L-shaped cuts around the toilet flange or door jambs, make multiple straight relief cuts up to the line, then snap away the waste with tile nippers.
Curved cuts around the toilet flange require a grinder with a diamond blade or a hole saw sized to the flange. Measure twice, because a mis-cut tile wastes material and time. Always wear safety glasses when cutting, as porcelain shards are razor-sharp.
Grouting the Joints
Remove all spacers and scrape any dried thinset out of the joints with a utility knife. Mix sanded grout to a thick, smooth consistency. Scoop it onto the floor and spread it diagonally across the joints with a grout float, pressing firmly to pack the joints full. Work in 10 to 15 square foot sections.
Wait 15 to 20 minutes, then wipe the haze with a barely damp sponge using circular motions. Rinse the sponge frequently in clean water. Avoid wiping directly along the joint, which pulls grout out. Two or three passes are usually needed to remove the haze completely. Let the grout cure for 72 hours before exposing it to standing water. Apply a penetrating grout sealer after 7 days to protect against moisture and staining.
Reinstalling the Toilet and Finishing Up
Remove the rag from the flange and inspect the closet ring. If the new tile raised the floor height, install a flange extension or an extra-thick wax ring to maintain a proper seal. Set the new wax ring on the flange, lower the toilet straight down onto the bolts, and press firmly while tightening the closet nuts alternately. Reconnect the water supply, turn it on, and flush twice while checking for leaks at the base.
Reinstall baseboards with a brad nailer, caulk the joint between the baseboard and tile with a matching color silicone caulk, and run a bead of silicone where the tile meets the tub or shower curb. Silicone, not grout, belongs at all change-of-plane transitions because it flexes with movement instead of cracking. Your retiled bathroom floor is now ready for daily use.
Prefer to explore on your own?
See how new flooring looks in your actual room in seconds — free, no signup.
Try the free Floor Studio →