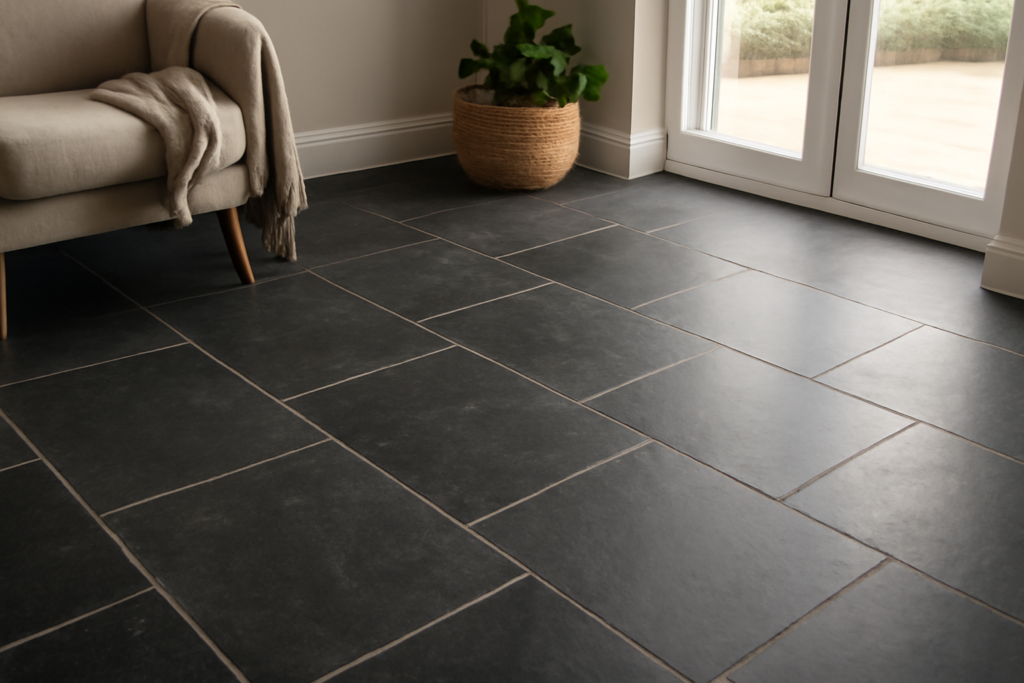
When a client wants natural stone with real drama, I often point them toward black limestone tile, a material that reads as sophisticated and grounded in a way few surfaces can match. Unlike jet-black porcelain that looks flat and uniform, genuine black limestone carries subtle veining, fossil traces, and tonal shifts from deep charcoal to near-graphite. That natural variation is the whole appeal, and it is also the thing you have to understand before you buy.
Part of our Tile & Grout guide — explore the full guide →
I have installed limestone in entryways, kitchens, patios, and spa-style bathrooms, and I have seen it done beautifully and done badly. This guide covers what black limestone actually is, where it belongs, what it costs, and the sealing and care routine that keeps it looking rich instead of gray and tired.
- What Is Black Limestone Tile
- Finishes and How They Change the Look
- Best Places to Use Black Limestone Tile
- What Black Limestone Tile Costs
- How to Install Black Limestone Tile
- Sealing and Ongoing Care
- Pros and Cons at a Glance
- Design Ideas That Show Off the Stone
- Common Mistakes to Avoid
- Final Thoughts on Black Limestone Tile
What Is Black Limestone Tile
Limestone is a sedimentary rock formed mostly of calcium carbonate, often packed with fossilized shell and marine sediment. The dark color in black limestone comes from organic carbon and mineral content laid down over millions of years. Popular varieties include Belgian blue limestone, Kadappa (Cuddapah) black from India, and various basalt-adjacent dark limestones sold under trade names.
Because it is a calcareous stone, black limestone is softer and more acid-sensitive than granite or porcelain. It typically rates around 3 to 4 on the Mohs hardness scale. That does not make it unusable, but it does mean the material demands respect: proper sealing, pH-neutral cleaners, and prompt cleanup of spills. Treated right, it lasts for decades and only gets more beautiful.
Finishes and How They Change the Look
The finish you choose dramatically changes both appearance and performance. Black limestone tile is sold in several surface treatments.
- Honed: A smooth, matte surface. This is my most-recommended finish for floors. It reads as a deep, velvety charcoal and hides light scratches better than polish.
- Polished: A reflective, glossy face that pushes the color toward true black and shows veining vividly. Stunning on walls and vanities, but it shows scuffs and etches on floors.
- Tumbled or brushed: A textured, slightly worn surface with softened edges. Great for slip resistance on patios and shower floors.
- Flamed or bush-hammered: A rough, matte texture used outdoors for maximum grip.
One important note: black limestone almost always looks lighter and grayer when dry and unsealed. A quality color-enhancing sealer is what restores that deep, saturated black most homeowners fall in love with in the showroom.
Best Places to Use Black Limestone Tile
This stone shines where its natural depth can breathe. Entryways and foyers get an immediate high-end feel from honed black limestone underfoot. Kitchen floors work well too, provided you commit to the sealing routine, because kitchens see acidic spills like lemon juice, wine, and tomato sauce that can etch unsealed limestone.
In bathrooms, black limestone makes a jaw-dropping shower feature wall or vanity backsplash. On the floor, use a tumbled or textured finish for grip. Outdoors, black limestone pavers create elegant patios and pool surrounds, but choose a flamed or brushed finish and be aware that in freeze-thaw climates you must confirm the specific stone is frost-rated.
What Black Limestone Tile Costs
Pricing varies by variety, thickness, and finish. As a working range, expect the following for material alone.
- Standard Kadappa or Indian black limestone: $5 to $10 per square foot
- Belgian blue and premium honed limestone: $10 to $20 per square foot
- Large-format or specialty slabs: $20 to $35 per square foot
Professional installation typically adds $8 to $16 per square foot for interior floors, more for intricate patterns, walls, or exterior work with proper drainage. Do not forget consumables: a good impregnating sealer runs $40 to $70 per quart, and you will use it on day one and again periodically. For a 150-square-foot kitchen floor, a realistic installed budget lands between $2,700 and $5,400 depending on stone grade and labor rates.
How to Install Black Limestone Tile
Limestone installation follows natural-stone best practices, and a few of those steps are non-negotiable if you want a lasting result.
- Confirm a flat, structurally sound substrate. For floors, I install over a cement backer board or an uncoupling membrane like Schluter Ditra to protect the stone from substrate movement and cracking.
- Seal before setting. This is the step DIYers skip and regret. Apply an impregnating sealer to the backs and edges of porous dark stone to prevent moisture and mortar staining, which can cause dark blotches or picture-framing.
- Use white polymer-modified thinset. Gray thinset can telegraph through and shift the color of natural stone.
- Back-butter each tile fully. Voids under limestone lead to cracks and hollow spots underfoot.
- Keep grout joints tight, typically 1/16 to 1/8 inch, and choose a charcoal or dark gray grout so the joints disappear into the field.
- After grout cures, apply a color-enhancing topical sealer to lock in the deep black and add stain protection.
Sealing and Ongoing Care
Sealing is the heart of owning black limestone. Because the stone is porous and acid-sensitive, I seal it before grouting, after grouting, and then on a maintenance schedule. Test whether it is time to reseal by dripping water on the surface: if it soaks in and darkens within a couple of minutes, it is time for another coat. Most interior floors need resealing every 1 to 3 years, kitchens and showers more often.
Daily Cleaning Rules
- Use only pH-neutral stone cleaners. Never use vinegar, lemon, bleach, or generic bathroom sprays, which etch and dull limestone.
- Wipe acidic spills immediately to prevent etch marks.
- Dust-mop floors and use felt pads under furniture to avoid scratches.
- In showers, squeegee after use to reduce hard-water buildup and soap film.
Pros and Cons at a Glance
Every material has trade-offs, and black limestone is no exception. Weigh these honestly before you commit.
The Upsides
- Rich, natural color and unique veining no manufactured tile can copy
- Timeless, high-end appearance that suits both modern and traditional homes
- Cooler underfoot, and pairs beautifully with radiant floor heat
- Long lifespan when maintained
The Drawbacks
- Requires regular sealing and careful cleaner choice
- Acid-sensitive and prone to etching from spills
- Softer than porcelain, so it can scratch and chip
- Color lightens if the sealer wears off
Design Ideas That Show Off the Stone
Black limestone is a strong material, so I like to let it carry a room rather than compete with busy patterns. In a modern kitchen, large-format honed tiles laid in a straight grid with tight, dark grout create a nearly seamless charcoal floor that makes cabinetry and countertops pop. Pair it with brass or matte-black hardware and the look turns instantly upscale.
In bathrooms, I love running black limestone up a single shower wall while keeping the surrounding surfaces light. That contrast frames the stone and highlights its natural veining. For entryways, a border detail in a contrasting light limestone or marble gives an old-world, tailored feel. And do not overlook the material’s affinity for radiant heat: because stone is dense and conducts warmth well, a black limestone floor over a hydronic or electric mat feels wonderful underfoot on a cold morning and helps the color read even deeper and richer.
Sizes and Layouts to Consider
- 12 by 24 inch planks for a contemporary, large-format floor with fewer grout lines
- 18 by 18 inch squares for a classic, balanced foyer
- 2 by 2 inch tumbled mosaics for shower floors, where extra grout lines add grip
- Brick-set or one-third offset patterns to add subtle movement on walls
Common Mistakes to Avoid
The biggest error I see is skipping the pre-installation seal, which leads to mortar staining that is nearly impossible to reverse on dark, porous stone. Close behind is using the wrong cleaner: a well-meaning homeowner reaches for a vinegar spray or a bathroom acid cleaner and etches dull, cloudy rings into a brand-new floor within weeks.
Another pitfall is buying too little material. Natural stone varies from crate to crate, so order 15 percent extra from the same lot to ensure your tiles match and to have spares for future repairs. Finally, do not install polished black limestone on a wet or high-traffic floor and expect it to stay pristine. Choose honed or textured finishes where slips and scratches are a concern, and save the mirror-polished stone for walls and vanities.
Final Thoughts on Black Limestone Tile
Few surfaces bring the grounded, natural elegance of black limestone tile. It rewards a homeowner willing to seal it properly and clean it gently, and it punishes neglect with etching and fading. Choose a honed finish for interior floors, a textured finish for wet or outdoor areas, and commit to the maintenance routine from day one. Do that, and your black limestone will anchor the room with a depth and character that lasts for decades.
Prefer to explore on your own?
See how new flooring looks in your actual room in seconds — free, no signup.
Try the free Floor Studio →