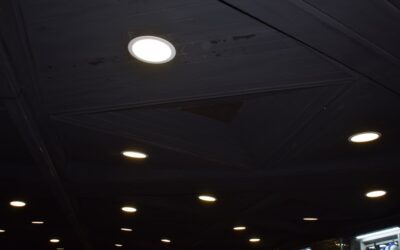
Cramming a recessed light into an insulated ceiling without the right fixture is a genuine fire hazard, and it is one of the most common code violations home inspectors flag. That is exactly why IC rated LED recessed lighting exists. The IC stands for insulation contact, meaning the fixture is engineered to sit safely surrounded by ceiling insulation without overheating. For any recessed light going into an attic floor, a top-floor ceiling, or an insulated cavity, IC rating is not optional, it is a safety requirement.
This guide explains what the rating means, how modern LED fixtures make the whole subject simpler, and how to install them correctly in your home.
What IC Rated Actually Means
Recessed fixtures come in two ratings: IC and non-IC. A non-IC fixture requires at least 3 inches of clearance from any insulation because it runs hot enough to ignite material touching it. An IC-rated fixture is built with thermal protection and materials that tolerate direct contact with insulation, so you can bury it in blown-in cellulose or batts without a fire risk.
Non-IC fixtures still exist for uninsulated spaces like a ceiling between two conditioned floors. But if there is any chance insulation will contact the housing, IC rated is the only safe and code-compliant choice. Most building codes now require IC-rated, airtight fixtures in insulated ceilings to prevent both fire hazards and energy loss.
Why LED Changed the Game
Old incandescent and halogen recessed cans ran extremely hot, which made IC rating a constant concern and drove up your cooling bills. LED recessed fixtures run dramatically cooler, often barely warm to the touch, because they convert far more energy into light rather than heat. This makes them inherently safer around insulation and much easier to seal against air leaks.
Modern LED recessed lights also come in slim, canless designs, sometimes called wafer or disc lights, that install directly into the ceiling without a bulky housing above. Many of these are IC rated and airtight right out of the box, so a single fixture solves the insulation-contact problem and the air-sealing problem at once.
Reading the Labels: IC and Airtight
When shopping, look for two markings on the fixture or its packaging.
- IC rated: Safe for direct insulation contact.
- Airtight (AT) or ASTM E283 compliant: Seals against air leakage between the living space and the attic, which saves energy and prevents moisture problems.
The ideal fixture for an insulated ceiling is marked IC-AT, meaning both insulation-contact safe and airtight. Pairing those two properties keeps your heated and cooled air where it belongs and eliminates the drafty, energy-wasting holes that old recessed cans notoriously created.
Choosing the Right LED Recessed Light
Beyond the safety rating, several specs shape how the light performs.
- Size: 4-inch and 6-inch are the common diameters. Use 4-inch for accent and tighter spacing, 6-inch for general room lighting.
- Color temperature: Measured in Kelvin. 2700K to 3000K gives a warm, cozy light for living spaces; 3500K to 4000K reads cleaner for kitchens and workspaces. Many fixtures offer a selectable-CCT switch so you can choose on site.
- Lumens: Brightness output. Expect 600 to 900 lumens per fixture for general lighting.
- Dimmable: Confirm the fixture is dimmable and paired with an LED-compatible dimmer to avoid flicker.
Selectable-CCT wafer lights have become the homeowner favorite because one product covers every room and lets you dial the mood after installation.
Installing IC Rated LED Recessed Lights
Canless wafer lights are remarkably DIY-friendly, but any electrical work demands caution and respect for local code.
- Turn off the circuit at the breaker and confirm it is dead with a non-contact voltage tester.
- Mark and cut the ceiling hole with a hole saw sized to the fixture, typically 4 or 6 inches.
- Connect the included junction box to your ceiling wiring: black to black, white to white, ground to ground.
- Tuck the junction box up into the ceiling cavity through the hole.
- Squeeze the fixture’s spring clips and push the light up into the opening until it snaps flush against the ceiling.
- Restore power and test. Adjust the color temperature switch if your fixture has one.
A wafer light install takes about 20 minutes per fixture once the hole is cut. For traditional canister housings in new construction, the fixture nails to the joists before drywall goes up.
What It Costs
LED recessed lighting is affordable and getting cheaper. Individual IC-rated wafer lights run $10 to $30 each, with multi-packs bringing the per-light cost down further. Traditional IC-AT housings plus separate LED trims cost $20 to $50 per fixture. If you hire an electrician, expect $70 to $200 per light installed, depending on attic access and whether new wiring is required. A room outfitted with six wafer lights might total $60 to $180 in materials for a capable DIYer.
Common Mistakes to Avoid
The biggest error is installing a non-IC fixture in an insulated ceiling to save a few dollars, which creates a real fire risk and fails inspection. Another is forgetting the airtight rating, leaving your attic connected to your living space through a dozen leaky holes. Homeowners also frequently pair LED fixtures with old incandescent dimmers, causing buzzing and flicker, when an inexpensive LED-rated dimmer solves it. Finally, resist overloading a single circuit, and always verify your total wattage against the breaker capacity.
New Construction Versus Remodel Fixtures
The kind of IC-rated fixture you buy depends on whether the ceiling is open or already finished. New-construction housings have mounting brackets or bar hangers that nail directly to the ceiling joists before drywall goes up. They are rated for insulation contact and let the electrician position each light precisely during the framing stage. If you are building or gutting a room to the studs, these give the cleanest, most secure install.
Remodel or retrofit fixtures are designed to go into an existing finished ceiling. Canister remodel housings clip to the drywall with spring tabs from below, while slim wafer lights need only a junction box and a hole saw. Both must still carry the IC rating if insulation sits above the ceiling. For most homeowners updating an existing room, IC-rated wafer lights are the easiest path because they require the smallest hole, the least clearance above the ceiling, and no bulky can to fish past insulation and joists.
Spacing and Layout Basics
Once you have the right fixtures, plan their placement so the room lights evenly. A common guideline divides the ceiling height by two to set the maximum distance between fixtures, so an 8-foot ceiling gets lights roughly 4 feet apart. Keep the outer row about 2 to 3 feet from the walls to wash them gently with light rather than leaving dark edges.
For general room lighting, 6-inch fixtures spaced on that grid provide broad, even coverage, while 4-inch lights work well for accent rows or tighter areas like hallways and above counters. Think about what each light needs to do: ambient fill, task lighting over a work zone, or accent on a wall or artwork. Putting different groups on separate dimmer switches lets you tune the room from bright and functional to soft and relaxed, getting far more use out of the same fixtures.
Final Word
IC rated LED recessed lighting brings together safety, energy efficiency, and clean modern looks in one fixture. For any recessed light touching insulation, an IC-AT rated LED, ideally a slim wafer design, is the right call because it installs safely against insulation, seals out drafts, and runs cool for decades. Match the size and color temperature to each room, use a compatible dimmer, and always kill the breaker before you start. Done right, it is an approachable upgrade that makes a home brighter, more efficient, and up to code.