An island hood hangs from the ceiling with nothing behind it, which changes almost everything compared with a wall-mounted hood. To install island vent hood units safely, you need solid wood blocking between the ceiling joists to carry the weight, a duct path that reaches the outdoors through the ceiling or roof, and a power supply that is planned before the drywall goes back up. Skip any of the three and the hood either sags, underperforms, or fails inspection.
The short version: locate the joists above the cooktop, add blocking sized to the manufacturer’s mounting bracket, run rigid duct to an exterior cap, bring a properly protected electrical supply to the mounting point, then lift the hood into place with a helper. Most island range hood installation projects take a full day for an experienced DIYer and longer if the attic is tight or the duct must go through the roof.
Island hoods also need more airflow than wall hoods of the same width because cross-drafts pull smoke sideways. That makes the duct run more important than on a wall installation, where the back wall helps contain rising heat and grease.
How to Install Island Vent Hood Support in the Ceiling
Island hoods commonly weigh anywhere from about 40 to over 100 pounds, and that load hangs from a few screws in the ceiling. Drywall alone cannot hold it. The mounting frame must bolt into solid framing.
Start by finding the cooktop centerline on the ceiling. Use a stud finder, then confirm joist direction and spacing from the attic or by drilling a small test hole. If a joist does not sit exactly where the bracket needs to go, which is common, install blocking.
- Cut 2×6 or 2×8 lumber (match joist depth where practical) to fit snugly between joists.
- Install at least two pieces, spaced to match the hood bracket’s screw holes.
- Fasten each end with structural screws or nails driven into the joists, or use joist hangers for a stronger connection.
- Keep the bottom face of the blocking flush with the joist bottoms so the drywall and bracket sit flat.
If you are working from below, you may need to open a section of drywall, install the blocking, and patch afterward. Some installers leave a larger opening temporarily so the duct and electrical can be routed at the same time. If the ceiling framing looks undersized, notched, or damaged, have a contractor evaluate it before adding a heavy fixture.
Tools and Materials
- Island hood with the manufacturer’s ceiling mounting frame and chimney covers
- Stud finder, tape measure, level, and a plumb bob or laser
- 2x lumber for blocking, structural screws, and joist hangers if needed
- Drill-driver, drywall saw, reciprocating saw or hole saw
- A rigid range hood duct kit sized to the hood outlet, plus elbows and a roof or wall cap with a backdraft damper
- Aluminum foil tape (not cloth duct tape) and sheet-metal screws
- Non-contact voltage tester, wire connectors, and cable clamps
- Stable step ladder or platform ladder, safety glasses, and gloves
Planning Height and Duct Route
Before you install island vent hood hardware, settle the mounting height, because it affects capture and comfort. Manufacturers typically specify a range, often around 30 to 36 inches from the cooking surface to the bottom of the hood; always follow the installation manual for your specific model and cooktop type, since gas and electric ranges can have different minimums. Hang it too high and smoke escapes; too low and taller cooks bump their heads.
Plan the duct route next. The goal is the shortest, straightest path to the outdoors with as few elbows as possible. Island ducts usually rise straight through the ceiling into the attic, then either continue up through the roof or turn and run to a gable or soffit-adjacent wall cap. Keep these rules in mind:
- Use smooth rigid metal duct at the full diameter of the hood outlet. Never reduce size.
- Minimize elbows, since each one adds resistance equivalent to several feet of straight duct.
- Always terminate outside. Never vent into the attic, a soffit cavity, or a chimney chase.
- Insulate duct runs through cold attics to limit condensation.
- Seal every joint with foil tape and fasten sections with short sheet-metal screws.
Recirculating kits exist for islands where outdoor venting is impossible, but they filter grease and odor only and do not remove heat or moisture.
Step-by-Step Island Range Hood Installation
- Turn off the power. Switch off the breaker feeding the planned hood circuit, then confirm the wires are dead with a non-contact voltage tester before handling them.
- Mark the center. Transfer the cooktop centerline to the ceiling with a plumb bob or laser and mark the bracket outline.
- Install blocking. Add blocking as described above and confirm the bracket screw locations land in solid wood.
- Cut the duct opening. Cut the ceiling hole for the duct within the bracket footprint.
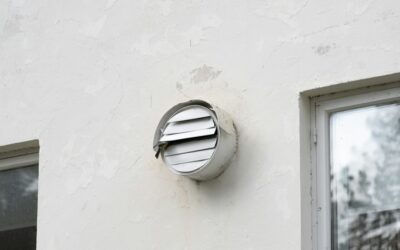
- Run the duct. Route rigid duct from the ceiling opening to the exterior cap. Install the roof or wall cap with proper flashing and sealant so it stays weathertight.
- Mount the ceiling frame. Fasten the mounting frame to the blocking with the specified screws or lag bolts, then level it. Many frames have adjustable legs to set the final height.
- Lift the hood. With two people, raise the hood body onto the frame and secure it. Do not attempt this lift alone from a ladder.
- Connect the duct. Join the hood outlet to the duct with foil tape and screws.
- Make the electrical connection. With the breaker still off, connect the hood wiring per the manufacturer’s diagram, including the ground, and secure the cable with a clamp.
- Install chimney covers. Slide the decorative covers into place and attach them to the frame.
- Restore power and test. Turn the breaker on, then test every fan speed and the lights. Hold a lit match or incense near the hood edge to confirm capture.
Ladder and Lifting Safety
Most of this job happens overhead. Use a platform ladder rated for your weight plus tools, set it on a level floor, and keep three points of contact whenever possible. Never stand on the top cap or top step. Protect countertops with a moving blanket rather than climbing on them. In the attic, step only on joists or a laid-down plank, and watch for nails protruding through the roof deck. The hood lift is always a two-person job.
Troubleshooting After Installation
- Hood rattles or vibrates: the frame is not fully tight to the blocking, or the duct is touching framing. Snug fasteners and add a foam isolator where the duct passes framing.
- Weak draw: check for a stuck backdraft damper, crushed flexible sections, or too many elbows.
- Drips from the hood: condensation in an uninsulated attic duct. Insulate the run and confirm it slopes slightly toward the exterior cap.
- Hood hangs out of level: adjust the frame legs before the chimney covers go on.
- Lights work but fan does not: recheck the wiring connections against the diagram with the power off.
Cost Ranges
Island hoods cost more than wall models, commonly from several hundred dollars to a few thousand for high-output stainless units. Duct parts and a roof cap add a modest amount. Professional island range hood installation often costs more than a wall hood install because of the ceiling work, and prices rise if a new circuit, roof penetration, or drywall repair is involved. Get itemized quotes that separate carpentry, ducting, roofing, and electrical.
When to Call a Licensed Professional
Hire a licensed electrician if the hood needs a new circuit, if there is no existing supply near the mounting point, or if you are unsure about the wiring. Large, high-CFM hoods can also trigger makeup-air requirements under local code, and designing that system is work for a licensed HVAC contractor. A roofer should handle roof penetrations if you are not comfortable with flashing, and a contractor should evaluate any ceiling framing that looks undersized. Check with your local building department about permits before you begin.
Handled carefully, you can install island vent hood hardware that looks clean, stays solidly anchored, and moves smoke outdoors where it belongs.
Frequently Asked Questions
Do island range hoods need blocking in the ceiling?
Almost always. Island hoods are heavy and hang entirely from the ceiling, so the mounting frame must fasten to solid blocking or joists, never drywall alone.
Can an island hood vent into the attic?
No. Venting into an attic deposits grease and moisture that can cause mold and fire risk. Always run the duct to an exterior roof or wall cap.
How high should an island vent hood be above the cooktop?
Many manufacturers specify roughly 30 to 36 inches, but follow your hood’s installation manual, since required clearances vary by model and cooktop type.
What duct is best for an island hood?
Smooth rigid metal duct at the full outlet diameter works best. It resists grease buildup and airflow loss better than flexible or corrugated duct.
Do I need an electrician to wire an island hood?
If a suitable circuit already exists, a confident DIYer can connect it with the breaker off. New circuits or uncertain wiring should go to a licensed electrician.