Ductless heat pumps have become one of the most popular ways to add efficient heating and cooling to a room without expensive ductwork, and installing a mini split is a project many capable homeowners consider tackling themselves. These systems pair an outdoor condenser with one or more indoor air handlers, connected by a slim line set that carries refrigerant, power, and condensate through a small hole in the wall.
This guide covers how the system works, sizing, the tools and steps involved, electrical and refrigerant considerations, and realistic costs so you know what you are getting into before you start.
- How a Mini Split Works
- Sizing Your System
- Tools and Materials You Will Need
- Step-by-Step Installation
- Electrical Requirements
- Refrigerant and the Line Set
- What It Costs
- Single-Zone Versus Multi-Zone Systems
- Placement and Positioning Tips
- Maintenance for Efficiency and Longevity
- Understanding Efficiency Ratings
- Is DIY Right for You?
How a Mini Split Works
A mini split moves heat rather than generating it, making it far more efficient than resistance heaters or window units. The outdoor unit compresses refrigerant and exchanges heat with the outside air, while the indoor head blows conditioned air into the room. In summer it pulls heat out of your home; in winter it reverses to pull heat in from outside, even in cold weather. Because there are no ducts, energy losses are minimal and installation is far less invasive than central HVAC.
Sizing Your System
Choosing the right capacity is critical. An undersized unit runs constantly and never keeps up, while an oversized one short-cycles and wastes energy. Capacity is measured in BTUs. As a rough starting point:
- 150 to 250 square feet: around 6,000 to 9,000 BTU.
- 250 to 400 square feet: around 9,000 to 12,000 BTU.
- 400 to 650 square feet: around 12,000 to 18,000 BTU.
- 650 to 1,000 square feet: around 18,000 to 24,000 BTU.
Insulation quality, ceiling height, sun exposure, and climate all affect the real number, so treat these as guidelines and adjust upward for poorly insulated or sunny rooms.
Tools and Materials You Will Need
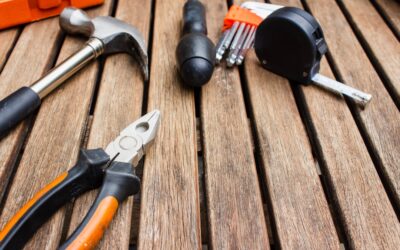
Before installing a mini split, gather the right equipment. A typical DIY install requires:
- A drill with a hole saw large enough for the line set.
- A level, stud finder, and mounting hardware for the indoor bracket.
- An adjustable wrench and torque wrench for the flare fittings.
- A vacuum pump and manifold gauge set to evacuate the lines, unless you buy a precharged kit.
- Electrical supplies and, in most cases, a licensed electrician for the dedicated circuit.
Many DIY-friendly systems ship with a precharged line set and quick-connect fittings, which eliminate the need for a vacuum pump and make the job accessible to homeowners.
Step-by-Step Installation
While details vary by brand, the overall sequence is consistent. The main steps are:
- Mount the indoor unit’s bracket on an interior wall, level and anchored to studs.
- Drill a downward-sloping hole through the exterior wall for the line set to pass through.
- Feed the refrigerant lines, control wire, and condensate drain through the hole and hang the indoor head on its bracket.
- Set the outdoor condenser on a level pad or wall bracket, keeping it clear of obstructions.
- Connect the flare fittings between the line set and both units, tightening to spec.
- Evacuate the lines with a vacuum pump, or open the service valves on a precharged system.
- Make the electrical connections and install the condensate drain with proper slope.
- Power up, test heating and cooling, and check for leaks.
The downward slope of the wall hole is important so condensate drains outward rather than back into the room. Take your time with the flare connections, since a poor flare is the most common cause of refrigerant leaks.
Electrical Requirements
Most mini splits need a dedicated 240-volt circuit with an appropriately sized breaker and a disconnect box near the outdoor unit. This is the part of the job where many homeowners bring in a licensed electrician, both for safety and to satisfy local code. Undersized wiring or an improper connection can damage the equipment and create a fire hazard, so do not cut corners on the electrical side.
Refrigerant and the Line Set
The refrigerant lines are the heart of the system. Traditional installs require pulling a vacuum on the lines to remove air and moisture before releasing refrigerant, a step that demands a vacuum pump and gauges. Precharged DIY kits skip this by sealing the refrigerant in the line set with quick-connect couplings, letting you simply attach the fittings. If your system is not precharged and you are not comfortable with refrigerant work, this is the point to hire an HVAC professional.
What It Costs
Cost depends heavily on whether you do it yourself and how many indoor heads you need:
- DIY single-zone system: equipment often runs $1,000 to $2,500.
- Professional single-zone install: commonly $3,000 to $5,000 all in.
- Multi-zone systems: frequently $5,000 to $12,000 installed, depending on the number of heads.
Doing the mounting and running the lines yourself can save a substantial amount, though hiring out the electrical and refrigerant work is often money well spent.
Single-Zone Versus Multi-Zone Systems
One early decision shapes both cost and complexity: how many rooms you want to condition. The two configurations serve different needs:
- Single-zone: one outdoor unit paired with one indoor head, ideal for a single room, addition, garage, or bonus space. It is the simplest and cheapest to install.
- Multi-zone: one outdoor unit connected to several indoor heads, letting you condition multiple rooms with independent temperature control. It costs more and involves more line sets and connections.
For a DIY project, a single-zone system is far more manageable. Multi-zone systems, with their multiple refrigerant runs and heavier electrical demands, are often better left to professionals.
Placement and Positioning Tips
Where you mount both units affects comfort and efficiency as much as the install quality. For the indoor head, choose a high spot on an interior or exterior wall that lets conditioned air circulate across the room without blowing directly onto a bed or seating. Keep it clear of obstructions and away from heat sources like lamps or electronics that could fool its sensor. For the outdoor condenser, pick a level, well-drained spot with clearance around it for airflow, ideally shaded from harsh afternoon sun and away from bedroom windows where its hum might be a nuisance. Keeping the line-set run between the two units as short and direct as possible improves efficiency and reduces the chance of leaks.
Maintenance for Efficiency and Longevity
A mini split rewards simple, regular upkeep with years of efficient service. The most important task is keeping the indoor unit’s filters clean, since clogged filters choke airflow and force the system to work harder. A basic routine includes:
- Rinsing or vacuuming the indoor filters every few weeks during heavy use.
- Wiping down the indoor unit and clearing the condensate drain to prevent clogs and leaks.
- Keeping the outdoor unit free of leaves, grass clippings, and snow.
- Scheduling an occasional professional check of refrigerant levels and coils.
This light maintenance preserves efficiency, keeps energy bills down, and extends the life of the equipment well beyond a decade.
Understanding Efficiency Ratings
When shopping for a system, you will encounter efficiency ratings that directly affect your energy bills, so it pays to understand them. The key numbers are:
- SEER: the Seasonal Energy Efficiency Ratio measures cooling efficiency; higher numbers mean lower cooling costs.
- HSPF: the Heating Seasonal Performance Factor measures heating efficiency; again, higher is better.
- Inverter technology: variable-speed compressors ramp up and down instead of cycling on and off, which saves energy and holds temperatures steady.
A higher-rated unit costs more upfront but uses less electricity, which can pay back the difference over the years, especially if you heat and cool the space heavily. In cold climates, look specifically for cold-climate rated models that maintain strong heating output even when outdoor temperatures drop well below freezing. Balancing the upfront price against the efficiency rating and your local energy costs helps you choose a system that is economical to run for its full lifespan, not just cheap to buy. Many regions also offer rebates or tax incentives for high-efficiency heat pumps, which can meaningfully reduce the net cost.
Is DIY Right for You?
Handy homeowners can absolutely handle installing a mini split, especially with a precharged, DIY-oriented kit that removes the trickiest refrigerant steps. Just be honest about your comfort with electrical work and refrigerant handling. Mount everything securely, respect the drainage slope, torque the fittings correctly, and bring in licensed help where code or safety demands it. Done right, a ductless system delivers quiet, efficient, room-by-room comfort that pays for itself in energy savings for many years.