Insulation is supposed to be a set-it-and-forget-it part of the house, but it does not last forever, and worn-out insulation quietly bleeds money out of your home every day. Insulation replacement becomes worthwhile when the material has been wet, compressed, contaminated by pests, or simply falls short of today’s R-value standards, all of which are common in homes more than 20 or 30 years old. Replacing it typically runs $1 to $4 per square foot depending on the material and whether old insulation must be removed first, and it often pays back through lower energy bills within a few years. Here is how to recognize when it is time, what the job involves, and what it costs.
Signs Your Insulation Needs Replacing
Some warning signs are obvious and some are subtle. Rising energy bills with no change in habits, rooms that never hold a comfortable temperature, and floors or walls that feel cold to the touch all point to insulation that is no longer doing its job.
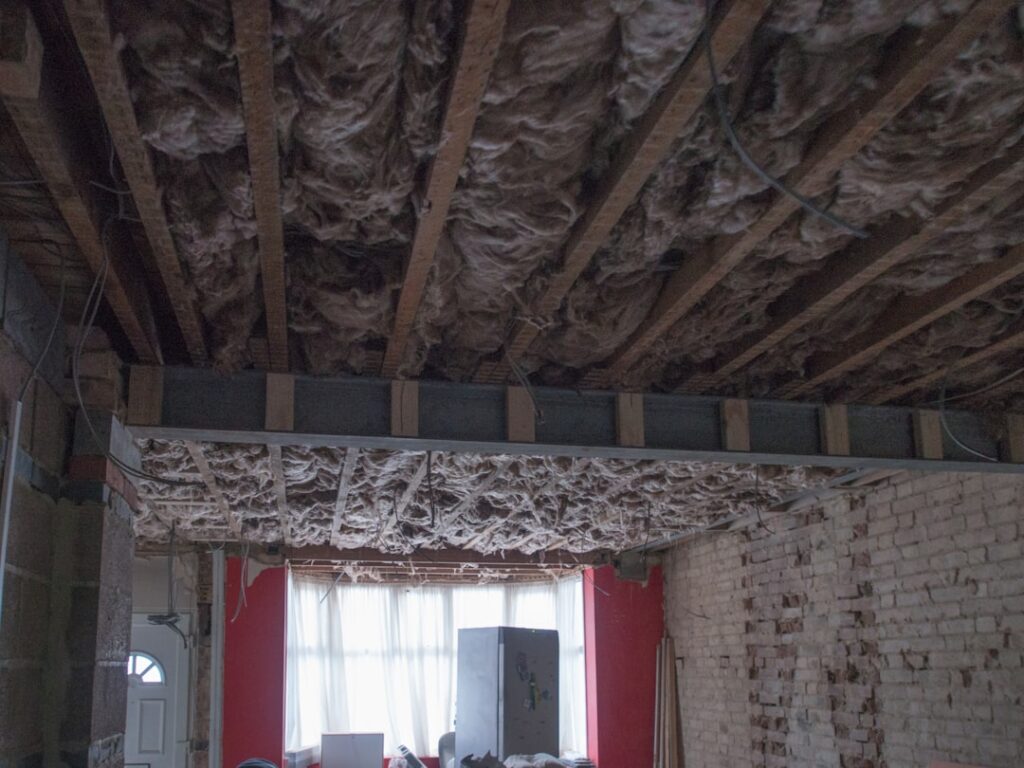
- Water damage: a roof leak or plumbing failure that soaked the insulation ruins fiberglass and cellulose, which lose R-value and grow mold when wet.
- Pest infestation: rodent droppings, nests, and urine contamination make insulation a health hazard that should be removed, not left.
- Compression and settling: old blown insulation settles over decades, and matted-down material insulates far less than its original rating.
- Musty odors or visible mold, which signal moisture problems the insulation is now harboring.
Uneven temperatures between rooms and ice dams forming on the roof in winter are also red flags that the attic insulation and air sealing have failed.
Repair, Add, or Full Replacement?
Not every situation calls for a complete tear-out. If your attic insulation is dry, clean, and simply too shallow, the cheapest fix is often to add more on top rather than remove what is there, topping up blown cellulose or laying batts across the joists to reach the modern R-49 to R-60 target.
Full replacement is warranted when the existing material is contaminated, wet, moldy, or infested. In those cases you cannot just cover the problem; the compromised insulation has to come out, the cause has to be fixed, and fresh material goes in. Deciding between topping up and replacing usually comes down to whether the old insulation is sound but insufficient, or actually damaged.
The Replacement Process
A full attic replacement follows a predictable sequence. Crews first protect the living space and set up containment, then remove the old material, typically vacuuming out blown insulation with a large insulation removal vacuum into bags, or hauling out old batts by hand.
- Inspect and diagnose, confirming the cause of any moisture or pest damage.
- Remove old insulation, vacuuming blown material and bagging batts for disposal.
- Fix the root problem, repairing roof leaks, sealing pest entry points, and drying the space.
- Air seal penetrations, top plates, and around fixtures, which is the step that makes new insulation perform.
- Install baffles at the eaves to keep soffit vents clear.
- Blow or lay new insulation to the target depth and R-value, with depth markers to verify coverage.
Air sealing during the replacement is the highest-value step and the reason a fresh install outperforms the old one even at the same R-value.
What It Costs
Pricing depends on material, area, and whether removal is needed. As a rough guide, expect these ranges.
- Blown fiberglass or cellulose: roughly $1 to $2.50 per square foot installed for the new material.
- Old insulation removal: add about $1 to $2 per square foot, more if it is contaminated and needs hazmat handling.
- Spray foam: $3 to $7 per square foot, higher R-value and air sealing in one step.
- Batts: $0.50 to $1.50 per square foot for the material in accessible open cavities.
A typical 1,000-square-foot attic replacement often lands between $1,500 and $4,500 all in. Vermiculite or asbestos-suspect material raises costs sharply because it demands specialized abatement, so never disturb it yourself.
Choosing New Materials
Replacement is a chance to upgrade, not just restore. Blown cellulose and fiberglass are the economical choices for attic floors and flow nicely around framing. Spray foam costs more but delivers the highest R-value per inch and doubles as an air barrier, which is compelling for cathedral ceilings, rim joists, and hard-to-seal assemblies.
Match the material to the space and your climate zone target. In most attics, dense-packed cellulose or blown fiberglass to R-49 or R-60 gives the best value. For basements and rim joists, rigid foam board or closed-cell spray foam handles the moisture and air-sealing demands better than fibrous insulation.
The Payback
The financial case is strong when insulation is genuinely failing. Homeowners commonly see heating and cooling costs drop 10 to 20 percent after a proper attic replacement with air sealing, and in a leaky, under-insulated house the improvement can be larger. On a home spending $2,400 a year on energy, a 15 percent cut is $360 annually, which recovers the project cost in several years and keeps paying afterward.
Beyond the dollars, insulation replacement fixes comfort problems that no thermostat setting can, eliminating cold floors, drafty rooms, and ice dams. If your insulation shows the warning signs above, especially water damage or pest contamination, replacing it is one of the more dependable home investments you can make, both for your budget and for the health of the house.
Health and Safety Reasons to Replace
Beyond energy savings, some insulation replacements are really about indoor air quality. Insulation contaminated by rodent urine and droppings can carry pathogens and allergens, and disturbed contaminated fiberglass sends those particles into the air you breathe. Mold-laden insulation from a past leak is a persistent source of spores that aggravate asthma and allergies, and simply covering it never solves the problem.
The most serious case is vermiculite insulation, a loose, pebbly gray-brown material found in some attics built before the 1990s, which may contain asbestos from the Libby, Montana mine that supplied most of it. Never disturb suspected vermiculite yourself; have it tested, and if it is positive, hire a licensed abatement contractor. The same caution applies to any old insulation you suspect contains asbestos. In these situations, replacement is not optional maintenance but a genuine health measure, and the disposal must follow the proper channels.
Timing the Project Right
When you replace insulation can be almost as important as whether you do. The best time is during other work that already opens up the space, a reroof that exposes the attic, a renovation that strips walls to the studs, or after fixing the roof leak or pest entry that damaged the insulation in the first place. Coordinating the replacement with those jobs saves labor and avoids doing the same access twice.
Season matters too. Attic work is brutal in midsummer heat, when temperatures up there can exceed 130°F, so spring and fall are kinder for both DIYers and crews. If you are chasing energy-cost relief, getting the work done before the heating season means you capture a full winter of savings rather than waiting until the following year. And because incentive programs and contractor availability fluctuate, scheduling ahead of the fall rush often gets you a better price and a faster start than calling once the cold weather has already arrived and everyone else is calling too.
DIY Versus Hiring It Out
Some insulation replacements are within reach of a determined homeowner, while others clearly are not. Adding blown insulation over a sound, clean attic floor is a reasonable DIY project; you can rent a blower, often free with a bulk material purchase, and top up to R-49 or R-60 in a weekend. Removing old batts by hand in an accessible attic is also doable, if unpleasant work.
The jobs to hand off are the messy and hazardous ones. Vacuuming out contaminated blown insulation, removing pest-soiled material, dense-packing closed walls, spraying foam, and anything involving suspected asbestos or vermiculite all call for professionals with the right equipment and containment. Even where DIY is feasible, weigh the discomfort: attic work means heat, tight spaces, fiberglass itch, and careful footing on the joists. If the scope includes removal and disposal of a large volume of old material, the labor and dumpster costs often make a professional crew the better value once you account for your time and the mess.