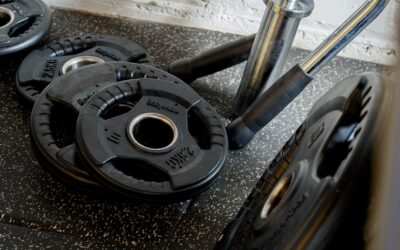
Drop a 45-pound dumbbell on bare concrete and you crack the slab; drop it on the right rubber tile and it barely leaves a mark. Interlocking rubber flooring tiles are the workhorse solution for home gyms, garages, playrooms, and workshops precisely because they absorb impact, grip underfoot, and install in an afternoon with no glue and no special tools. But the market runs from flimsy foam-backed squares to commercial vulcanized rubber, and the price gap reflects real performance differences. This guide covers thickness, density, and cost so you buy once instead of twice.
Part of our Tile & Grout guide — explore the full guide →
- How Interlocking Rubber Tiles Work
- Thickness: Match It to the Job
- Density Matters as Much as Thickness
- What They Cost
- Where They Shine
- Installation Step by Step
- Downsides to Know
- Recycled Rubber vs EPDM
- Cleaning and Maintenance
- How Many Tiles You Will Need
- Using Interlocking Rubber Floor Tiles Outdoor: UV, Drainage, and Base Prep
- Frequently Asked Questions
How Interlocking Rubber Tiles Work
These tiles use a puzzle-piece edge, tabs and loops that lock into neighboring tiles so the floor holds together as a single mat without adhesive. Most are made from recycled rubber (ground-up tires bound with polyurethane) or higher-grade EPDM and vulcanized rubber. The interlocking design means you can install over concrete, plywood, or even existing hard flooring, and you can pull the whole floor up and take it with you when you move, a big draw for renters and garage gyms.
Thickness: Match It to the Job
Thickness is the number that determines whether the floor performs. It is measured in millimeters or fractions of an inch, and the right choice depends entirely on use:
- 8 to 10 mm (about 3/8 inch): light use, playrooms, home offices, standing mats, light cardio
- 12 to 15 mm (about 1/2 inch): general home gyms, treadmills, light free weights
- 20 mm (3/4 inch): serious weightlifting, CrossFit, dropping loaded barbells
- 25 to 38 mm (1 to 1.5 inch): heavy Olympic lifting platforms and commercial gyms
If you deadlift or drop weights, do not go below 3/4 inch. Thin tiles will transmit impact to the slab and can split at the seams under repeated heavy drops.
Density Matters as Much as Thickness
Two tiles of the same thickness can perform very differently depending on density, the amount of rubber packed into the tile. Denser tiles resist compression, hold up under heavy equipment, and last longer. Low-density recycled-rubber tiles feel spongy and can develop permanent divots under a rack or treadmill. For any application involving heavy weights or rolling equipment, choose a high-density tile even if it costs more; density is what stops a floor from bottoming out under load.
What They Cost
Interlocking rubber tiles are priced per square foot, and the range is wide:
- Thin foam-rubber puzzle tiles (8 to 10 mm): $1 to $2.50 per sq ft
- Mid-grade recycled rubber (12 to 15 mm): $2.50 to $4.50 per sq ft
- Heavy-duty high-density (20 mm and up): $4.50 to $8 per sq ft
- Premium EPDM color-fleck tiles: $6 to $12 per sq ft
Rolled rubber flooring is often cheaper per square foot for large uninterrupted areas, but interlocking tiles win on ease of installation, portability, and the ability to replace a single damaged tile rather than a whole roll.
Where They Shine
Interlocking rubber tiles are the default for a reason. In home gyms they protect the slab, cushion joints, deaden the clang of dropped weights, and provide grip. In garages they resist oil, grease, and dropped tools while adding warmth underfoot. In playrooms and daycare spaces, thicker tiles cushion falls and meet impact-attenuation needs. They also work for utility rooms, workshops, and basements where a hard, quiet, water-tolerant surface beats bare concrete.
Installation Step by Step
Installation is genuinely a DIY afternoon:
- Sweep and dry the subfloor; rubber traps moisture, so the slab must be dry.
- Dry-lay the tiles across the floor to plan your layout and minimize awkward edge cuts.
- Start in a corner and press the interlocking tabs together, tapping seams flush with a rubber mallet.
- For edges, measure and cut tiles with a sharp utility knife against a straightedge; several passes beat one forced cut.
- Add straight-edge border pieces (sold with many kits) for a finished look against walls.
Let the tiles relax flat for a day so any curl from shipping settles out. Heavy tiles hold themselves down by weight; lighter ones may benefit from double-sided tape at the perimeter in high-traffic spots.
Downsides to Know
Rubber has a distinct smell when new, especially recycled tires; ventilate the space for a few days and it fades. Cheaper tiles can develop gaps at the seams over time as they compress, and low-density tiles dent under fixed heavy loads. Rubber is also heavy: a 3/4-inch tile can weigh 15 to 20 pounds, so ordering enough for a two-car garage is a real hauling job. None of these are dealbreakers, but they are worth planning around.
Recycled Rubber vs EPDM
The material inside the tile matters as much as its dimensions. Recycled rubber, made from ground-up tires bound with polyurethane, is the affordable workhorse: durable, shock-absorbing, and fine for garages and home gyms, though it carries the classic black color and a stronger initial odor. EPDM rubber is a virgin synthetic rubber offered in color flecks and full colors, with better UV stability, less odor, and a more finished look, at a higher price. For a hidden garage gym, recycled rubber gives you the most performance per dollar. For a visible playroom, daycare, or a space where appearance counts, EPDM-topped tiles justify the premium. Many mid-range tiles combine a recycled-rubber base with an EPDM wear surface to balance cost and looks.
Cleaning and Maintenance
Rubber tiles are low-maintenance but not no-maintenance. Sweep or vacuum regularly to keep grit from grinding into the surface, and damp-mop with warm water and a mild pH-neutral cleaner for spills and sweat. Avoid harsh solvents, bleach, and oil-based cleaners, which can degrade the rubber over time. In a home gym, wiping down the tiles after heavy sessions prevents sweat and bacteria buildup at the seams. Because the tiles interlock rather than glue down, you can lift a section to clean underneath if moisture ever sneaks between the tiles and the slab, which is a real advantage over glued rolled rubber in damp spaces.
How Many Tiles You Will Need
Ordering is simple once you know the tile size. Most interlocking rubber tiles are 2 by 2 feet (4 square feet each) or 3 by 3 feet (9 square feet each). Measure your room’s square footage, divide by the coverage per tile, and add roughly 5 to 10 percent for edge cuts and the occasional replacement. Remember that puzzle-edge tiles lose a little coverage where the tabs interlock, and border pieces trim the exposed tabs on the perimeter, so factor those in. Buying a couple of spare tiles up front means you can swap a damaged one later without hunting for a matching batch.
Using Interlocking Rubber Floor Tiles Outdoor: UV, Drainage, and Base Prep
Interlocking rubber floor tiles outdoor face a very different set of stresses than the same tiles in a basement gym. Sun, standing water, freeze-thaw cycles, and a base that shifts with the seasons decide whether a patio, deck, or outdoor workout area stays flat for years or curls and pools after one summer. Choose the tile and prepare the ground with those forces in mind.
Pick a Tile Built for Sun and Water. Not every rubber tile is rated for exterior use, so confirm the manufacturer lists outdoor installation before buying. Ultraviolet light slowly breaks down low-grade rubber and binders, which shows up as chalking, fading, and surface cracking. Tiles with an EPDM wear layer or added UV inhibitors hold their color and flexibility far longer in direct sun than plain recycled-tire tiles. Dark tiles also get hot on summer afternoons, so test the surface with your hand before letting kids or pets play barefoot on it, and consider a lighter color-fleck finish for sunny exposures.
Plan for Drainage. Water trapped under rubber breeds algae, stains the slab, and can lift tiles when it freezes. Look for tiles with drainage channels or raised studs molded into the underside so rain can run beneath the surface to the edges. The base itself should slope away from the house; most existing patios and decks already have a gentle pitch that works well. Leave the low edge open or use perimeter pieces that allow water to escape rather than damming it in.
Prepare a Stable Base
- Concrete or pavers: The best outdoor base. Pressure-wash, let it dry fully, and grind or patch any lips that would telegraph through.
- Wood decks: Confirm boards are sound and fasteners are flush; tiles with drainage channels let the decking dry between rains.
- Gravel: Use a compacted, level crushed-stone base rather than loose pea gravel, which lets tiles rock and separate.
- Grass or bare soil: Avoid it. Soil settles unevenly, stays damp, and lets weeds push up through the seams.
Rubber expands in heat and shrinks in cold, so leave a small gap at walls, posts, and steps instead of wedging the last row tight. In freezing climates, clear snow with a plastic shovel rather than a metal blade, and check the manufacturer’s guidance before using deicing salts. A quick look each spring for lifted corners or separated seams keeps an outdoor rubber floor flat and safe underfoot.
Frequently Asked Questions
How thick should interlocking rubber tiles be for a home gym?
For general home gym use with treadmills and light free weights, 1/2 inch (12 to 15 mm) is enough. If you drop loaded barbells or do CrossFit, step up to 3/4 inch (20 mm) so the impact does not reach the slab and split the seams.
Can you install interlocking rubber tiles over concrete?
Yes, concrete is the ideal substrate. Make sure the slab is clean and dry first, since rubber can trap moisture underneath. The tiles simply lock together on top with no adhesive needed.
Do interlocking rubber floor tiles smell?
New rubber tiles, especially recycled-tire products, have a noticeable odor at first. Ventilating the room for several days to a couple of weeks lets it dissipate. Higher-grade EPDM tiles smell less than recycled rubber.
Are rubber tiles or rolled rubber better?
Interlocking tiles are easier to install, portable, and let you replace a single damaged piece, making them ideal for home gyms and rooms with obstacles. Rolled rubber is often cheaper per square foot and has fewer seams, which suits large, open commercial floors.
How do you cut interlocking rubber tiles?
Score and cut them with a sharp utility knife against a metal straightedge, making several progressively deeper passes rather than forcing one cut. For thick 3/4-inch tiles, a fresh blade and patience produce a clean edge.
Prefer to explore on your own?
See how new flooring looks in your actual room in seconds — free, no signup.
Try the free Floor Studio →