For generations, a can of paste wax was standard equipment in American homes, and the name most people reach for is Johnson floor wax. The term traces back to SC Johnson, the company behind the classic Johnson’s Paste Wax and the old Johnson Wax line that put a warm, hand-rubbed shine on wood floors and furniture for decades. Some of those classic products have been discontinued or reformulated over the years, so before you go looking, it helps to understand what floor wax actually does, how to apply it correctly, and, just as important, which floors you should never wax at all.
This guide covers paste and liquid wax technique in general terms, the results you can realistically expect, and the modern flooring that manufacturers specifically warn against waxing.
What Johnson Floor Wax Is and What It Does
Floor wax is a blend of natural and synthetic waxes, usually carried in a solvent, that you spread thin over a floor. As the solvent flashes off, a hard, protective wax film is left behind. Buffing that film aligns and compresses it into a smooth, reflective surface. The result is a soft luster, a bit of slip resistance underfoot, and a sacrificial layer that takes scuffs and minor wear instead of the floor itself.
Two general formats exist. Paste wax comes in a can and is worked in by hand or with a cloth; it’s dense and durable but more labor to apply. Liquid wax is thinner, spreads faster over larger areas, and is easier for a first-timer, though the film is usually thinner per coat. Both build protection through several thin applications rather than one thick one.
Which Floors Can Be Waxed
Traditional wax belongs on a short and specific list of surfaces. Match the product to the floor or you’ll cause more harm than good.
- Unfinished or oil-finished solid wood: Classic candidates for paste wax, which nourishes and protects raw or penetrating-oil-finished boards.
- Older waxed wood floors: If the floor already has a wax finish, re-waxing maintains it.
- Cork with a wax-compatible finish: Some cork takes wax well, but check the maker’s guidance.
- Certain vinyl and linoleum: Older non-coated vinyl and true linoleum can be waxed, but most modern vinyl is a no-wax product.
- Concrete and some stone: Paste wax is occasionally used to add luster and protection to sealed concrete.
Floors You Should Never Wax
This is the part that saves floors. Most modern flooring is designed to shine on its own and will be ruined by wax.
- Polyurethane-finished hardwood: The vast majority of floors installed in the last 30 years have a urethane surface finish. Wax won’t bond to it, leaving a hazy, slippery film that traps dirt and interferes with any future recoat.
- No-wax vinyl and luxury vinyl plank (LVP): These have a built-in wear layer meant to be cleaned, not waxed. Wax dulls them and voids many warranties.
- Laminate flooring: Sealed on top and never meant to be waxed; wax builds up in the seams and streaks.
- Prefinished engineered wood with aluminum-oxide finish: Same story as polyurethane. Leave the factory finish alone.
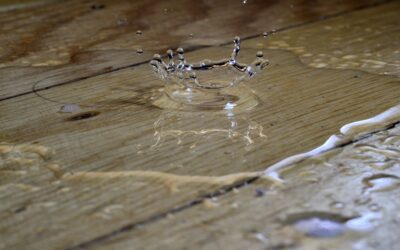
If you’re unsure whether a wood floor is waxed or urethane-coated, do the water test: put a few drops of water in a hidden spot. If it beads and sits, you likely have a surface finish that should not be waxed. If it soaks in and darkens the wood, you may have an older wax or oil finish that can be re-waxed.
How to Apply Johnson Floor Wax
Once you’ve confirmed your floor is a genuine wax candidate, the technique is simple but unforgiving of shortcuts. Thin coats are everything.
- Clean thoroughly. Sweep and damp-mop, then let the floor dry completely. Wax over dirt seals the dirt in.
- Strip old buildup if needed. If prior wax has yellowed or built up in layers, remove it with a wax stripper or mineral spirits before adding a fresh coat.
- Apply a thin coat. Use a clean, soft cloth or a wax applicator. Work in small sections with the grain, spreading the wax as thin as you can. A thin, even film beats a thick smear every time.
- Let it dry. As a general range, allow about 30 minutes of dry time per coat, though this varies with the product, temperature, and humidity. Always follow the can’s directions.
- Buff. Once hazy and dry, buff by hand with a clean cloth or with a floor buffer fitted with a soft pad until the surface shines.
- Add a second coat. For more depth and durability, apply and buff a second thin coat. Two thin coats outperform one heavy one.
Tools You’ll Want
- Soft, lint-free cloths or a lamb’s-wool applicator
- A floor buffer or polisher for larger rooms
- Wax stripper or mineral spirits for removing old buildup
- Knee pads and good ventilation, since solvent-based waxes have strong fumes
Paste Wax Versus Liquid Wax
People often ask which format to buy, and the honest answer is that it depends on the size of the job and how much elbow grease you’re willing to spend. Paste wax, the traditional can you scoop from with a cloth, lays down the densest, most durable film. It’s the choice for a small room, a stair landing, or furniture where you want maximum protection and don’t mind rubbing it in by hand. The downside is labor: a large room worked entirely by hand with paste wax can eat up an afternoon.
Liquid wax trades some durability for speed. Because it spreads thin and fast, you can cover a whole living room in a fraction of the time, which makes it friendlier for a first-timer or a big open floor. Expect to apply more coats to reach the same depth of protection a single paste application gives. Whichever you pick, the golden rule never changes: several thin coats always beat one thick coat, which stays tacky, streaks, and yellows faster.
Reading the Label Before You Buy
Because some classic formulas have been discontinued or reworked over the years, don’t assume the can on the shelf behaves exactly like the one your grandfather used. Read the label for the intended surfaces and the specific dry and buff times, and check whether it’s solvent-based or water-based. Solvent waxes generally cure harder but need real ventilation; water-based products are lower-odor. When in doubt, buy a small can and test a hidden corner before committing to the whole floor.
Results You Can Realistically Expect
Done right, a waxed floor has a warm, hand-rubbed glow that many people prefer to the plasticky sheen of polyurethane. Wax hides fine scratches, adds a little grip, and can be spot-repaired: scuff an area and you simply rub in a touch more wax and buff, no sanding required. That repairability is the real charm of a traditional wax finish.
The trade-offs are honest. Wax needs upkeep, typically a re-wax or buff every 6 to 12 months in busy areas. It can turn slippery when freshly applied and shows water spots, so wipe spills quickly. Over many years, layers build up and yellow, which is why periodic stripping is part of the deal. Wax is also not as scratch- or moisture-resistant as a modern urethane coat.
Final Thoughts
Johnson floor wax and paste wax in general still have a rightful place on the right floors: solid wood with a penetrating finish, older waxed boards, and certain vinyl and concrete surfaces. The rules are simple. Confirm your floor can be waxed, strip old buildup when it yellows, apply thin coats, respect the roughly 30-minute dry time, and buff to a shine. Just remember that most modern hardwood, LVP, and laminate floors are no-wax by design and should never see a can of wax. Match the wax to the floor and you’ll get that timeless, hand-rubbed luster without doing any harm.
Prefer to explore on your own?
See how new flooring looks in your actual room in seconds — free, no signup.
Try the free Floor Studio →