A Kerdi shower pan is the foundation of the Schluter waterproofing system, and it has transformed how modern tile showers get built by replacing the old, failure-prone mortar-bed-and-liner method with a fast, reliable, fully bonded assembly. If you are planning a tile shower and want a system that resists leaks and mold for decades, understanding how the Kerdi pan works, what it costs, and how to install it correctly will help you decide whether this is the right approach for your bathroom.
Part of our Bathroom Remodeling & Flooring guide — explore the full guide →
- What Is a Kerdi Shower Pan?
- How the Schluter System Works
- Pan Sizes and Options
- What It Costs
- Installation Step by Step
- Why the Flood Test Matters
- Common Mistakes to Avoid
- Kerdi Pan vs. Other Systems
- Is It Right for Your Project?
- Preparing the Subfloor Correctly
- Tiling Over the Kerdi Pan
- Maintaining Your Kerdi Shower
What Is a Kerdi Shower Pan?
The Kerdi shower pan, sold as the Schluter Kerdi-Shower-ST or -SB, is a pre-sloped, ready-to-tile foam base made of expanded polystyrene. It comes pitched at the correct angle toward the drain right out of the box, eliminating the need to hand-pack a sloped mortar bed. Paired with Kerdi waterproofing membrane on the walls, a Kerdi-Drain, and Kerdi-Band at the seams, the pan creates a continuous waterproof surface that sits directly under your tile. Because the waterproofing is at the tile surface rather than buried below a mortar bed, water never gets a chance to soak into the structure.
How the Schluter System Works
Traditional showers waterproof with a rubber liner buried under a thick mortar bed. The problem is that water inevitably passes through the tile and grout and sits in that mortar bed, staying damp and breeding mold, only draining slowly through weep holes that often clog. The Kerdi approach flips this. The orange Kerdi membrane bonds to the surface right beneath the tile, so water is stopped at the top and directed to a bonded flange drain immediately. Nothing stays wet inside the assembly. This surface-waterproofing concept is why the system is so reliable when installed correctly.
Pan Sizes and Options
Kerdi shower pans come in many standard sizes to fit common alcove and neo-angle layouts, including 32×60 inches for a standard tub-to-shower conversion, 48×48, 36×60, 32×32, and larger custom-cut options. Drain placement varies: center drains are most common, but off-center and linear-drain versions exist for curbless and modern designs. You can also field-cut a pan smaller to fit an odd opening, and Schluter sells a curb piece and shower-kit bundles that include the pan, drain, membrane, band, and corners together. Buying the kit ensures every component is compatible.
What It Costs
A standard Kerdi shower pan alone runs about $150 to $300 depending on size. A complete Kerdi-Shower-Kit with pan, Kerdi-Drain, a roll of membrane, band, and preformed corners typically costs $400 to $700. Add thinset mortar, tile, and grout on top of that. If you hire a pro to build the full waterproofed shower base, labor and materials together commonly land between $1,200 and $2,500 before the finish tile. The system costs more up front than a basic mud pan, but the reliability and speed often justify it.
Installation Step by Step
Installing a Kerdi pan is very achievable for a determined DIYer who follows the Schluter instructions exactly. The general sequence is:
- Prepare a clean, flat, structurally sound subfloor. Dry-fit the pan and drain to confirm the fit and slope direction.
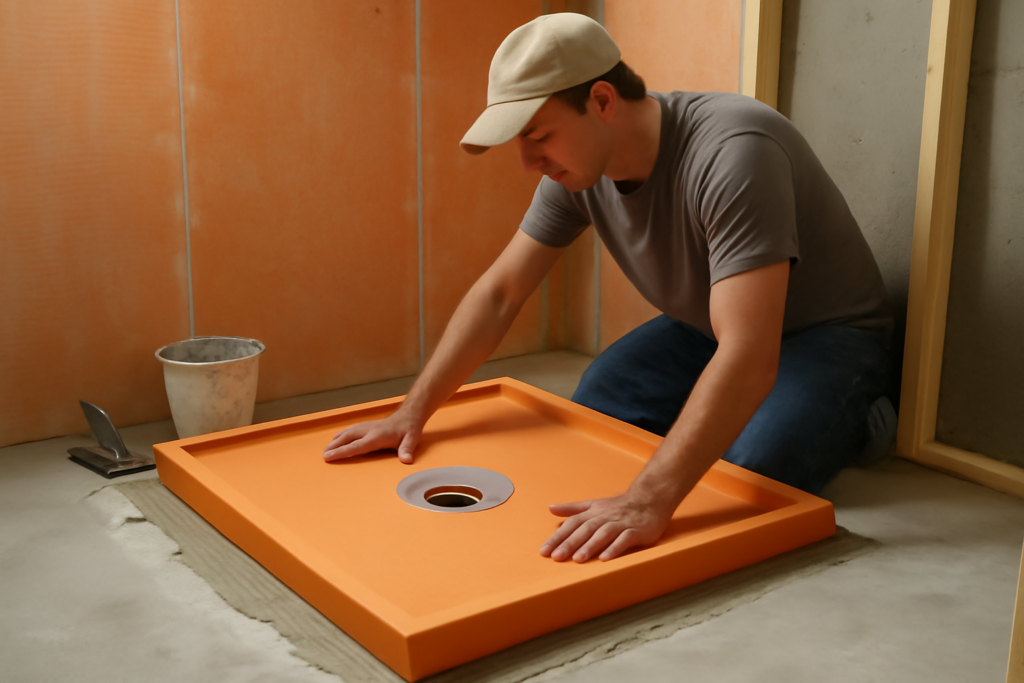
- Trowel unmodified thinset mortar onto the subfloor with the correct notch size, then embed the foam pan firmly, pressing it into full contact so there are no voids underneath.
- Install the Kerdi-Drain, bonding its integrated fleece flange into thinset on the pan so the membrane and drain become one continuous waterproof layer.
- Waterproof all seams and the pan-to-wall transitions with Kerdi-Band and preformed inside and outside corners, bedded in thinset with no gaps.
- Install the curb, wrapping it with membrane, and seal every corner meticulously.
- Perform a flood test if possible: plug the drain, fill the pan, and confirm it holds water before tiling.
Use only unmodified thinset with Kerdi products unless Schluter specifically approves otherwise, because modified thinset can fail to cure properly when sandwiched between two non-porous surfaces.
Why the Flood Test Matters
The single most valuable step DIYers skip is the flood test. Plugging the drain and letting the assembled pan hold a few inches of water overnight proves your waterproofing before a single tile goes down. If it holds, you have confidence for the next decade. If it leaks, you find out now, when the fix is easy, rather than after the tile is set. Professional installers on high-end jobs do this routinely, and it is worth the extra day.
Common Mistakes to Avoid
The most frequent and costly mistake is using modified thinset where unmodified is specified, which can leave the bond uncured and soft. Another is failing to embed the pan fully, leaving hollow voids that crack tile and grout later. Skipping or sloppily installing the Kerdi-Band at seams and corners defeats the whole waterproofing scheme, since those transitions are exactly where water tries to escape. People also sometimes puncture the membrane with screws or fasteners after waterproofing, creating a hidden leak. Finally, rushing to tile before the thinset under the pan has cured can shift the base.
Kerdi Pan vs. Other Systems
The main competitors are traditional mud pans and other foam systems like Wedi and USG Durock. A hand-built mud pan costs less in materials but takes real skill to slope correctly and relies on a buried liner. Wedi is a similar surface-waterproofed foam system, often with the waterproofing built into the board so it needs fewer separate membrane steps, though it can cost more. Kerdi’s advantage is a huge installed track record, wide availability at big-box stores, and abundant tutorials. For most homeowners choosing a proven, well-documented system, Kerdi is a safe pick.
Is It Right for Your Project?
A Kerdi shower pan is an excellent choice if you want a reliable, mold-resistant, surface-waterproofed tile shower and are willing to follow the system’s rules precisely. It shines in DIY renovations because the components are engineered to work together and the process is well documented. If you are on the tightest possible budget and have real mud-work skill, a traditional pan can cost less, but for reliability and peace of mind, the Kerdi system earns its price.
Preparing the Subfloor Correctly
The reliability of a Kerdi pan depends heavily on what sits beneath it. The subfloor must be structurally sound, clean, and flat, because the foam pan needs full, even contact with the thinset to avoid voids that crack tile later. On a wood subfloor, make sure it is stiff enough to prevent deflection; a bouncy floor will telegraph movement into the tile and grout no matter how good the waterproofing is. Many installers add a layer of plywood to stiffen the floor before setting the pan. On a concrete slab, confirm it is level and free of loose material. Taking the time to get a solid, flat base is not glamorous, but it is what separates a shower that lasts decades from one that fails in a few years.
Tiling Over the Kerdi Pan
Once the pan is installed, waterproofed, and flood-tested, tiling proceeds like any tile floor, with a couple of considerations. The sloped pan means your tile must be small enough to follow the pitch toward the drain without lippage; this is why small mosaic tiles, often 2×2 inches or smaller, are the standard choice for shower floors. The many grout lines in a mosaic also add slip resistance underfoot, which matters in a wet area. Use the thinset specified for your tile and the Kerdi surface, back-butter the mosaic sheets for full coverage, and keep the drain grate accessible. After the tile cures, grout the joints and seal the grout if it is cement-based to keep it easy to clean.
Maintaining Your Kerdi Shower
A properly built Kerdi shower needs little maintenance, but a few habits extend its life. Keep the grout sealed if it is cement-based, squeegee or wipe the walls to reduce soap scum, and periodically clear the drain of hair and debris so water flows freely. Inspect the silicone joints at the corners and where the floor meets the wall once a year, and refresh them if they crack or pull away, since these flexible joints handle the small movements that rigid grout cannot. With minimal care, the surface-waterproofed assembly keeps water where it belongs for the long haul.
A properly installed Kerdi shower pan gives you a fast, dependable, fully waterproofed base that keeps water at the tile surface instead of trapping it inside the structure. Use unmodified thinset, embed the pan fully, seal every seam and corner with Kerdi-Band, and run a flood test before tiling, and you will have a leak-free tile shower built to last for decades.