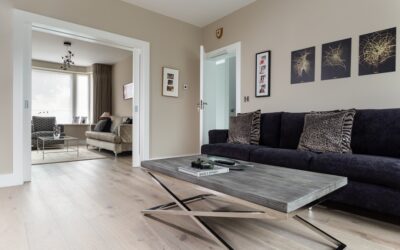
Picking kitchen flooring from a 4-by-4-inch sample stuck on a foam board is a recipe for regret. Real kitchen flooring ideas photos show how a material reads in actual rooms — under pendant lighting, against cabinet color, with morning sun raking across it. After designing kitchens for clients in three regions and photographing the finished installs, the same eight looks keep winning. Each delivers a different vibe and a different durability profile, and knowing which one fits your real cooking-and-cleaning life matters more than which one is trending on Pinterest this week.
Part of our Kitchen Remodeling guide — explore the full guide →
- 1. Porcelain Tile in Herringbone Pattern
- 2. Wide-Plank White Oak Hardwood
- 3. Luxury Vinyl Plank in Wide-Format Wood Look
- 4. Hexagon Tile (Marble or Cement Look)
- 5. Black-and-White Checkerboard
- 6. Terracotta and Saltillo Tile
- 7. Marble Mosaic Floor (Carrara, Calacatta, Thassos)
- 8. Concrete or Polished Concrete
- How to Use Photos to Make a Decision
- Practical Considerations Before You Order
- Sample Order Strategy
- Final Take
1. Porcelain Tile in Herringbone Pattern
Herringbone laid with wood-look porcelain plank tile is having a long moment. The classic 6×24-inch or 8×40-inch planks installed at 90-degree angles create instant European farmhouse character, and the porcelain handles every kitchen abuse — water, dropped pans, dragged stools, dog claws.
Look at the Daltile Emerson Wood line in Hickory Pecan or the MSI Carolina Timber series in Saddle. Installation runs roughly $9 to $15 per square foot installed, including the 25 percent waste factor herringbone demands. Use a thin, color-matched grout — 3/16 inch with a sanded warm gray is the formula that hides imperfections and reads natural.
While you’re upgrading the kitchen floor, it might be a good time to rethink the seating too. Swapping out old bar stools is one of those small changes that makes the whole room feel more pulled together.
We may earn a commission when you purchase through our links.
2. Wide-Plank White Oak Hardwood
If you want timeless and you have the cabinet color to support it, 7-inch white oak planks with a clear matte finish are the most photographed kitchen flooring of the past three years. The pale, slightly Scandinavian tone bridges modern and traditional cabinetry equally well.
Specify rift-and-quartered cuts to minimize the “cathedral” grain that ages the look. Use a hard-wax oil like Rubio Monocoat for natural matte tone, or water-based polyurethane (Bona Traffic HD) for highest durability. Cost: $11 to $18 per square foot installed.
Real-talk: hardwood in kitchens does take dents and water damage if you’re sloppy. Run a runner mat in front of the sink and the prep zone if you want it to look new at year five.
3. Luxury Vinyl Plank in Wide-Format Wood Look
For families with kids, dogs, or budget limits, LVP is genuinely the right answer in a kitchen. The current 9-inch-wide and longer formats from COREtec, Karndean, and Mannington Adura look almost indistinguishable from real wood from standing height.
Pick a 22-mil or thicker wear layer for kitchen use. Mid-tone walnut, weathered oak, and warm gray are the three most-installed colors. Cost: $4 to $9 per square foot installed. Waterproof seams handle dishwasher overflows without panic.
4. Hexagon Tile (Marble or Cement Look)
Hex tile in 4-inch or 8-inch format reads classic but refreshes a kitchen instantly. White marble-look porcelain hex with thin gray veining is the vintage-bistro reference. Cement-look hex in muted blue, green, or charcoal lands more modern.
Look at Marazzi Hex Cementi or Cle Tile’s hand-painted concrete hex if budget allows ($14-$22 per sq ft installed). For budget, Floor & Decor stocks hex options under $5 per square foot in the materials. Pair with simple Shaker cabinets for the highest contrast.
5. Black-and-White Checkerboard
The classic 12×12-inch black and white checker is back in farmhouse and English-style kitchens. Modern interpretations use an off-black (Pewter or Iron Ore tones) and a warm cream rather than stark white-and-true-black, which softens the look.
For real durability, use 12-inch porcelain tiles rather than vinyl. Lay on a 45-degree diagonal for a more dynamic feel or straight grid for traditional. Plan on 6 to 10 percent waste depending on cuts.
6. Terracotta and Saltillo Tile
Terracotta floors deliver warmth no synthetic product can replicate. Hand-made Saltillo from Mexico, Provence terracotta from France, or US-made Tabarka all bring earthy texture into the kitchen. Best with rustic, Mediterranean, or Spanish Colonial cabinet styles.
Sealing is critical. Use a penetrating sealer (Aqua Mix Sealer’s Choice Gold) plus a topical wax for traditional terracotta. Plan a resealing every 18-24 months in active kitchens. Cost: $10-$20 per square foot installed.
7. Marble Mosaic Floor (Carrara, Calacatta, Thassos)
For high-end or jewel-box kitchens, a small-format marble mosaic floor reads luxurious. Penny round, 2-inch hex, and basket-weave Carrara mosaics are the classic patterns. Pricier than ceramic alternatives but unmatched for old-world elegance.
Use only honed (matte) marble; polished marble in kitchens is a slip risk and shows etching from acidic spills. Seal annually with a penetrating natural-stone sealer. Cost: $18-$35 per square foot installed.
8. Concrete or Polished Concrete
For modern industrial kitchens or open-plan loft spaces, polished concrete remains the cleanest contemporary look. Existing slabs can be ground and polished in place; in upper floors a microcement overlay (Mortex, Beton Cire) achieves the same look in 1/8 inch thickness.
Color options include natural gray, integral pigments (charcoal, taupe, terracotta), or acid stain finishes. Cost: $4-$8 per square foot for ground and sealed concrete; $10-$20 per square foot for microcement overlay.
How to Use Photos to Make a Decision
Saving 50 inspiration shots is easy; turning them into the right floor for your home takes three steps:
- Filter by cabinet color. Save only photos with cabinets similar to yours. Floor reads completely differently against navy lowers vs white perimeter cabinets.
- Look for matching natural light. A floor in a south-facing photo will look very different in your north-facing kitchen.
- Read the captions. Designers usually credit the manufacturer and exact product. Track down the model name and order a real sample.
Practical Considerations Before You Order
Beautiful photos don’t show the everyday tradeoffs. Before you commit:
- How long will you stand at the sink? Tile and concrete are hard on knees and feet. Hardwood and LVP are softer.
- Do you have radiant floor heat? Tile, stone, and concrete are ideal. Hardwood needs specific approval for radiant.
- Will it transition to the next room? Match heights and sightlines. Cork or LVP transitioning into hardwood at a doorway can look awkward.
- What’s the slab condition? Cracked or out-of-level slabs may rule out tile without expensive prep.
Sample Order Strategy
Order at least three samples of each finalist. Tape them to the floor in the actual kitchen and live with them for 4-7 days. Take photos in the morning, midday, and at night under your existing lighting. Viewing samples in your real lighting eliminates 90 percent of the regret you’d otherwise have post-install.
Final Take
The best kitchen flooring ideas photos share three things: light that flatters the floor, a color that complements the cabinets, and a material that handles the actual wear of cooking. Whether you go porcelain herringbone, wide-plank oak, LVP, or marble mosaic, prioritize how the floor reads in your light, against your cabinet color, and how it handles the realities of dropped pans, soup spills, and 20 years of foot traffic. Save the photos that match your conditions, not the ones that look pretty in someone else’s house.
Prefer to explore on your own?
See how new flooring looks in your actual room in seconds — free, no signup.
Try the free Floor Studio →