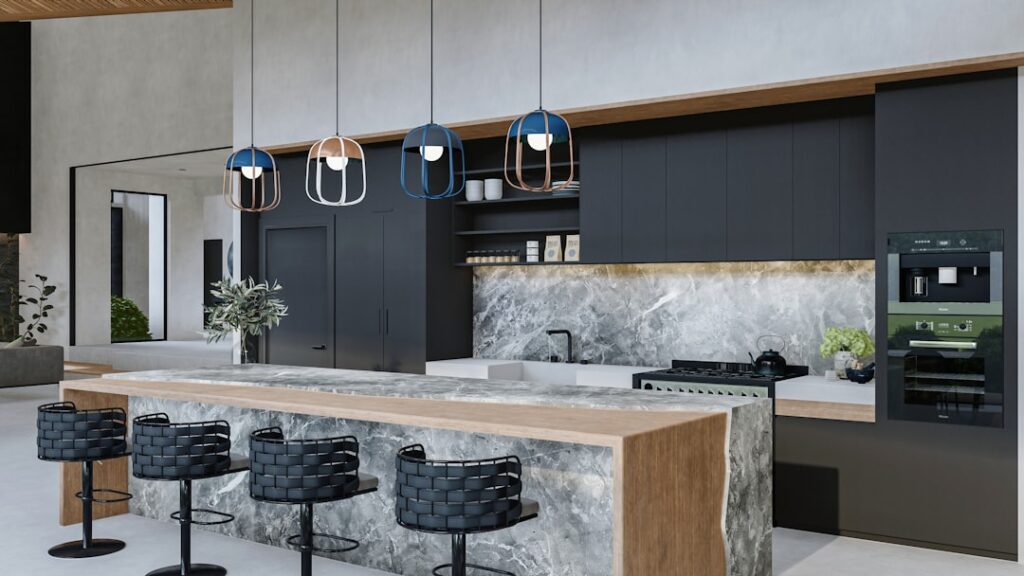
A kitchen island is often the visual anchor of the whole room, yet many come from the builder as a plain, flat-sided box. Adding trim is one of the highest-impact, lowest-cost ways to transform that blank slab into a custom, furniture-quality centerpiece. These kitchen island trim ideas range from simple picture-frame molding you can install in an afternoon to full board-and-batten and shiplap treatments that read as bespoke cabinetry. Whatever your style — farmhouse, modern, classic, or coastal — the right trim gives your island character and depth.
Part of our Kitchen Remodeling guide — explore the full guide →
- Why Trim Transforms an Island
- Board and Batten
- Shiplap
- Beadboard Paneling
- Picture-Frame and Applied Molding
- Corbels and Legs for a Furniture Look
- Fluted and Reeded Panels
- Color and Contrast Strategies
- Installation Tips for a Professional Finish
- Matching Trim to Your Kitchen Style
- Planning Your Materials and Budget
- Frequently Asked Questions
Why Trim Transforms an Island
Trim adds dimension, texture, and craftsmanship to a surface that would otherwise be flat and forgettable. It draws the eye, creates shadow lines that add visual interest, and signals quality. Best of all, it is affordable — most island trim projects cost under $150 in materials and use tools many homeowners already own. Because the island’s sides are flat and accessible, they are one of the easiest places in the kitchen to practice trim carpentry with impressive results.
Board and Batten
Board and batten is a favorite for farmhouse and transitional kitchens. It uses evenly spaced vertical battens (thin boards) over a flat backer to create a rhythmic paneled look. On an island, you can run full-height battens or create a grid with horizontal rails.
To install, plan your batten spacing so the panels are even across the island’s width, typically 10 to 16 inches apart. Attach the battens with construction adhesive and finish nails, caulk the edges, fill the nail holes, and paint the whole island one color for a seamless, high-end look. It is forgiving, fast, and dramatically changes the island’s presence.
Shiplap
Shiplap brings coastal and modern-farmhouse charm with its clean horizontal (or vertical) planks and distinctive shadow gaps between boards. Wrapping an island in shiplap gives it a relaxed, textured look that pairs beautifully with a butcher-block or white quartz top.
Pre-milled shiplap boards or nickel-gap planks make this straightforward — the built-in spacing lip ensures even gaps. Run the boards horizontally for a wider, grounded feel or vertically to add height. Paint them a soft white, a moody navy, or a natural wood stain depending on your palette.
Beadboard Paneling
For a cottage or traditional kitchen, beadboard delivers fine vertical grooves that add subtle texture without shouting for attention. It comes in easy-to-install 4-by-8 sheets or individual planks, making it one of the quickest trim upgrades.
Cut beadboard panels to fit each island side, adhere and nail them in place, then finish the top edge with a chair-rail or cap molding for a clean transition to the countertop overhang. Beadboard is especially effective when painted in a color that contrasts gently with the perimeter cabinets.
Picture-Frame and Applied Molding
The simplest of all island trim ideas, applied molding creates rectangular “frames” on flat panels using thin decorative molding. This adds classic, custom-cabinet detailing with minimal effort.
- Measure and mark evenly spaced rectangles on each island side.
- Miter-cut lengths of decorative molding to form frames.
- Attach with adhesive and brad nails, caulk the seams, and paint.
The result mimics expensive raised-panel cabinetry for a fraction of the cost, and it suits traditional and transitional kitchens especially well.
Corbels and Legs for a Furniture Look
To make an island feel like a freestanding piece of furniture, add decorative corbels under the countertop overhang or turned legs at the corners. Corbels support and accent a raised seating overhang while adding architectural richness. Turned or tapered legs at an island’s ends give it that unfitted, table-like quality prized in classic and French country kitchens. These elements pair well with any of the panel treatments above for a layered, high-end result.
Fluted and Reeded Panels
For a look that feels current and elevated, fluted or reeded trim — vertical rounded grooves or ridges — has surged in popularity. Applied to island sides, fluted paneling adds a tactile, architectural texture that works in both modern and transitional spaces. It photographs beautifully and gives a designer-showroom feel. Pre-made fluted panels or half-round molding strips make it achievable, though it takes patience to keep the spacing perfectly even.
Color and Contrast Strategies
Trim is only half the story; color choices amplify the effect.
- Contrasting island color: Paint the trimmed island a bold color — navy, green, black, or a warm wood tone — against lighter perimeter cabinets to make it a true focal point.
- Two-tone tops: Pair a butcher-block or waterfall stone top with painted trim for contrast.
- Monochrome elegance: Paint trim and island the same color for a subtle, sophisticated texture-only effect.
- Natural wood accents: Stain shiplap or beadboard to introduce warmth against painted cabinetry.
Installation Tips for a Professional Finish
A few habits separate amateur from custom-quality results. Always use construction adhesive plus finish nails so panels stay put permanently. Caulk every seam and edge — this single step makes applied trim look built-in rather than glued on. Fill and sand all nail holes before painting. Use a quality cabinet-grade or semi-gloss paint that stands up to the scuffs and cleaning an island endures. And prime any raw MDF or wood so the finish is smooth and durable.
Matching Trim to Your Kitchen Style
The most successful island trim complements the rest of the kitchen rather than competing with it. In a farmhouse or cottage kitchen, board and batten, beadboard, and shiplap feel right at home alongside apron sinks and open shelving. Traditional kitchens with raised-panel cabinets pair naturally with applied picture-frame molding and corbels that echo the existing millwork. Modern and transitional spaces lean toward fluted panels, clean vertical shiplap, or simple flat trim in a bold contrasting color.
Pay attention to your existing cabinet door style as a guide. If your perimeter cabinets have Shaker doors, a simple framed or Shaker-inspired island panel keeps the look cohesive. If they are ornate, you have license to add more detail. When in doubt, a subtle treatment that harmonizes with the cabinets reads as more custom and timeless than a loud statement that fights the rest of the room.
Planning Your Materials and Budget
Before you start cutting, plan the project so it goes smoothly. Measure each exposed side of the island and sketch your layout, marking panel spacing and where seams will fall. Buy trim, adhesive, caulk, filler, primer, and paint in one trip, adding 10 to 15 percent extra material for mistakes and waste. MDF trim is affordable and paints beautifully for interior island use, while PVC or moisture-resistant trim is smarter for the sink side where splashes are likely. A basic project using picture-frame molding might cost $50, while a full board-and-batten or fluted treatment runs closer to $150 in materials. Either way, the payoff in custom character far exceeds the modest investment.
Frequently Asked Questions
What is the easiest island trim for beginners?
Applied picture-frame molding and beadboard paneling are the most beginner-friendly. They require basic tools, forgiving measurements, and deliver a big visual payoff with minimal carpentry skill.
How much does it cost to trim a kitchen island?
Most DIY island trim projects cost $50 to $150 in materials, depending on the treatment. Board and batten, shiplap, and picture-frame molding all fall in this affordable range, versus hundreds more for custom cabinetry.
Can I add trim to an existing painted island?
Yes. Lightly sand the surface for adhesion, attach the trim with adhesive and nails, caulk, and repaint the whole island. Existing paint is not a barrier as long as you prep the surface.
The right kitchen island trim ideas turn a plain box into the heart of the room. Whether you choose board and batten, shiplap, beadboard, applied molding, or fluted panels, the project is affordable, achievable, and transformative. Pick the style that fits your kitchen, finish it with careful caulking and paint, and enjoy a custom centerpiece you built yourself.