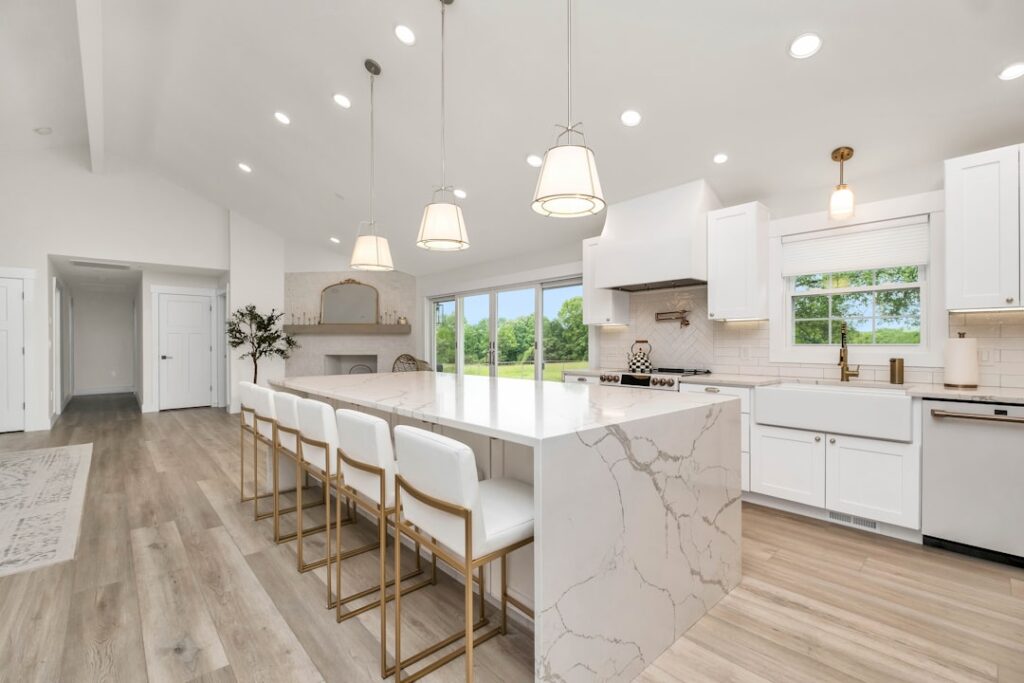
When a single straight island cannot hold everything a busy kitchen demands, bending it into an L opens up a world of possibilities. An l shaped kitchen island with seating combines generous prep counter, extra storage, and a dedicated dining zone in one flexible shape that works especially well in large or open-concept kitchens. The angled leg naturally defines a casual eating area while keeping cooks and guests comfortably out of each other’s way.
This guide covers the layouts, dimensions, clearances, seating counts, and costs that make an L-shaped island function beautifully rather than just look impressive. Get the proportions right and you gain a hardworking hub; get them wrong and the corner becomes wasted, awkward space.
Why Choose an L-Shaped Island
The L shape earns its keep by separating tasks. One leg becomes the working counter close to the range and sink, while the perpendicular leg extends into the room to hold stools and casual meals. That division keeps hot pans and knife work apart from where people sit, which is safer and more social.
The shape also creates a natural traffic buffer between the kitchen and an adjoining living or dining area, helping an open floor plan feel zoned without walls. And because the L wraps a corner, it can capture space that a rectangular island would leave empty, adding storage and countertop where you need it most.
Ideal Dimensions and Clearances
An L-shaped island only works in a kitchen with enough floor area, so measure before you commit. Each leg of the L generally needs to be at least 4 feet long to be useful, and the whole footprint reads best in kitchens of roughly 200 square feet or more.
Clearance is where most plans succeed or fail. Leave adequate walkway on every side so cabinet doors, appliances, and people all have room.
- Standard walkway clearance: at least 36 inches around the island, and 42 to 48 inches on cooking and cleanup sides where two people pass.
- Counter height: 36 inches for a standard work surface, or a raised 42-inch bar-height section for a casual look and to hide clutter.
- Island depth: 24 to 42 inches per leg; add depth on the seating leg for legroom.
- Seating overhang: 12 inches of counter overhang for comfortable knee space at standard height, 15 inches at bar height.
Skimping on the overhang is the most common comfort mistake. Anything less than 12 inches leaves diners perched with nowhere to tuck their knees.
Planning the Seating Zone
The seating leg is the social heart of the island, so plan how many stools it holds. Each stool needs roughly 24 inches of linear counter to sit comfortably without elbow bumping. A 6-foot seating leg fits three stools, while an 8-foot run handles four.
- Standard 36-inch counter: pair with 24-inch counter-height stools; feels integrated with the work surface.
- Raised 42-inch bar: pair with 30-inch bar stools; hides prep mess from view of seated guests.
- Two-level design: keep the work leg at 36 inches and raise the seating leg to 42 inches for a defined dining ledge.
Position seating on the leg that faces the living area so diners look out into the room rather than at the cooktop backsplash. Wrapping stools around the inside corner of the L can add one or two extra seats, though the corner spot is the least roomy.
Maximizing Storage and Function
The bulk of an L-shaped island is prime real estate for storage and appliances. The corner where the two legs meet is the trickiest zone, so plan it deliberately rather than letting it become a dead cavity.
- Fit the corner with a lazy Susan, angled cabinet, or deep pull-out to reach the back.
- Build deep drawers along the work leg for pots, pans, and small appliances.
- Add open shelving or a wine rack on the seating-leg end for display and easy grab items.
- Integrate a prep sink, dishwasher, or microwave drawer to make the island a true second work zone.
- Include an outlet or two along the seating leg for laptops, phones, and countertop gadgets.
Think through utilities early. Running plumbing or electrical to an island means opening the floor, so decide on a sink, dishwasher, or cooktop before construction rather than wishing for them later.
Style and Material Choices
The island can either blend with the perimeter cabinetry or stand out as an intentional accent. A contrasting island color, such as deep navy or forest green base cabinets against white perimeter cabinets, has become a favorite way to add personality.
For countertops, quartz and granite are the workhorses, resisting scratches and heat, while butcher block adds warmth on the seating leg. Waterfall edges, where the counter material runs down the sides to the floor, give a modern, high-end finish. Pendant lighting overhead ties the zone together; hang two or three pendants centered over the seating leg, 30 to 36 inches above the counter.
Budget and Cost Ranges
Cost depends heavily on size, materials, and whether you add plumbing or electrical. A basic L-shaped island with stock cabinets and a laminate top can start around $3,000 to $5,000, while semi-custom cabinetry with quartz counters typically runs $6,000 to $12,000.
Adding a sink, dishwasher, or cooktop pushes costs higher because of plumbing and wiring, often adding $1,500 to $4,000. Fully custom islands with premium stone, waterfall edges, and integrated appliances can reach $15,000 to $25,000 or more. Stools add another $60 to $300 each depending on quality. Set your budget with the utilities and finishes in mind, since those choices drive the final number more than the cabinetry alone.
Lighting, Outlets, and Everyday Details
The details that make an island livable are easy to overlook during planning. Lighting is the biggest one. Beyond the decorative pendants over the seating leg, add recessed cans or under-cabinet-style task lighting so the work leg is bright enough for chopping and reading recipes. Put the pendants on a dimmer so the same island can host homework at full brightness and a glass of wine at a low glow.
Electrical outlets belong on the island by code in most kitchens, and they earn their keep. Place at least one outlet on the seating leg for charging devices and one near the work leg for blenders and mixers. Consider a pop-up outlet if you want a clean, uncluttered counter look. A charging drawer with built-in USB ports keeps cords out of sight entirely, which is a small upgrade that people use every day.
Common Layout Mistakes to Avoid
A few predictable errors undermine otherwise great L-shaped islands. The first is cramming the island into a kitchen that is too small, which chokes the walkways and makes the room feel tight; if you cannot keep 36 to 42 inches of clearance all around, a smaller straight island or a peninsula may serve better.
The second common mistake is neglecting the inside corner, which becomes a black hole of unreachable storage without a lazy Susan or angled pull-out. The third is placing seating on the wrong leg, where diners end up staring at a messy prep zone or blocking the main cooking path. Plan the seating leg to face the open room and sit outside the primary work triangle of sink, range, and refrigerator so cooks and guests never collide.
Frequently Asked Questions
How much space do I need for an l shaped kitchen island with seating?
Plan for a kitchen of roughly 200 square feet or more, with each leg at least 4 feet long and 36 to 48 inches of clear walkway on every side so people and appliance doors have room.
How many stools fit on an L-shaped island?
Allow about 24 inches of counter per stool. A 6-foot seating leg holds three stools and an 8-foot leg holds four, with an option to add one or two more around the inside corner.
What counter overhang do I need for seating?
Provide at least 12 inches of overhang at a standard 36-inch counter and 15 inches at a 42-inch bar so diners have comfortable knee and legroom.
Can I put a sink or cooktop in an L-shaped island?
Yes, and it makes the island a true second work zone, but plan the plumbing and electrical before construction since running utilities into an island requires opening the floor.
With the right leg lengths, generous clearances, and a well-planned seating overhang, an L-shaped island becomes the most versatile surface in the kitchen, serving as prep station, dining spot, storage powerhouse, and gathering place all at once. Measure carefully, plan the utilities early, and the shape will pay off every single day.