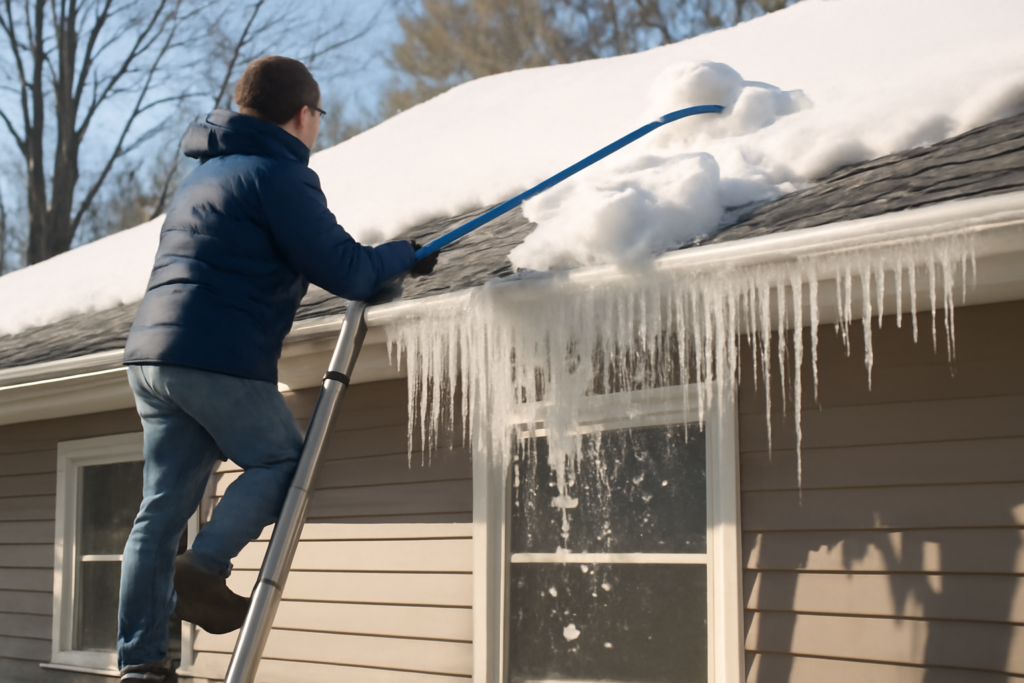
If you want to know how to prevent ice dams on a roof, forget the roof rake for a minute and go look in your attic. That ridge of ice building along your eaves is not a roofing problem. It is a heat problem. Warm air escaping from your living space melts the snow up high on the deck, the meltwater runs down to the cold overhang, and it refreezes into a dam that backs water up under your shingles. I have torn out enough water-stained ceilings to tell you the fix lives in the insulation and air sealing, not in a bag of ice-melt tossed on the roof at midnight.
- Why Ice Dams Form in the First Place
- Seal the Air Leaks First
- Get Your Attic Insulation Right
- Ventilate to Keep the Deck Cold
- Add an Ice and Water Shield at the Eaves
- When Heat Cables Make Sense
- What to Do During a Storm
- Watch for the Warning Signs Before Damage Starts
- Think of It as a System, Not a Single Fix
The good news is that ice dams are almost entirely preventable, and the work pays for itself in one hard winter of avoided drywall repairs. This guide walks through why they form and the exact steps that stop them, from R-values to attic ventilation ratios to heat cable specs when a stubborn eave needs help.
Why Ice Dams Form in the First Place
An ice dam needs three ingredients working together: snow on the roof, a roof surface above freezing near the ridge, and a roof surface below freezing at the eaves. When your attic leaks heat, the deck over the heated part of the house climbs above 32°F even when the outside air is at 20°F. Snow against that warm deck melts from the bottom up. The water trickles down until it reaches the roof overhang, which hangs out beyond the warm wall and stays at outdoor temperature. There it refreezes.
Repeat this cycle over a week of freeze-thaw and you get a wall of ice several inches thick sitting at the edge of the roof. Every new melt event pools behind it. Water is patient. It works sideways and uphill under capillary action, slips beneath the shingle laps, and finds the plywood, then the insulation, then your bedroom ceiling. The dam itself rarely damages anything. The trapped water behind it does all the harm.
Seal the Air Leaks First
Air leakage is the single biggest driver of a warm roof deck, and it is the cheapest thing to fix. Warm, moist household air rises and finds every gap into the attic: the hole around the bathroom exhaust fan, the gaps where wiring and plumbing penetrate the top plate, the open chase behind a dropped soffit, and the worst offender of all, a leaky attic access hatch.
Get up there with a headlamp on a cold day and look for dirty insulation, which marks spots where air has been filtering through for years. Seal them:
- Caulk or foam every wire, pipe, and duct penetration through the ceiling plane with fire-rated sealant.
- Build an insulated, weatherstripped box or cover over the attic hatch or pull-down stairs.
- Seal the top plates of interior walls and any open framing chases.
- Make sure bath and kitchen fans vent all the way outside, never into the attic.
Do this before you add a single inch of insulation. Insulation slows heat that moves by conduction, but it does nothing to stop the fast, wet air leaking through gaps. Air seal first, then insulate on top.
Get Your Attic Insulation Right
Once the leaks are sealed, insulation keeps whatever heat remains inside the house where it belongs. The U.S. Department of Energy recommends R-49 to R-60 for attics in most cold climates, which works out to roughly 16 to 20 inches of blown cellulose or fiberglass. A lot of older homes I open up are running R-19 or less, and it shows in the icicles.
Pay special attention to the perimeter where the ceiling meets the exterior wall. That corner is tight, and insulation gets crushed thin over the top plate right above the coldest part of the roof. Baffles at the eaves keep the insulation from sliding down and blocking airflow while still letting you pack the corner. If you have recessed can lights below the attic, replace them with IC-rated, airtight fixtures so you can bury them safely instead of leaving heat-leaking gaps around each one.
Ventilate to Keep the Deck Cold
Air sealing and insulation reduce the heat reaching the deck. Ventilation carries away whatever slips past. A properly vented attic pulls cold outdoor air in at the soffits and lets it wash up the underside of the deck and out the ridge, keeping the entire roof surface close to outdoor temperature so snow does not melt unevenly.
The building-code baseline is the 1:300 rule: one square foot of net free vent area for every 300 square feet of attic floor, split roughly half low at the soffits and half high at the ridge. If you cannot balance intake and exhaust, use the more generous 1:150 ratio. For a 1,500 square foot attic, 1:300 means about 5 square feet of net free vent area total. The most common mistake I see is beautiful ridge venting choked off by insulation stuffed into the soffits, killing the intake. Cold air cannot exit the top if it cannot enter the bottom.
Add an Ice and Water Shield at the Eaves
When it is time to reroof, spend the money on a self-adhering ice and water membrane along the eaves. This rubberized underlayment seals around nail shanks and creates a waterproof barrier that stops backed-up meltwater from reaching the deck. Code in most cold-climate jurisdictions requires it to extend from the edge to at least 24 inches inside the interior wall line, which usually means running the first two or three courses up from the gutter.
Run it in the valleys and around penetrations too. A membrane will not prevent an ice dam from forming, but it is your last line of defense if one does. On a steep, chronically iced eave, I like to see it carried up 3 feet or more from the edge.
When Heat Cables Make Sense
Sometimes the geometry beats you. A north-facing valley, a low-slope porch roof, or a spot where two roof planes dump onto a cold overhang can dam up no matter how tight the attic is. That is when self-regulating heat cable earns its place. These cables draw roughly 5 to 8 watts per foot and adjust their output to the temperature, so they run warm during a freeze and idle when it warms up.
Lay the cable in a zigzag along the eave, extending up the roof far enough to reach past the exterior wall line, usually 2 to 3 feet, and run a tail down through the gutter and downspout so meltwater has a clear drain path. A 100 foot run covers a fair stretch of eave and pulls around 500 to 800 watts. Put it on a thermostatic or moisture-sensing controller rather than leaving it energized all winter. Treat cables as a targeted fix for problem spots, not a substitute for fixing the attic.
What to Do During a Storm
If a dam is already forming and you are watching water threaten a ceiling, you are in triage mode. Pull the snow off the lower 3 to 4 feet of roof with a long-handled roof rake from the ground so there is less snow to melt and feed the dam. Never climb an icy roof to do it. Do not chip at the ice with a hatchet or hammer, which shatters shingles. If you must open a drain channel, fill a leg of pantyhose with calcium chloride ice melt and lay it across the dam perpendicular to the eave. It melts a vertical slot that lets the pooled water escape.
These are stopgaps to get you through the night. Come spring, do the real work: air seal the attic, top up the insulation to R-49 or better, balance your ventilation to the 1:300 ratio, and let a cold roof deck do what it was always supposed to do. Prevent the melt and there is nothing left to dam.
Watch for the Warning Signs Before Damage Starts
You can catch an ice dam problem long before water stains a ceiling if you know what to look for. Big icicles hanging off the eaves and gutters are the classic tell. Icicles mean water is melting up on the roof and refreezing at the cold edge, which is the exact mechanism behind a dam. A little bit is normal in a hard freeze, but a wall of them along the whole eave says your attic is leaking heat.
Look at how the snow melts, too. If the snow over the middle of your roof disappears while the eaves and the north side stay buried, your deck is warm where it should be cold. Uneven melt patterns, bare stripes over rafter bays, or a clean line where the heated wall ends are all signs of heat escaping into the attic. Inside, check the attic during a cold snap for frost on the underside of the deck or damp, matted insulation, both of which point to warm household air leaking up and setting the stage for the next dam.
Think of It as a System, Not a Single Fix
The homeowners who beat ice dams for good are the ones who stop looking for a single silver bullet. There is no product you spray on the shingles that fixes a warm attic. The lasting solution is a chain: seal the air leaks so warm, moist air stops rising into the attic, insulate to R-49 or better so conduction slows, ventilate at the 1:300 ratio so any remaining heat gets flushed away and the deck stays uniformly cold, and back it all up with an eave membrane and targeted heat cable only where the roof geometry forces the issue.
Do those in order and the whole roof stays close to outdoor temperature all winter. The snow melts slowly from sun and air, drains off the edge, and never gets the chance to refreeze into a dam. Chase them piecemeal and you will be back on the roof with a sock full of ice melt every January. Fix the attic once and the problem simply stops coming back.