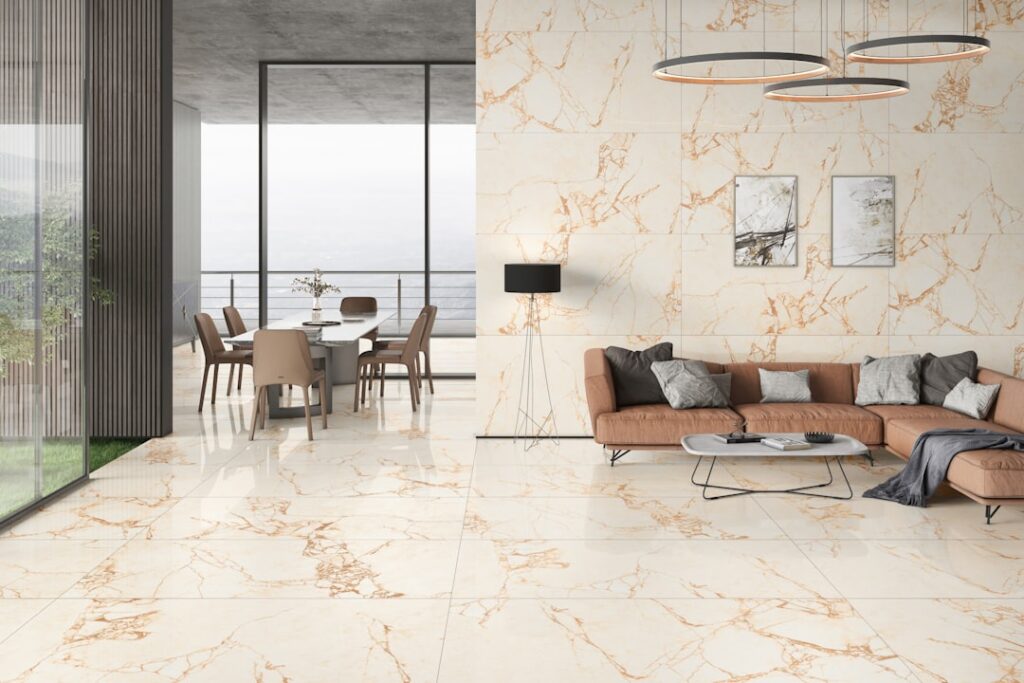
A room tiled in 24×24 has roughly a quarter of the grout lines you would get with 12×12, and that single fact explains why designers keep specifying big-format tile. Large floor tiles 24×24 make a space read bigger, cleaner, and more expensive, all at once. But those same oversized panels are less forgiving of a wavy subfloor and a lot heavier to handle. Before you fall for the seamless look, it helps to know what you are signing up for.
Part of our Tile & Grout guide — explore the full guide →
Here is an honest breakdown of the advantages, the drawbacks, and how to lay 24-inch tile so it looks flawless instead of lumpy.
Why 24×24 Tile Looks So Good
A 24×24 tile covers 4 square feet, so a 200-square-foot room needs only about 50 tiles instead of roughly 200 twelve-inch tiles. Fewer tiles means dramatically fewer grout lines, and grout is what visually chops up a floor. The result reads as one continuous surface, which tricks the eye into perceiving a larger, more open room, a real advantage in small bathrooms and compact condos.
Big-format tile also suits modern, minimalist interiors and the popular marble-look and concrete-look porcelains, whose veining and mottling need room to breathe. On a 12-inch tile the pattern repeats too tightly; on a 24-inch panel it flows.
Pros of Large Floor Tiles
- Fewer grout lines: Less grout to clean, seal, and watch discolor over time.
- Visually enlarges rooms: Continuous surface makes small spaces feel open.
- Faster coverage: A pro can set 4 square feet at a time, speeding installation of large areas.
- Modern, high-end look: Pairs perfectly with realistic stone and concrete visuals.
- Easier maintenance: Grout is the hardest part of a tile floor to keep clean, and there is far less of it.
Cons You Should Know
The biggest challenge is flatness. Large tiles are rigid, so they cannot bend to follow a subfloor that dips or humps. The Tile Council of North America recommends the substrate be flat within 1/8 inch over 10 feet for tiles with any edge longer than 15 inches. If your floor is not that flat, you will get “lippage,” where one tile edge sits higher than its neighbor and catches toes and mop heads.
These tiles are also heavy, a single 24×24 porcelain can weigh 12 to 18 pounds, which makes them harder to handle and cut. Cutting requires a large wet saw rather than a handheld snap cutter. And because each tile covers so much area, a single mistake wastes more material.
- Demanding subfloor prep, often requiring self-leveling compound
- Heavier tiles that are harder to lift and set solo
- More costly cuts and higher waste per broken tile
- Not ideal for very small or oddly shaped rooms with many cuts
What 24×24 Tile Costs
Material pricing tracks with quality and finish:
- Basic porcelain or ceramic 24×24: $2 to $5 per square foot
- Mid-range marble-look or concrete-look porcelain: $5 to $9 per square foot
- Premium polished or natural stone: $10 to $20 per square foot
Installation runs $8 to $15 per square foot, higher than for small tile because of the leveling work and two-person handling. Factor in self-leveling underlayment at $1 to $3 per square foot if your slab needs it, plus a leveling clip system at around $30 to $50 per 100 clips. For a 150-square-foot bathroom in mid-range porcelain, budget roughly $2,000 to $3,500 installed.
Best Materials and Finishes for 24×24
Porcelain dominates the 24×24 category for good reason. At 0.5 percent water absorption or less, it handles kitchens, bathrooms, and basements, and it comes in the realistic marble, concrete, and stone looks that big-format tile shows off best. Glazed ceramic in this size costs a little less but is softer and better suited to light-traffic rooms. Natural stone like marble and travertine is stunning at 24×24 but heavier still, more fragile at the edges, and needs periodic sealing.
Finish matters as much as material. A polished 24×24 marble-look tile makes a dramatic, reflective statement in a formal entry or bathroom but turns slick when wet. For floors that see water, a matte or lightly textured surface with a DCOF of 0.42 or higher gives you the clean big-tile look without the slip risk. Rectified tiles, ground to a precise size after firing, are worth seeking out at this scale because they let you run the tight grout joints that make the seamless effect work.
Getting the Installation Right
Flatness first. Check your subfloor with a 10-foot straightedge and grind down highs or pour self-leveler in the lows. Use a large-and-heavy-tile (LHT) mortar, sometimes called medium-bed mortar, which resists slumping under the tile’s weight, and back-butter each tile to guarantee full coverage, you want at least 95 percent contact for a floor.
Use a leveling clip and wedge system to keep adjacent edges flush while the mortar cures. Trowel with a 1/2 inch square-notch and comb the ridges in one direction, then flatten them so air cannot get trapped under the panel. A tile this size hides hollow spots that will crack later if you rush.
Grout Lines and Layout Ideas
Keep grout joints tight, 1/8 inch to 3/16 inch, to reinforce the seamless look, and choose a grout color close to the tile so lines nearly vanish. Rectified tiles, which have machine-ground precise edges, allow the narrowest joints. Skip aggressive brick-pattern offsets; because large tiles are never perfectly flat, offsetting them more than one-third of their length increases lippage. A straight stacked grid or a modest 1/3 offset is safest.
Design-wise, large floor tiles 24×24 shine wall-to-wall in open kitchens, as a spa-like continuous surface running from a bathroom floor into a curbless shower, and in entryways where you want a clean, uninterrupted first impression. Continuing the same tile up a shower wall or across a threshold amplifies the seamless effect even more.
Cutting and Handling Big Tiles
A 24×24 tile is too large and too hard for a handheld snap cutter, so plan on a rail-mounted wet saw with a diamond blade, or rent one for the weekend at $50 to $90 a day. Score-and-snap manual cutters rated for large format exist, but for L-cuts around cabinets and toilet flanges you will want the wet saw and a diamond hole saw. Measure twice; a single wasted 4-square-foot tile costs four times what a 12×12 mistake does.
Handling is a two-person job once mortar is on the floor. These tiles flex slightly and can crack if you carry them flat and unsupported, so lift them on edge and set them with a suction cup on each side. Use a leveling clip system to hold adjacent edges flush, and tap each tile with a rubber mallet and beating block to seat it evenly into the mortar. Rushing the handling is how installers end up with hairline cracks that only show up weeks later once the floor is grouted and in use.
Is 24×24 Right for Your Space?
If you have a reasonably flat subfloor, a room without too many cuts, and you love a modern, minimal look, 24×24 tile is one of the best-value upgrades in flooring. If your floor is wavy, your room is small and chopped up with fixtures, or you are set on a DIY install without leveling tools, smaller tile will save you grief. Get the substrate flat, use the right mortar and leveling clips, and big-format tile rewards you with a sleek floor that looks custom and stays low-maintenance for decades. Spend the extra day on subfloor prep up front, because no grout color or premium tile can hide lippage once the mortar has cured, and fixing it later means tearing the floor back out.
Prefer to explore on your own?
See how new flooring looks in your actual room in seconds — free, no signup.
Try the free Floor Studio →