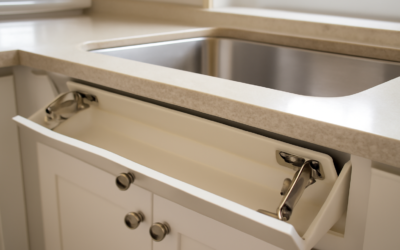
Most dirty-clothes piles exist because the hamper has nowhere to live. Hiding a laundry basket inside cabinet space solves that in an afternoon: you convert an existing base cabinet in the laundry room, bathroom vanity run or closet into a pull-out or tilt-out hamper, and the clutter disappears behind a door that matches the rest of your cabinetry. No new cabinet box is required in most cases, just the right hardware and careful measuring.
Part of our Kitchen Remodeling guide — explore the full guide →
The short answer to “can I do this myself?” is yes, provided your cabinet is at least 15 inches wide inside and roughly 21 inches deep. A pull-out hamper rides on full-extension slides mounted to the cabinet floor or sides and attaches to the existing door, so the whole front glides out like a drawer. A tilt-out hamper hinges at the bottom and leans forward, which works well in shallower spaces or where a drawer slide would hit plumbing. Both approaches use a removable basket or cloth bag so you can carry the load straight to the washer.
- Choosing a Laundry Basket Inside Cabinet: Pull-Out vs Tilt-Out
- Measure Your Cabinet Before You Buy
- Tools and Materials
- How to Install a Pull-Out Hamper Step by Step
- Installing a Tilt-Out Hamper
- Troubleshooting Common Problems
- Cost Ranges for a Built-In Hamper
- When to Call a Pro
- Frequently Asked Questions
Below you will find how to pick between the two styles, the measurements that matter, the tools you will need, a step-by-step install, fixes for the most common problems, and what a realistic budget looks like.
Choosing a Laundry Basket Inside Cabinet: Pull-Out vs Tilt-Out
Before buying anything, decide which motion suits the room. Each style has clear strengths, and the wrong choice usually shows up as a door that binds or a basket that is awkward to lift out.
Pull-out hampers
A pull-out system is the most common way to fit a laundry cabinet basket into a standard base cabinet. It uses a frame on bottom-mount or side-mount slides, with one or two baskets sitting in the frame. Double-basket versions let you sort lights and darks as you go. Pull-outs handle heavier loads, typically 50 to 100 pounds depending on the slides, and they give full access from above because the entire basket clears the cabinet opening.
Tilt-out hampers
Tilt-outs pivot on hinges at the bottom of the door and stop at an angle, usually 20 to 30 degrees, held by a chain, strap or friction stay. They need less depth than a pull-out and cost less, so they are popular in bathroom vanities and furniture-style cabinets. The tradeoff is capacity. A tilt-out basket is often a single bin, and you lift clothes over the front edge rather than dropping them straight down.
Quick decision guide
- Cabinet 15 to 24 inches wide, full depth, no plumbing inside: pull-out, single or double basket.
- Vanity with a drain trap or supply lines in the way: tilt-out on the unobstructed side, or a narrow pull-out beside the sink base.
- Freestanding furniture or face-frame cabinet with a shallow box: tilt-out.
- Family laundry room with heavy daily loads: double pull-out with soft-close slides.
Measure Your Cabinet Before You Buy
Hamper kits are sold by the minimum cabinet opening they fit, not the nominal cabinet size, so a tape measure matters more than the catalog. Open the door, remove any shelf, and record these numbers:
- Interior opening width: measure between the face-frame stiles on a framed cabinet, or between the side panels on a frameless one. A “15-inch cabinet” with a face frame may only give you about 12 inches of clear opening.
- Interior depth: from the back of the face frame (or front edge of the box) to the back panel. Most pull-out kits need 20 to 22 inches.
- Interior height: from the cabinet floor to the underside of the countertop or top rail. Standard base cabinets give about 28 to 30 inches.
- Obstructions: note hinges, face-frame lips, drain pipes, supply valves and electrical boxes.
Also check the door. Pull-out kits usually reuse your existing door, attached to the front of the frame with adjustable brackets. If the door is a full-overlay style with concealed hinges, you will remove the hinges entirely. Inset doors need a kit designed for inset mounting, because the door must sit flush inside the face frame when closed.
Tools and Materials
The job needs ordinary hand tools. Gather everything first so the cabinet is not half-dismantled while you hunt for a bit.
- A pull out hamper cabinet kit sized to your opening (frame, slides, baskets or bags, door brackets)
- Cordless drill/driver with a #2 Phillips bit and a 1/8-inch pilot bit
- Tape measure, combination square and pencil
- Torpedo level
- Screwdrivers, including a stubby for tight spaces
- Spacer blocks (scrap 3/4-inch plywood) if slides must clear a face frame
- Painter’s tape to mark hole locations on the door back
- Wood glue and 1-1/4-inch screws if you add filler strips
- Safety glasses
How to Install a Pull-Out Hamper Step by Step
These steps cover the most common case: a bottom-mount pull-out kit going into a framed base cabinet. Side-mount kits follow the same logic with the slides fastened to the cabinet walls instead of the floor.
- Empty the cabinet and remove the door. Unclip or unscrew the hinges from the face frame, then take the hinges off the door. Remove any shelf and shelf pins.
- Check that the cabinet floor is flat and square. Lay the level across the floor front to back and side to side. If the floor dips, shim under the slide locations so the frame will run true.
- Add spacers if needed. On a face-frame cabinet, the frame edge often sits inward of the box sides. Bottom-mount kits usually clear this, but side-mount slides need plywood strips glued and screwed to the cabinet walls so the slides sit flush with the inside of the face frame.
- Position the slide base. Set the kit’s base plate or slide rails on the cabinet floor, pushed back so the front of the frame will sit just behind the face frame when closed. Most kits give a setback dimension, commonly around 1/8 to 1/4 inch behind the frame.
- Drill pilot holes and fasten. Mark the holes, drill 1/8-inch pilots, and drive the supplied screws. Keep the rails parallel; measure the distance between them at front and back.
- Attach the frame and test the slides. Snap or screw the hamper frame onto the slides and run it in and out several times. It should move smoothly with no rubbing on the face frame.
- Mount the door brackets. Fasten the adjustable brackets to the front of the frame. Hold the door in place with the cabinet closed, check the reveal against neighboring doors, and mark the bracket positions on the door back with painter’s tape.
- Fasten the door. Screw through the brackets into the door, using screws short enough not to break through the face. For a 3/4-inch door, 5/8-inch screws are typical.
- Adjust the reveal. Use the bracket adjusters to line the door up with adjacent fronts, matching gaps top, bottom and side.
- Drop in the baskets or bags and load test with a full hamper’s worth of weight to confirm the slides hold without sagging.
Installing a Tilt-Out Hamper
Tilt-outs are simpler. The door is hinged at the bottom edge with a pair of butt hinges or a piano hinge fastened to the cabinet’s bottom rail. A basket or wire frame is screwed to the back of the door, and a restraint keeps the door from falling flat.
- Remove the existing side hinges and fill the old cup holes with wood filler or cover them with the basket frame.
- Fasten the bottom hinges to the door edge, then to the face-frame rail, checking that the door clears the floor or toe kick as it tilts.
- Attach the basket frame to the door back, centered and set high enough to clear the cabinet floor when closed.
- Install the stop chain, strap or friction stay so the door opens to roughly 25 degrees.
- Add a magnetic or roller catch at the top to hold the door closed, plus a knob or pull.
Troubleshooting Common Problems
Most issues trace back to measurement or alignment rather than defective hardware.
- Door rubs the face frame: the slides are set too far forward or not parallel. Loosen the rail screws, square them up and re-fasten through new pilot holes.
- Hamper drifts open: the cabinet floor slopes toward the front. Shim the back of the slides slightly higher, or choose soft-close slides that pull the frame shut in the last inch.
- Basket sags when loaded: the slides are underrated for your loads. Upgrade to higher-capacity full-extension slides, or remind the household that a full wet-towel load weighs far more than dry clothes.
- Door will not line up with its neighbors: use every adjustment on the brackets before re-drilling. If you are out of range, reposition the frame on the slides rather than moving the door.
- Tilt-out door flops open: the stop is too long or the friction stay needs tightening.
- Odors: choose a kit with ventilated baskets or mesh bags, and avoid hampers sitting over damp plumbing.
Cost Ranges for a Built-In Hamper
Costs vary with materials and brand, but general ranges help you plan. A basic tilt-out hardware set or wire basket frame usually sits at the low end of the market, while a single pull-out kit with a wire or plastic basket falls in the lower-middle range. Double-basket pull-outs with soft-close slides and cloth liners cost noticeably more, and premium wood-frame systems with full-extension undermount slides are the top tier. Expect to spend a bit extra on spacer stock, screws and replacement bags.
If you do not have a spare cabinet, adding a new base cabinet specifically for a laundry basket inside cabinet setup is the biggest cost driver, especially if countertop work is involved. Hiring a handyman or cabinet installer for a retrofit into an existing cabinet is usually a short job billed at an hourly rate, often a couple of hours of labor.
When to Call a Pro
Most homeowners can handle a retrofit with basic tools. Consider hiring a cabinet installer or finish carpenter when:
- You need to cut down or rebuild a face frame to widen the opening.
- The hamper is going into a sink base where plumbing must be relocated; that part belongs to a plumber.
- You are adding a new cabinet and need countertop cut-outs or re-leveling of an existing run.
- The doors are inset or custom and you want perfect reveals without trial and error.
A clean retrofit keeps laundry off the floor and makes sorting part of the daily routine. Measure twice, match the kit to your opening, and a laundry basket inside cabinet space will feel like it came with the house.
Frequently Asked Questions
What size cabinet do I need for a pull-out hamper?
Most single-basket pull-outs need a clear opening of roughly 12 to 15 inches wide and about 20 to 22 inches deep. Double-basket models usually need an 18-inch or wider cabinet. Always go by the clear opening, not the nominal cabinet size.
Can I use my existing cabinet door on a hamper kit?
Yes. Most pull-out kits include adjustable brackets that fasten your existing door to the front of the frame. You remove the old hinges, and the door moves in and out with the hamper.
Is a tilt-out or pull-out hamper better for a bathroom vanity?
A tilt-out often fits better in a vanity because it needs less depth and avoids plumbing. If you have a full-depth, unobstructed section beside the sink, a narrow pull-out gives more capacity and easier access.
How much weight can a laundry cabinet basket hold?
That depends on the slides. Common kits are rated somewhere between 50 and 100 pounds. Wet towels are heavy, so pick a higher rating if the hamper will collect bathroom laundry.
Do built-in hampers cause laundry to smell?
They can if airflow is poor. Choose ventilated wire baskets or breathable cloth bags, empty the hamper regularly, and avoid placing it where plumbing leaks or condensation could keep it damp.