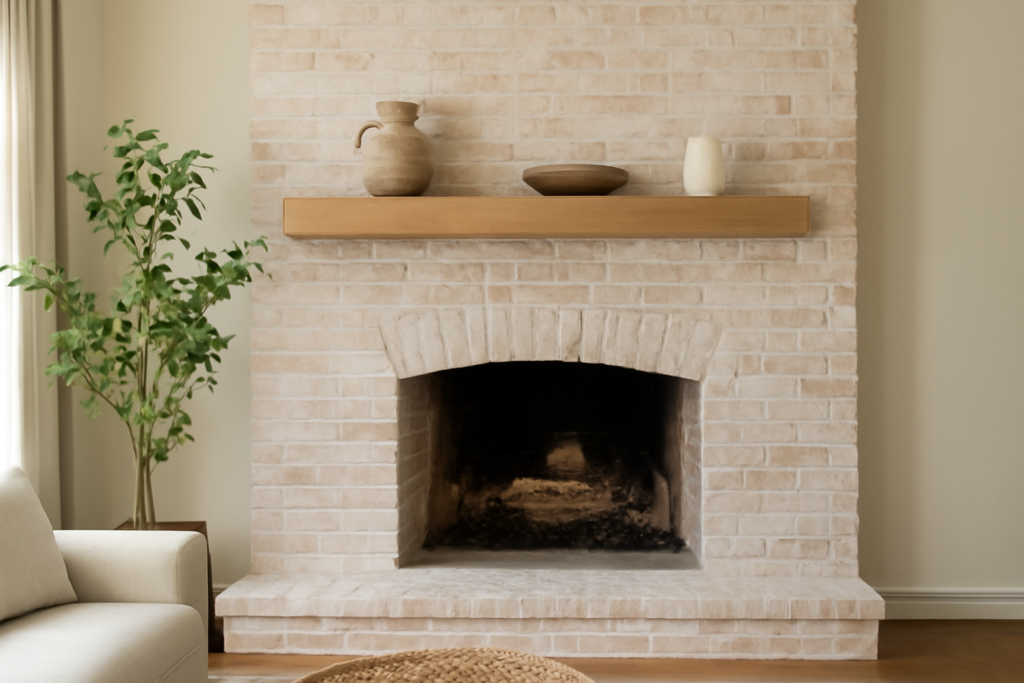
Most people who hate their red brick fireplace do not actually want it gone. They want it quieter. A limewash fireplace does exactly that: it softens harsh orange brick into a chalky, mottled finish that still shows the texture and mortar lines underneath, the way a century-old farmhouse wall looks after decades of weather. Unlike paint, limewash soaks into the masonry instead of forming a film on top, so it breathes, ages gracefully and can be partly scrubbed back if you change your mind in the first few weeks.
The process is simple but unforgiving of shortcuts. Soot left on the brick blocks absorption, dry brick pulls the lime in too fast and leaves streaks, and a heavy hand produces a flat white wall that looks like cheap paint. Get the cleaning, wetting and layering right and a weekend is enough to transform the whole surround.
- What a Limewash Fireplace Is and Why It Works on Brick
- Check Your Brick Before You Start
- Tools and Materials
- Safety: Lime Is Caustic
- How to Limewash a Brick Fireplace Step by Step
- Getting the Old-World Look Right
- Heat Zones Around the Firebox
- To Seal or Not to Seal
- Troubleshooting Common Problems
- Cost and When to Call a Pro
- Frequently Asked Questions
What a Limewash Fireplace Is and Why It Works on Brick
Limewash is slaked lime (calcium hydroxide) thinned with water, sometimes tinted with mineral pigments. When it dries, it reacts with carbon dioxide in the air and slowly turns back into calcium carbonate, essentially a thin layer of limestone bonded into the pores of the brick. That chemistry is why it needs a porous, uncoated surface. On raw brick or natural stone it becomes part of the masonry. On sealed or previously painted brick it simply sits on top and flakes.
Because the coating is mineral and vapor-permeable, moisture inside the masonry can escape instead of getting trapped behind a film. That matters on a fireplace, where brick heats and cools constantly. Paint can blister or yellow near the firebox opening; limewash tends to just weather a little lighter over time, which most homeowners actually like.
A lime wash fireplace also differs from whitewash. Traditional whitewash is often diluted latex paint, which forms a film and cannot be wiped back once cured. True limewash stays workable for a while after application, and that window is what lets you create the soft, uneven old-world variation people are after.
Check Your Brick Before You Start
Run a quick water test first. Flick a few drops of water onto several bricks, including near the hearth and the upper courses. If the water darkens the brick and soaks in within a minute, the surface is porous enough. If it beads up, there is a sealer, a water repellent or an old coating present, and the limewash will not bond. Sealed brick needs chemical stripping or a different product (a mineral silicate paint or a limewash-look latex) instead.
Also consider the age of the house. If the fireplace surround has ever been painted and the home was built before 1978, test that paint for lead before scraping or sanding anything. Old mortar repairs, firebox insulation and surrounding drywall joint compound from before the 1980s can contain asbestos, so have suspect materials tested before you disturb them.
Tools and Materials
- Powdered or premixed limewash in your chosen tint (about 1 gallon of mixed wash covers 100 to 200 sq ft of brick per coat, depending on porosity)
- A wide, natural-bristle limewash brush (a block-style brush with long, soft bristles holds the thin wash and pushes it into mortar joints)
- Pump sprayer or spray bottle for pre-wetting the brick
- Stiff nylon scrub brush, bucket, and a masonry soot cleaner or a mild detergent solution
- Rags, sponges and a soft-bristle brush for wiping back
- Drop cloths, painter’s tape and plastic sheeting for the hearth, floor and mantel
- Chemical-resistant gloves, safety goggles and long sleeves
- A paint stirrer or drill mixer and a second bucket for thinning
Safety: Lime Is Caustic
Lime is strongly alkaline. Wet limewash can burn skin and seriously injure eyes, so wear goggles (not just glasses), chemical-resistant gloves and long sleeves the entire time. Mix powdered lime outdoors or in a well-ventilated room while wearing a dust mask or respirator rated for fine particles, and pour powder into water slowly to keep dust down. Keep a clean water source nearby to flush skin or eyes immediately; for eye contact, rinse for at least 15 minutes and get medical attention.
Soot cleaners and any acid or degreaser you use for prep are chemicals in their own right. Read every label, ventilate the room, and never mix cleaning products together, especially anything containing bleach with acids or ammonia. Rinse prep chemicals completely before applying limewash, because acid residue reacts with the lime. If you use any solvent-based stripper, keep vapors well away from pilot lights and other ignition sources.
How to Limewash a Brick Fireplace Step by Step
- Let the fireplace go cold. Do not use it for at least 24 hours beforehand. Warm brick flashes the wash dry and causes streaking.
- Protect the room. Tape off the mantel, wall edges and firebox, and lay drop cloths with plastic underneath. Limewash drips are thin and run fast.
- Clean the soot. Scrub the face of the brick with a stiff nylon brush and a masonry soot cleaner or mild detergent solution, working from the bottom up to avoid streaks. Pay extra attention to the area above the firebox opening, where smoke stains concentrate. Rinse thoroughly and let the brick dry fully, usually 24 to 48 hours.
- Mix the wash. Follow the maker’s ratio. Many products start around 1 part limewash to 1 part water for the first coat. Stir well and keep stirring every few minutes, because lime settles quickly.
- Pre-wet the brick. Mist a 3 by 3 ft section until it is evenly damp but not dripping. Damp brick absorbs the wash slowly and evenly, which is the single biggest factor in a soft, natural finish.
- Brush on the first coat. Work the wash into brick faces and mortar joints with the limewash brush using crisscross strokes. Keep a wet edge and move section by section from top to bottom.
- Wipe back for character. After 5 to 20 minutes, while the wash is still workable, use a damp sponge, rag or the spray bottle to remove limewash from selected bricks and edges. Hit corners and high points harder so the original brick color peeks through.
- Let it cure and judge the color. Limewash dries much lighter than it looks wet. Wait at least 24 hours before deciding on another coat.
- Add a second coat if needed. Re-wet the brick and apply a slightly thicker mix for more coverage, or a thinner one for a subtle layered effect. Wipe back again in different places so the pattern does not look repetitive.
Getting the Old-World Look Right
A convincing limewash brick fireplace has variation built in. Real aged masonry is never one shade, so aim for a mix: some bricks nearly fully covered, some with only a haze, and a few left close to their original color. Step back every few minutes and look at the whole surround from across the room. It is easy to over-wipe one area and under-wipe another when you are standing a foot away.
Tint choice changes the mood. Bright white reads coastal and modern. Warm off-whites and putty colors look more European and pair well with wood mantels. Soft grays and taupes cool down very orange brick without the stark contrast of white. Test any color on a few bricks at the back or bottom of the surround and let it dry overnight before committing.
Stone fireplaces can be limewashed too, but natural stone varies more in porosity. Dense granite or slate may barely absorb anything, while sandstone and fieldstone drink it in. Always do a water test on stone, and expect to wipe back more aggressively on very porous pieces.
Heat Zones Around the Firebox
Limewash is non-combustible, so it is safe on the brick face surrounding the firebox. What it should not go on is the interior of the firebox itself, the firebrick or the refractory panels. That area sees temperatures well beyond what any decorative coating is meant to handle, and the finish will crack, flake and discolor. Leave the firebox interior alone.
Expect the brick directly above the opening to change faster. Heat and smoke will gradually yellow or gray the finish there, and soot can migrate into the porous lime. Many homeowners deliberately leave this band slightly heavier with wash, knowing it will darken with use, or plan to refresh just that strip every year or two. Make sure the damper works properly and the flue draws well; a smoky fireplace will stain any finish quickly.
Any fireplace you burn in should have working smoke and carbon monoxide alarms on that level and near sleeping areas, plus an annual chimney inspection. A cosmetic update is a good reminder to schedule one.
To Seal or Not to Seal
This is the most debated part of the job. Unsealed limewash keeps its full matte, chalky character and breathes completely, which is the traditional approach. The downside is that it can rub off slightly on clothes, and soot or hand marks are harder to clean.
A breathable masonry sealer or a matte mineral sealer adds stain resistance, especially on the hearth and around the opening. The trade-off is a slightly darker, richer color and a small loss of that powdery texture. Avoid glossy film-forming sealers; they trap moisture, can yellow with heat and make the finish look plasticky. If you decide to seal, wait for the limewash to cure fully (often 1 to 2 weeks) and test the sealer on a hidden spot first.
Troubleshooting Common Problems
- Streaks and lap marks: The brick was too dry or the wash dried before you blended sections. Re-wet and apply a thin coat across the whole area.
- Too white or too flat: Within the first few days, scrub with a damp brush to remove some wash. After it fully carbonates, you can still lighten it with a diluted masonry cleaner, but test first.
- Not enough coverage: Add another coat with less water in the mix. Lime builds up gradually; patience beats one heavy coat.
- Flaking: The surface was sealed, painted or dirty. Remove the loose wash and address the coating underneath.
- Chalky rub-off: Normal for unsealed limewash early on. It usually reduces as the lime cures, or a breathable sealer can lock it down.
Cost and When to Call a Pro
A DIY limewash fireplace usually costs somewhere around $60 to $200 in materials for a typical surround, including the wash, a quality brush and cleaning supplies. Professional limewashing for a standard fireplace often runs a few hundred dollars up to around $1,000 or more for floor-to-ceiling brick, tall walls that need scaffolding, or heavy soot removal.
Call a professional if the brick has a sealer that needs stripping, if mortar is crumbling and needs repointing first, if the surround is two stories tall, or if you suspect lead paint or asbestos in nearby materials. A chimney professional should handle any concerns about cracks in the firebox, draft problems or heavy creosote before you invest in a new look.
Frequently Asked Questions
Can you limewash a fireplace that has been painted?
Not directly. Limewash needs bare, porous masonry to bond. Painted brick must be stripped back to raw brick first, or you can use a limewash-look product designed for painted surfaces.
How long does a limewash fireplace last?
Indoors, a limewashed fireplace commonly lasts many years with little change. The area above the firebox may need a light refresh every year or two if you burn often.
Is limewash safe to use near a working fireplace?
Yes, on the brick face around the opening. Limewash is mineral and non-combustible. Keep it off the firebox interior and firebrick, and make sure the fireplace has been cold for a day before applying.
Can I remove limewash if I do not like it?
During the first few days you can scrub much of it off with water and a stiff brush. Once fully cured it bonds into the brick, so removal takes more effort and a masonry cleaner.
How many coats of limewash does brick need?
Most fireplaces look right with 1 to 2 coats. A single wiped-back coat gives a subtle, rustic haze, while two coats give a more uniform, softer white.