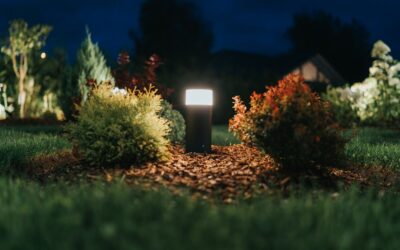
Curb appeal does not switch off at sunset, and the right lighting can make a modest house look like a magazine cover after dark. Low voltage outdoor landscape lighting is the system that makes this achievable for the average homeowner, running on a safe 12 volts instead of household 120 volts, which means you can bury the cable, connect fixtures, and expand the system yourself without hiring an electrician. It is energy-efficient, safe to handle, and endlessly customizable, which is why it has become the standard for illuminating paths, trees, facades, and gardens.
Part of our Windows & Doors guide — explore the full guide →
Understanding the transformer, wire, and fixture choices upfront will save you from the dim, flickering, or failed systems that plague poorly planned installs.
How Low Voltage Outdoor Landscape Lighting Works
A low voltage outdoor landscape lighting system has three core parts working together. A transformer steps your home’s 120-volt power down to a safe 12 volts. Low-voltage cable carries that power through the yard. And individual fixtures, path lights, spotlights, well lights, tap into the cable to illuminate specific features.
Because the system runs at 12 volts, the cable does not need to be buried deep in conduit like line-voltage wiring, and touching a connection will not shock you. That safety margin is exactly what makes it a homeowner-friendly project. The transformer is the brain, plugging into a GFCI-protected outdoor outlet, and modern units include timers, photocells, or smart controls to switch the lights on at dusk and off at a set hour automatically.
Sizing the Transformer Correctly
The transformer is where most DIY systems succeed or fail, and it comes down to simple math. Transformers are rated in watts, and you must not exceed their capacity.
Add up the wattage of every fixture you plan to run. If you have twenty 4-watt LED fixtures, that is 80 watts of load. The rule of thumb is to load a transformer to no more than 80 percent of its rating, so for an 80-watt load you want at least a 100-watt transformer, leaving headroom to add fixtures later. LED fixtures have transformed this equation; where old halogen path lights drew 20 watts each, comparable LEDs draw 3 to 5 watts, so a single 150-watt transformer can now run 30 or more lights easily.
- Small yard, up to 10 fixtures: a 100 to 150 watt transformer
- Medium yard, 10 to 25 fixtures: a 150 to 300 watt transformer
- Large property with multiple zones: a 300 watt or larger multi-tap transformer
Choosing the Right Wire Gauge
Voltage drop is the silent killer of landscape lighting, and wire gauge is your defense. The farther current travels down a cable, the more voltage it loses, so fixtures at the end of a long run go dim if the wire is too thin.
Low-voltage cable comes in gauges, and lower numbers are thicker:
- 16-gauge: short runs and a few fixtures, under about 100 feet
- 14-gauge: the versatile middle choice for most yards
- 12-gauge and 10-gauge: long runs and heavier loads to minimize voltage drop
For runs over 100 feet or with many fixtures, step up to 12-gauge. A pro trick is the hub or T-method wiring, where you split power from a central point so no single fixture sits at the far end of a long series run, keeping brightness even across the whole system.
Common Fixture Types and Their Jobs
Different fixtures do different jobs, and mixing them is what creates depth rather than a runway of identical path lights. Match the fixture to the effect.
- Path lights: illuminate walkways and garden beds with a downward glow; space them 6 to 8 feet apart, not lined up like an airport.
- Spotlights (uplights): aim up at trees, columns, or architectural features for drama.
- Well lights: sit flush in the ground for hidden uplighting, great for facades.
- Flood lights: wash a broad area or a large wall.
- Deck and step lights: improve safety on stairs and railings.
- Wash and bullet lights: graze textured walls or highlight shrubs.
Choose warm-white LEDs around 2700K to 3000K for a natural, inviting glow; cooler temperatures read harsh and commercial in a residential yard.
Pay attention to beam spread and lumen output as well as color temperature, because these determine how a fixture actually performs. A tight 15 to 20 degree spot beam concentrates light for uplighting a tall tree, while a wide 40 to 60 degree flood washes a broad wall or a low shrub. For brightness, think in lumens rather than the old watt habit: a path light needs only about 80 to 120 lumens to mark a walkway pleasantly, while uplighting a two-story facade may want 300 lumens or more. Many quality fixtures now accept interchangeable bulbs, so you can fine-tune the beam and brightness after installation without replacing the whole fixture, a real advantage as your plantings mature and the lighting needs change.
Step-by-Step Installation
A basic system is a genuine weekend project. Plan the layout in daylight, then install.
- Plan and place fixtures. Set fixtures where you want them, without burying anything yet, and view the effect after dark before committing.
- Mount the transformer. Attach it to an exterior wall near a GFCI outlet, about a foot off the ground.
- Lay the cable. Run low-voltage cable from the transformer along your fixture path, leaving slack. Do not connect to the transformer yet.
- Connect fixtures. Attach each fixture to the cable using waterproof connectors; gel-filled or silicone-filled connectors prevent corrosion, the number-one cause of failures.
- Test everything. Connect the cable to the transformer and power on at night. Adjust aim and spacing.
- Bury the cable. Once satisfied, tuck the cable a few inches into the soil or under mulch, keeping it clear of areas you dig or edge regularly.
Cost and Value
Landscape lighting spans a wide range, but DIY low-voltage is affordable, and the difference between a cheap kit and a lasting system shows up within a couple of seasons. Budget realistically before buying.
- Transformer: $80 to $300 depending on wattage and smart features
- Cable: $0.40 to $1.20 per foot by gauge
- LED fixtures: $20 to $80 each for quality brass or cast units
- A typical 10-fixture DIY system: $400 to $900 total
- Professional installation: $2,000 to $6,000 for a designed system
Spend on the fixtures. Cheap plastic path lights crack and fade within a couple of seasons, while solid brass or copper fixtures develop a handsome patina and last for decades outdoors.
Consider the smart-control upgrade when you buy the transformer, because it is far easier to install upfront than to retrofit later. A transformer with a built-in astronomic timer automatically tracks sunset and sunrise for your location and adjusts through the year, so the lights come on at dusk without you resetting a dial every few weeks. Wi-Fi and app-connected transformers add scheduling, dimming, and zone control from your phone, and some support color-changing fixtures for holidays. These features add $50 to $150 to the transformer cost but eliminate the fuss of manual timers and let you fine-tune scenes for entertaining versus everyday security lighting.
Avoiding the Common Failures
Most systems that fail do so for predictable reasons. Poor connections top the list; always use waterproof, corrosion-resistant connectors rather than twisting wires and taping them, because moisture will find any bare copper. Undersizing the transformer or the wire gauge causes dim, uneven lighting. Overloading a run leaves distant fixtures faint.
Plan for expansion by buying a transformer with extra capacity, use warm-white LEDs for a natural look, and revisit the aim of your spotlights each season as plants grow.
Lighting Techniques That Create Depth
The difference between a yard that looks professionally lit and one that looks like a hardware-store afterthought comes down to technique, not budget. Designers layer several effects rather than lining up identical path lights, and you can copy their moves.
Uplighting aims a spotlight up at a tree trunk or the face of the house for drama. Downlighting, or moonlighting, mounts a fixture high in a tree pointed down so it casts dappled shadows that mimic natural moonlight, one of the most sophisticated effects available. Grazing places a light close to a textured surface like stone or brick to rake across it and emphasize the texture. Silhouetting backlights a specimen plant against a wall so its shape reads as a dark outline. Mix three or four of these across a yard and the space gains real depth instead of a flat wash of brightness.
Restraint matters as much as technique. Resist the urge to light everything; a few well-placed accents with dark space between them look far more elegant than a yard lit up like a car lot. Aim fixtures away from windows and the street so you illuminate the landscape without glaring into eyes, and shield the light source itself so viewers see the effect, not the bulb.
Done thoughtfully, low voltage outdoor landscape lighting is a safe, satisfying upgrade that transforms your home’s nighttime presence, improves safety on paths and steps, and pays back every time you pull into the driveway after dark.